Select Language:
The combat in Pragmata is already tough on its own, no matter which difficulty level you pick. Along the way through each area, called sectors, you’ll find optional combat challenges known as Red Zones, marked as hazards on your map.
Use your Red Zone Keys to unlock each Red Zone and earn various rewards. Be sure to upgrade your gear before taking on these challenges—it’s important, especially since you’ll also unlock rows on the Cabin Bingo Board by completing them.
What Are Red Zones?
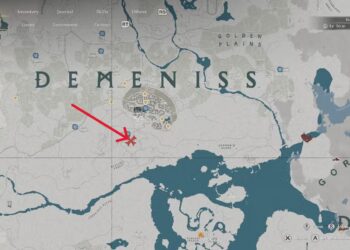
In the Mass Array Production sector of Pragmata, you’ll encounter a path blocked by a red transparent screen that prevents further progress until you obtain authorized access. Behind these barriers are Red Zones—optional combat challenges scattered throughout sectors on the moon.
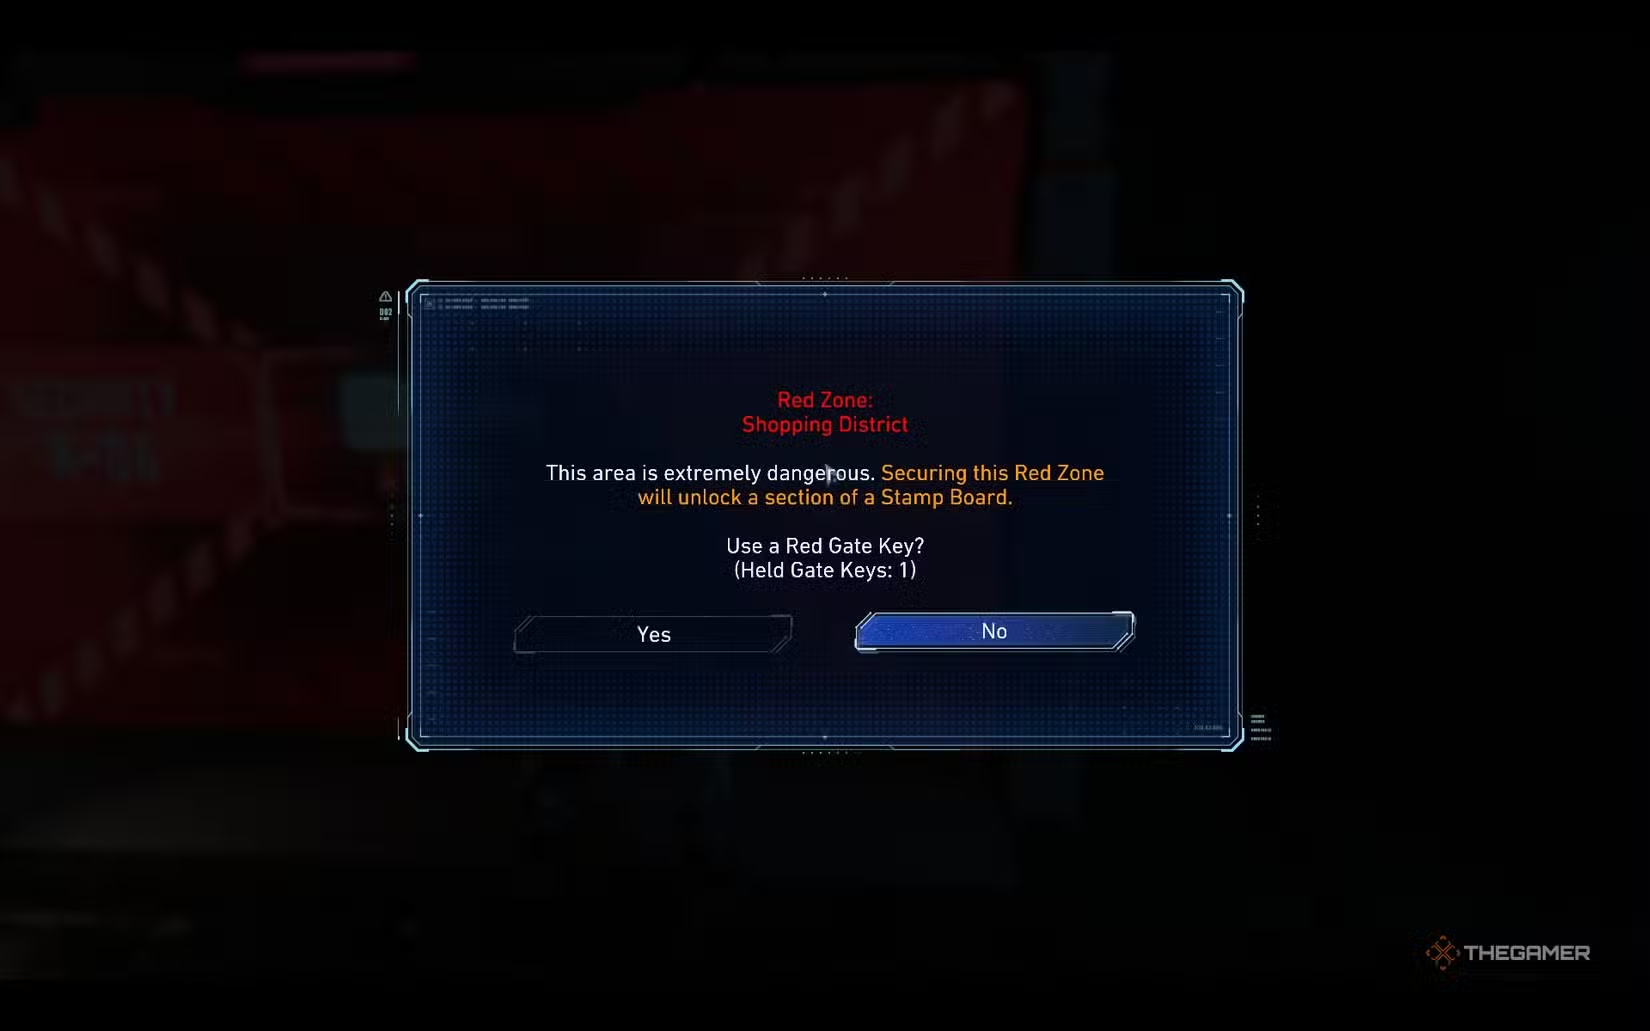
You can see Red Zones on your map for each sector; they are marked as dangerous areas if you choose to enter. When you find a Red Zone and try to interact with the lock on its side, the game gives you information about that Red Zone and checks if you’re eligible to enter. It also warns you that it’s a tough fight.
To access a Red Zone, you need to find a Red Zone Key to open the barrier. These keys might be discovered while chasing rewards shown on Diana’s Item Scanner or when you scan the immediate area with the Unit Printer, as the game labels Red Zone rewards as collectibles.
Once inside, you’ll face waves of challenging enemies, which become tougher as you advance in the game. Properly preparing your loadout before entering is vital. After using your ammo, you’ll need to find additional supplies, such as weapon mods and items dropped by enemies, to stay stocked up.
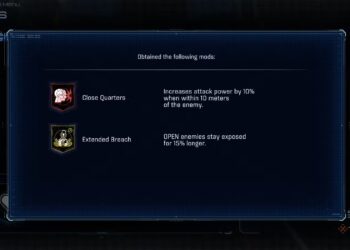
Enemies will drop weapons and mods that can help, often providing some of the best options for your fight, which can guide your choices if you decide to return later.
The door to each Red Zone locks behind you once you enter, so you’ll need to clear all enemies to escape or face the consequences.
After defeating all enemies, you can open chests containing rewards like Pure Lunum, Mods, Upgrade Components, and more. These are essential for upgrading your equipment, making Red Zones valuable even beyond the challenge.
Clearing certain Red Zones also unlocks new sections on Cabin Bingo Cards. Each card has areas blocked off with the same red transparent barrier, and completing Red Zones within those areas allows you to reveal and unlock those parts of the Bingo Board.
How Do You Get Red Zone Keys?
You’ll need lots of Red Zone Keys to access these high-risk, high-reward challenges. You can acquire them mainly through two methods:
– Finding them around sectors freely—many are left unguarded for players to discover, often obtained as rewards for difficult story encounters.
– Purchasing them with Cabin Coins from the Cabin Bingo Cards—most cards include at least one Red Zone Key, making it easy to stock up.
All Red Zones and Their Rewards
The game features multiple Red Zones across different sectors, each with unique enemies and rewards. Here’s a brief overview:
– Shopping District (Mass Array Production Sector, at the Entrance Station): Enemies include Walkers, Watchers, Spiders, and a Crusher.
– Business District (Mass Production Array Sector): Hostile enemies such as Spiders, Crushers, Walkers, and Creators, with rewards like the Pocket Refinery Mod and Pure Lunum.
– Terra Dome Entrance (Sector locations vary): Details vary, but enemies and rewards are typically noteworthy.
– Eco Modeling Lab (Terra Dome Sector, Envirolytics Station): You’ll face Bots, Watchers, and Crushers. Rewards include Pure Lunum, Collateral Damage Mod, and unique upgrades hidden in the area.
– Terrarium (Terra Dome Sector, Meteorology Lab): Encounter unspecified enemies, with potential rewards hidden within.
To succeed in each Red Zone, study the enemy types, prepare your loadout accordingly, and bring enough supplies—ammo, mods, and upgrades. Clearing these zones will not only grant rewards but also help reveal new areas for exploration and further unlocking on your Cabin Bingo Cards.