Select Language:
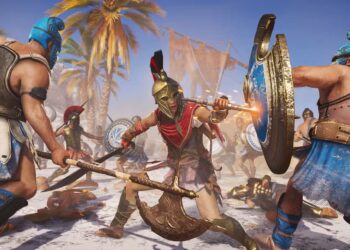
In the game Roblox Dead Rails, players can choose from four main classes: Doctor, Ironclad, Alamo, and Arsonist. Each class has its unique advantages and items that can influence your gameplay and the experience of your friends. It’s wise to have a diverse team with one of each class when embarking on a run to maximize your chances of success.
This guide will provide detailed insights into each class and instructions on how to select or change your class at the beginning of Dead Rails.
Recently, we introduced two new classes: the Conductor and the Priest.
All Classes in Dead Rails
There are currently ten distinct classes available in the game, and we anticipate that more will be added in the future.
- Doctor
- Miner
- Arsonist
- The Alamo
- Cowboy
- Conductor
- High Roller
- Priest
- Vampire
- Survivalist
- Zombie
- Ironclad
- None
Leveling up your class requires Bonds, a special form of currency you can earn through exploration or buy with Robux.
When starting, every player begins with the “None” class, which offers no unique features and provides only a basic shovel!
Doctor – 15 Bonds
The Doctor is ideal for players who enjoy keeping their teammates healthy, making healing significantly easier within Dead Rails.
- Starts with healing items.
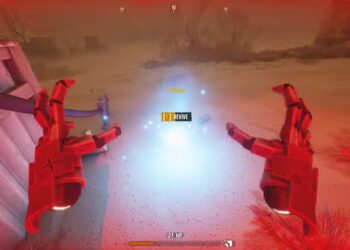
- You can help revive teammates at the cost of half your own health, eliminating the need for bandages!
| Starting Items | Number of Items |
|---|---|
| Shovel | x1 |
| Snake Oil | x2 |
| Bandage | x2 |
Ironclad – 100 Bonds
The Ironclad class is powerful, made for those who prefer combat against zombies while relying on their friends for assistance.
- Begins with a heavy armor set.
- The armor slows down movement by 20%.
This class is great for solo play but is also the most costly option in the game.
| Starting Items | Number of Items |
|---|---|
| Helmet | x1 |
| Chestplate | x1 |
| Left Shoulder Armor | x1 |
| Right Shoulder Armor | x1 |
| Shovel | x1 |
The Alamo – 50 Bonds
The Alamo class focuses on constructing defenses to protect the train from zombie attacks, equipped with a variety of buildable defensive items.
| Starting Items | Number of Items |
|---|---|
| Helmet | x1 |
| Metal Sheet | x3 |
| Barbed Wire | x3 |
| Shovel | x1 |
Arsonist – 20 Bonds
The Arsonist embodies an offensive playstyle with a double fire damage advantage and starts with a supply of molotov cocktails.
| Starting Items | Number of Items |
|---|---|
| Shovel | x1 |
| Molotov | x4 |
Miner – 15 Bonds
The Miner class starts out with extra coal and a headlamp, providing visibility in dark areas.
| Starting Items | Number of Items |
|---|---|
| Mining Helmet | x1 |
| Coal | x2 |
| Pickaxe | x1 |
Conductor – 50 Bonds
The Conductor’s primary focus is managing the train’s speed. While they can accelerate the train, they lack a weapon and have only half the health compared to other classes.
| Starting Items | Number of Items |
|---|---|
| Coal | x2 |
Priest – 75 Bonds
The Priest offers immunity from lightning strikes and kicks off with useful items like the Crucifix and Holy Water.
| Starting Items | Number of Items |
|---|---|
| Crucifix | x2 |
| Holy Water | x2 |
| Shovel | x1 |
Vampire – 70 Bonds
The Vampire has enhanced speed for both movement and melee attacks, but be cautious as exposure to sunlight will cause damage.
| Starting Items | Number of Items |
|---|---|
| Vampire Knife | x1 |
| Shovel | x1 |
Zombie – 75 Bonds
The Zombie class has a neat mechanic where it can consume corpses to regain health, though it can’t use traditional healing methods. Sneaking past other zombies is also made easier!
| Starting Items | Number of Items |
|---|---|
| Shovel | x1 |
Survivalist – 75 Bonds
This class gets a damage boost against zombies as your health dwindles. You also start with a Tomahawk!
| Starting Items | Number of Items |
|---|---|
| Shovel | x1 |
| Tomahawk | x1 |
How to Choose Your Class
You can select your class before starting a game by visiting the Tailor located next to the tracks in the starting town.
Classes can be acquired using Bonds, and once purchased, a class can be retained for multiple sessions. Remember to choose wisely as each class needs to be bought separately!