Select Language:
The Lunum Mines in Pragmata are an exciting area due to their unique use of gravity. You’ll experience shifts between low gravity and normal gravity zones, making combat in these environments both challenging and fun.
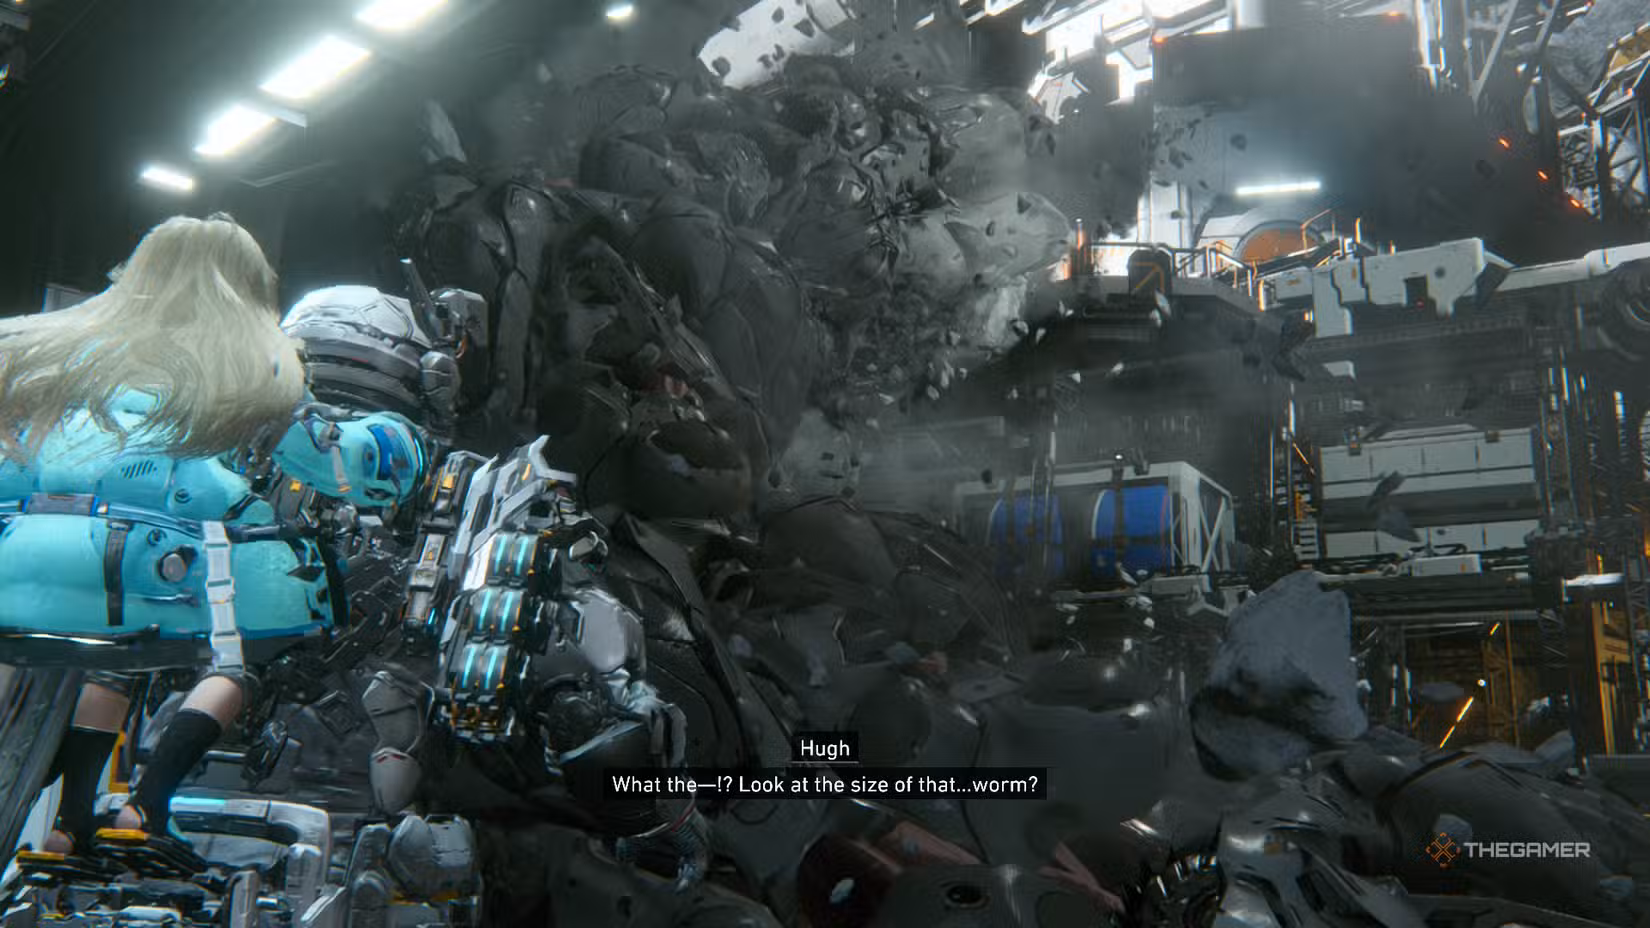
The LunaDigger boss stands out as a one-of-a-kind enemy. Unlike most bosses, you know its name right from the start, and you encounter it before your final fight as well. You also get a chance to repel it earlier in the game.
Where Is the LunaDigger Fought?
The LunaDigger is fought at the very end of the Sector, in the final part of the Lunum Mines. The game hints strongly when you’re close to the showdown, including a Shelter entrance just before it. There’s also an information board before the battle that provides helpful tips.
This fight takes place in low gravity, so keep that in mind before starting.
How to Repel the LunaDigger
You’ll need to fight the LunaDigger as the final boss of this Sector, but it’s also present throughout the mines. Some areas have patches of sand where the LunaDigger moves underground, indicated by disturbances. Walking on this sand triggers the creature to rush toward you. Staying on solid platforms keeps it from attacking.
You can repel the LunaDigger by baiting it out of the sand, hacking it, and shooting at it. Unlike typical enemies, it doesn’t have a health bar, so you won’t deal damage in the usual way. However, sustained damage will frighten it away and earn you the Courage In Desperation achievement.
Note that if you leave an area where you repelled the LunaDigger and return later, it will come back. Damage doesn’t carry over between zones, so repelling it isn’t a permanent solution but can be useful for exploration and collecting items.
How to Beat the LunaDigger
In the final battle, the LunaDigger unleashes new moves, but you’ll be better prepared if you’ve fought it earlier in the mines. Here’s a quick overview of its attack options:
| Move | Description |
|---|---|
| Missile Rain | Fires a barrage of missiles that rain down across the arena for a few seconds. |
| Emerging Grab | Emerges from the ground and quickly lunges forward, grabbing you. |
| Mouth Rush | After emerging, it slithers along the ground trying to grab you. |
| DigBit Deployment | When health is low, it surfaces, deploys DigBits, and sends them to attack. You can hack these. |
| Leaping Bite Dive | Performs a jumping attack over the arena, slamming down onto the surface for heavy damage. |
| Mouth Laser | Fires a large laser straight across the arena, which can cause long stun durations if hit. |
Battling this boss is different because most of its body remains hidden during the fight. Success depends on strategy—dodging attacks, especially the Emerging Grab, and hacking back to make it stagger is key. This creates openings for critical shots.
Range weapons are most effective: avoid close-range guns like the Shockwave Gun. Instead, use tools like the Photon Laser, Charge Piercer, or the Stasis Net. As its health drops, its Hacking Matrix becomes more complicated, so equipping the Code Generator and Sticky Bombs, both highly upgradeable, will help.
Once it drops below half health, the upper part of its body becomes exposed, offering more targets after hacking. But the boss becomes more aggressive, performing multiple attacks simultaneously—for example, combining DigBit deployment with Mouth Laser and Missile Rain—giving you multiple threats to manage at once.
When you defeat the LunaDigger, you’ll earn another Shelter License Key and proceed to the next Sector.