Select Language:
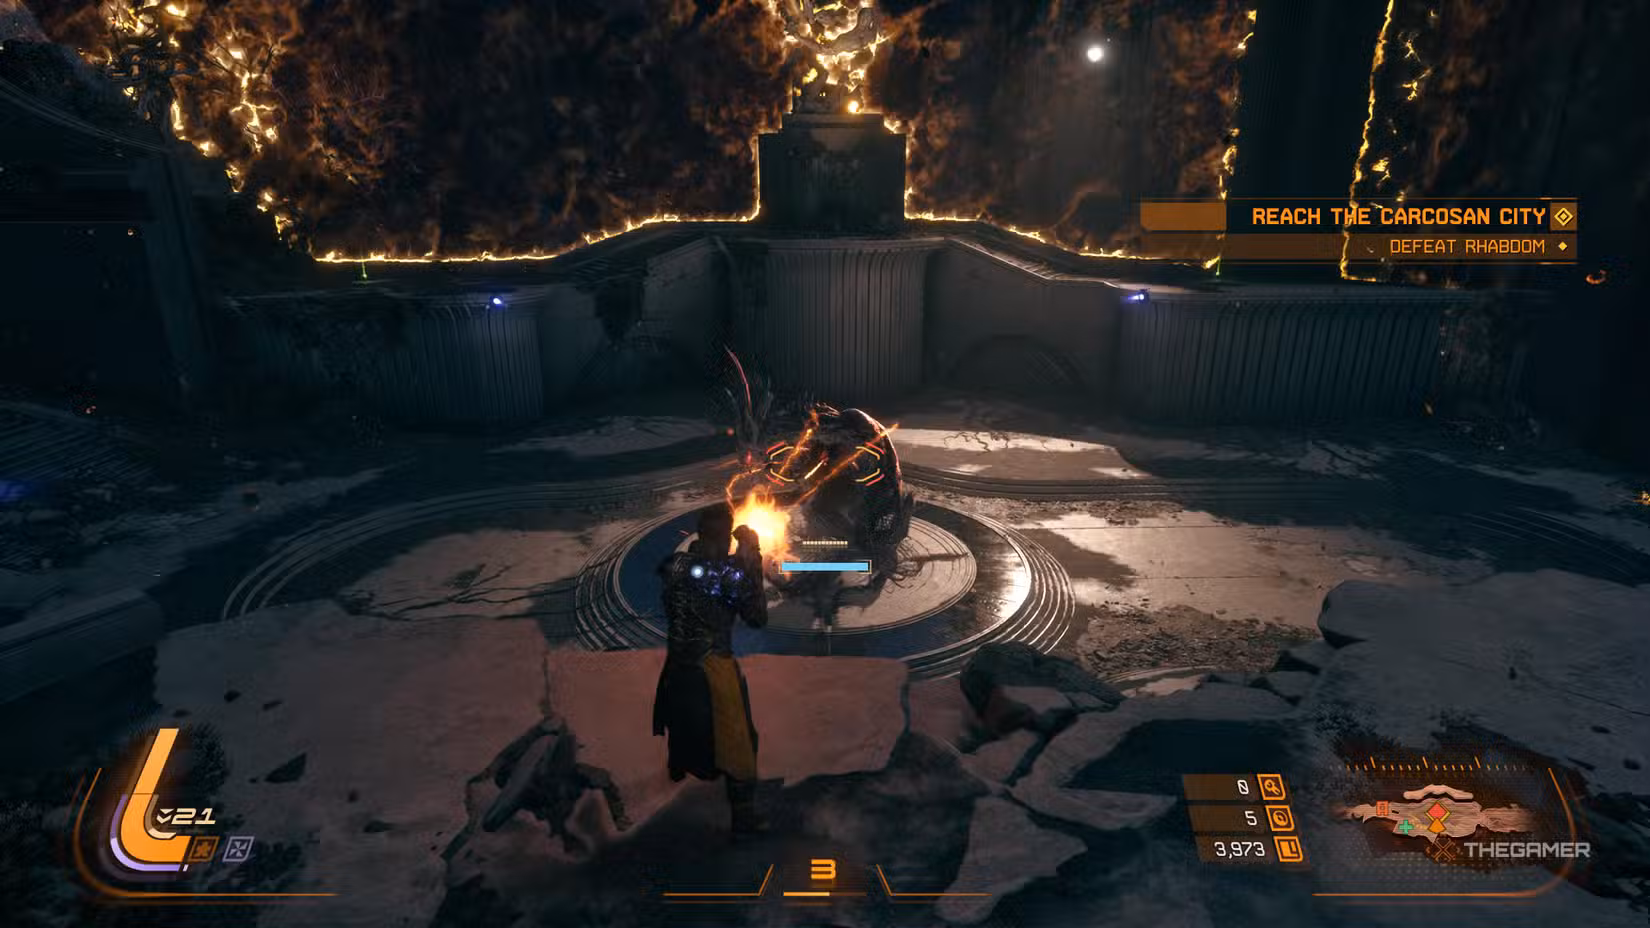
Shattered Descent, the third biome in Saros, has a boss that’s quite aggressive. The boss, Rhabdom, might remind you of the Aphex from the first biome because it likes to jump around the arena, but Rhabdom has more tricks up its sleeve.
The good news is that Rhabdom only has one health bar, which can make this fight a bit quicker and easier than previous boss battles. However, Rhabdom is very violent. In this guide, we’ll cover everything you need to know about fighting Rhabdom and share tips on how to defeat it.
How to Defeat Rhabdom
When you enter the arena, Rhabdom will appear immediately. You’ll have a few seconds before it starts moving, so use this time to use your Grapple to reach the higher platforms on the right and left sides and pick up the Aether there.
There are four Aethers available. If your health is full, you can leave them for later when you take damage.
One of Rhabdom’s first attacks involves creating dozens of yellow projectiles and rings on the ground. During this, shoot at Rhabdom from one of the higher platforms. Keep in mind, these projectiles will later shoot upward, but they are not homing, so staying on the platforms helps you avoid damage.
After this attack, Rhabdom might spit a group of blue homing projectiles. Use your shield to absorb them all. Absorbing these will charge your Power Weapon, allowing you to deal heavy damage.
Once Rhabdom’s health drops below half, the blue homing projectiles will turn yellow. You can absorb them if you have a certain Armor Matrix Upgrade; otherwise, just dash through them.
Another common move is Rhabdom jumping multiple times in a row, landing close to you, and exploding with Nova Projectiles—the red ones. You can’t block or dash through these; it’s best to stay as far away as possible when Rhabdom jumps.
Rhabdom often repeats a move where it jumps to your position and lands with explosive Nova Projectiles. When this happens, stay close to the grappling points. Using these points grants temporary invulnerability and helps you escape danger faster. During other attack phases, focus on shooting Rhabdom, and when the jumps happen, move between the grappling points. A triangle icon will appear below each point when you can use it.
Your Overdrive ability can be very helpful here. Use it as soon as it’s available to slow down time, giving you more chances to hit Rhabdom without worrying about missing.
Another attack Rhabdom will use once its health drops below half involves firing multiple yellow projectiles in straight lines across the arena. They come quickly, so Dodge to the sides or run past them, aiming to avoid getting hit by every line.
The fight generally becomes tougher when Rhabdom’s health gets lower, as it might add more projectiles to its attacks. But the core strategies remain the same.
Finally, Rhabdom’s last move includes firing a series of yellow projectiles in straight lines. Given their wide spread, it’s best to dash past every line to stay safe.
When Rhabdom’s health drops below half, expect more projectiles, but no major changes to its attack patterns—just an increase in difficulty. If you have the Second Chance feature unlocked in your Armor Matrix skill tree, it’s a good idea to enable it. This allows you to die once during the fight and get back up again.