Select Language:
Even though Revenge of the Savage Planet is a shorter game, there’s a lot to know before you embark on your adventure across distant alien worlds. After all, it’s a big deal to leave everything behind and dive into the unknowns of space!
As you crash-land on Pfyzzich Beach during the game’s opening moments, you’ll notice that the world is vast, vibrant, and teeming with alien life. To help you get started on your journey, here are some essential tips.
Scan Everything as You Explore
As soon as you escape the wreckage on Stellaris Prime and gather some Eko, your mission is to scan the items around you while searching for a way back to Earth. Eko introduces you to the Kindex, a journal feature that tracks everything you document during your planetary explorations.
You can hover over regions on your map to see how many collectibles are nearby. Each planet is packed with dozens of items to scan, and you may find some shared discoveries as you progress through additional missions. It’s wise to scan regularly to save time if you’re aiming for completion.
Scanning plants, animals, obstacles, and even entering new areas will add discoveries to your Kindex. If you want to log everything, it’s smart to scan roughly every 50 meters. Items you’ve already scanned will be marked in blue, while new discoveries will have an orange outline.
Activate Every Teleporter You Encounter
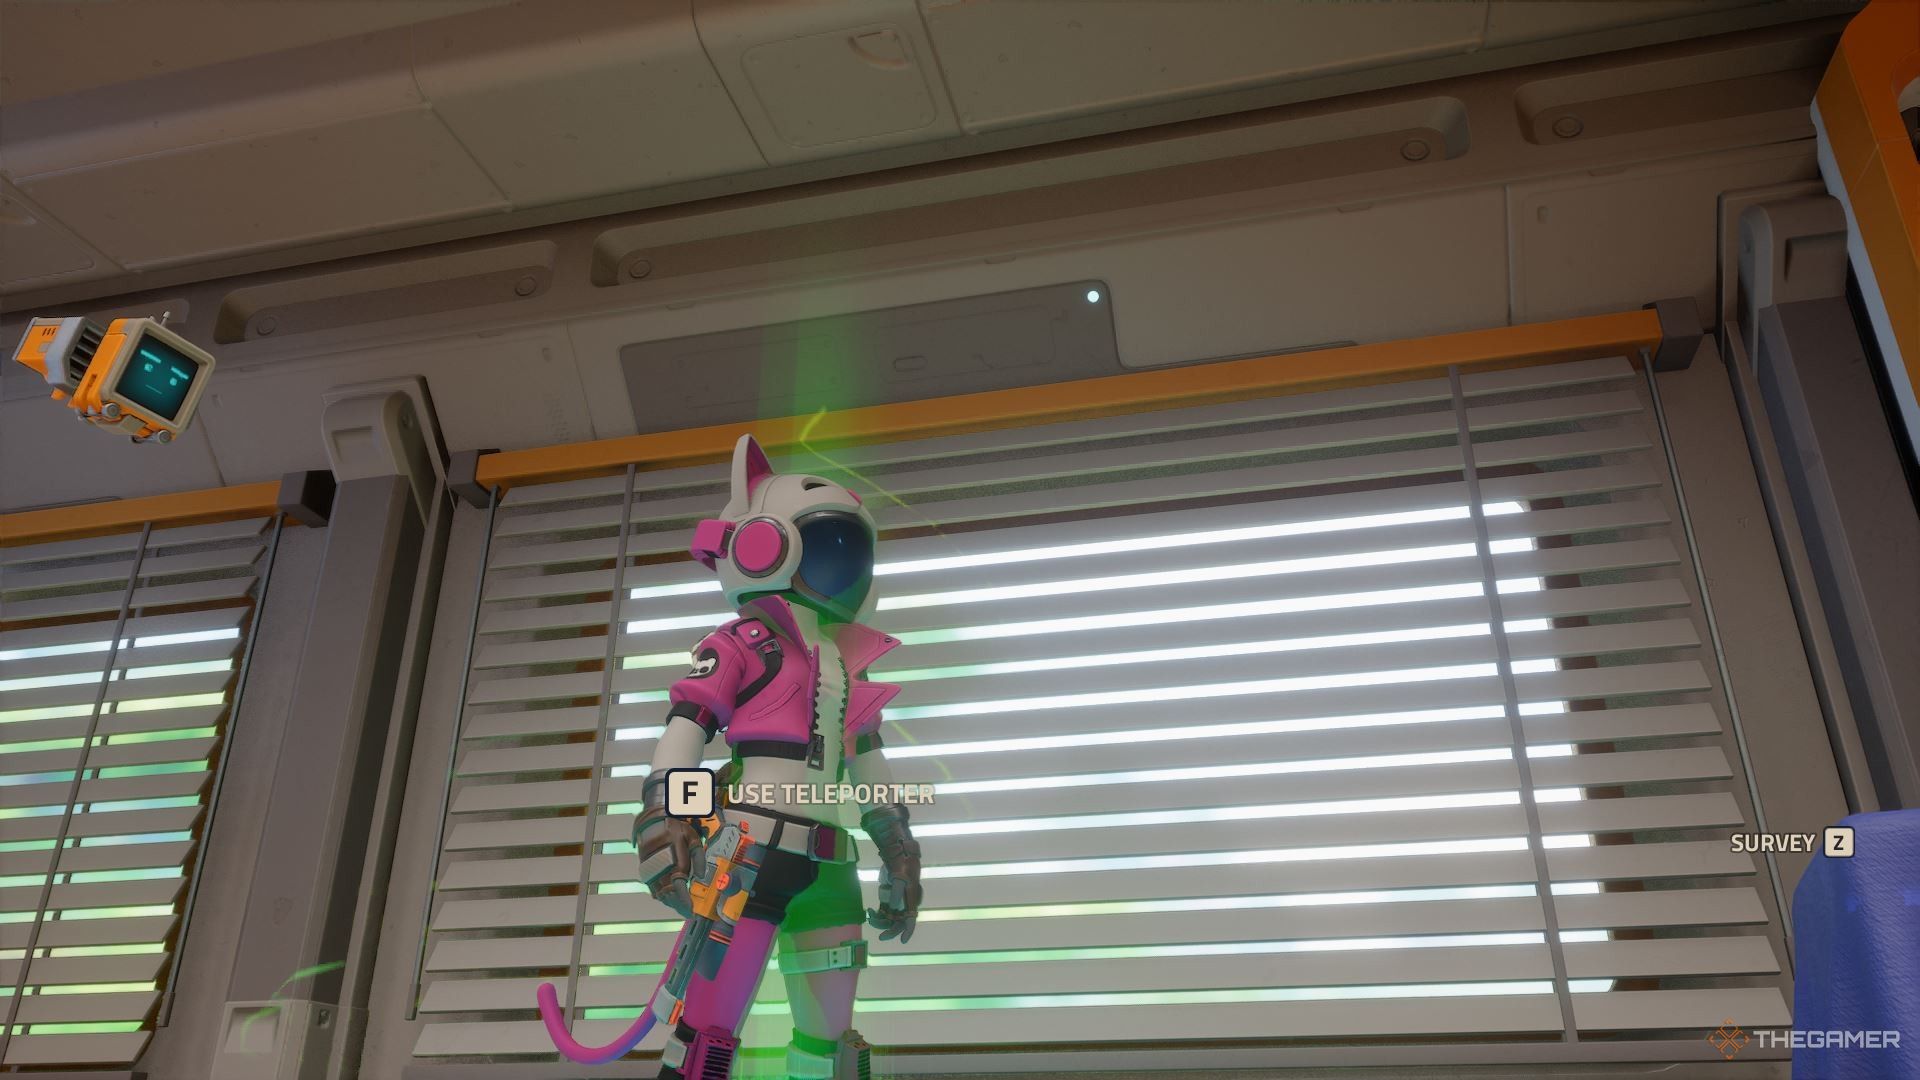
When you reach Nu Florida for the first time and start exploring Stellaris Prime, a mission appears in your journal called Worlds Traveler. Your task is to activate the teleporters scattered throughout the universe. They’re usually located in various areas, and to use them, you first need to reach and activate each teleporter.
Activating teleporters in different locations is crucial for an efficient gameplay experience in Revenge of the Savage Planet, as everything connects back to Stellaris Prime. If you die or restart, you’ll end up back at your Habitat. If you lose resources upon dying, their locations will be marked on your map for a return trip.
With so much to do across the planets, unlocking the ability to fast travel is key. Even if a teleporter is surrounded by challenges, it’s worth the extra effort—you won’t regret it later.
Your Habitat: A Canvas for Creativity
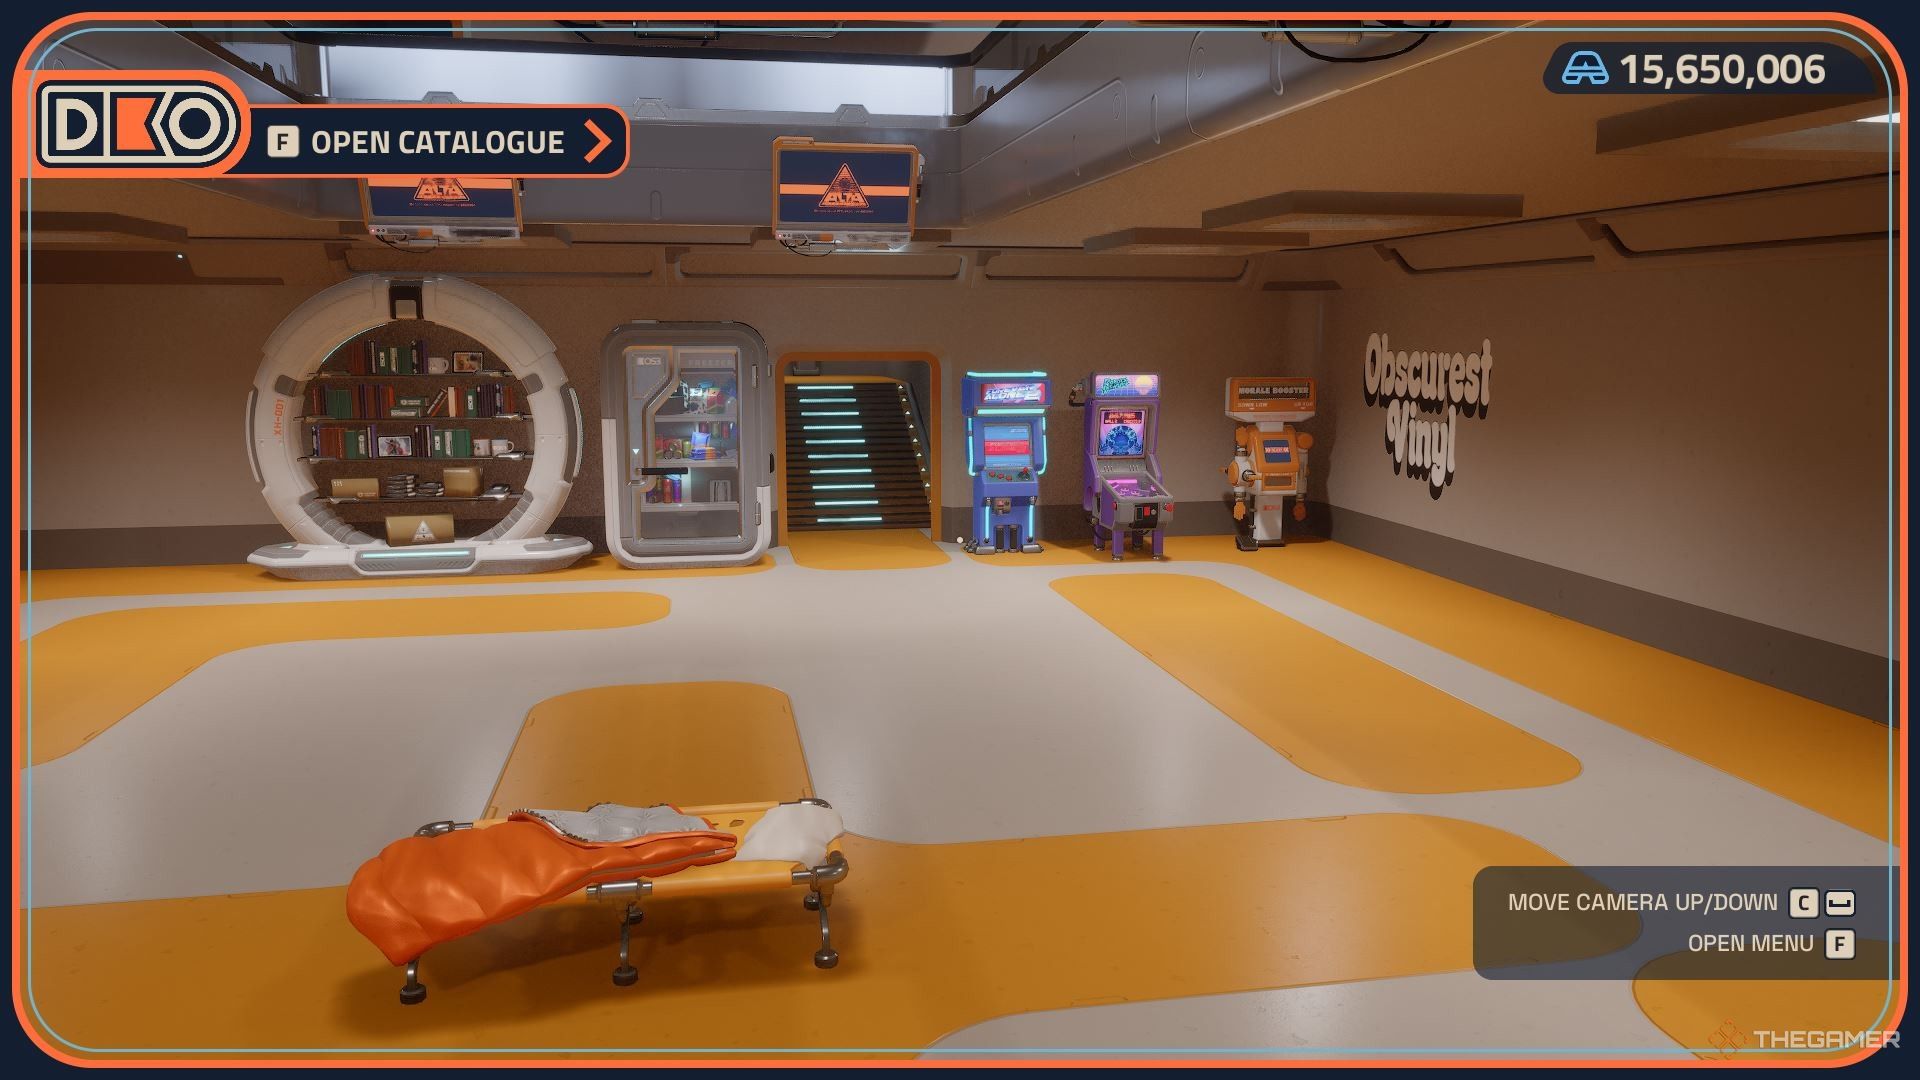
Once you explore the somewhat luxurious mobile home in Nu Florida (and try to ignore the video about losing your job and being stranded), you’ll have a base to return to frequently. Your main room includes essentials like a teleporter, a computer for emails and research, a wardrobe for outfits, and a video screen, among others. You’re free to decorate it as you wish!
You’ll find Alta crates scattered throughout the planets. When you come across ones that are not empty, you can grab Alta Bucks and Coupons to buy decorations from the Alta Store. Choices range from arcade machines to kitchen sets—anything a wandering space explorer might want for leisure back in the Habitat!
The Alta Store regularly updates with new items, so each time you’re back in the Habitat, check the Home DKO menu on your PC or enter the décor menu from your living space. You can interact with these decorations, so be sure to explore them and enjoy the playful features they offer.
Prioritize Finding Balls of Goo

As you explore, Eko points out the significance of finding Orange Goo. You can spot them while navigating, and they are also marked on your map in the journal. While it may seem odd to ingest globs of goo (somehow past your helmet), doing so will boost your health and stamina.
As in most adventure games, you start off with modest health and stamina levels. Stamina allows you to sprint across vast worlds, and sufficient health is crucial for surviving battles, especially during boss encounters!
It’s wise to regularly scan the area for items, as this will highlight nearby orange goo. So, scan often and stay alert!

Watch for Vitality Plants
While not as impactful as the orange goo, knowing where the nearest Vitality Plant is important. Eko will point these out as you explore; interacting with them will immediately restore your health.
These plants are typically located in areas filled with dangerous creatures or high falls, so if you’re unsure of their location, just scan the environment for guidance.
Customize Yourself and Eko in the Habitat
Not long after settling into your Habitat, you’ll receive a message from Shama Lama about a new program you’ve been enrolled in called the D.I.A.P.E.R. Program. This involves taking selfies at scenic spots across the planets, and completing it will reward you with new outfits for your character. You can change outfits in the Wardrobe at your Habitat whenever you want a new look.
In your main hub, you can also use the PC to customize your avatar and Eko’s voice. If Eko’s quips become repetitive, you can change their tone or reduce how often they speak. Turning Eko off entirely won’t hinder your understanding of the story.
Find all these options in the Parameters menu on your Habitat PC.
Use the Kindex to Learn About Enemies
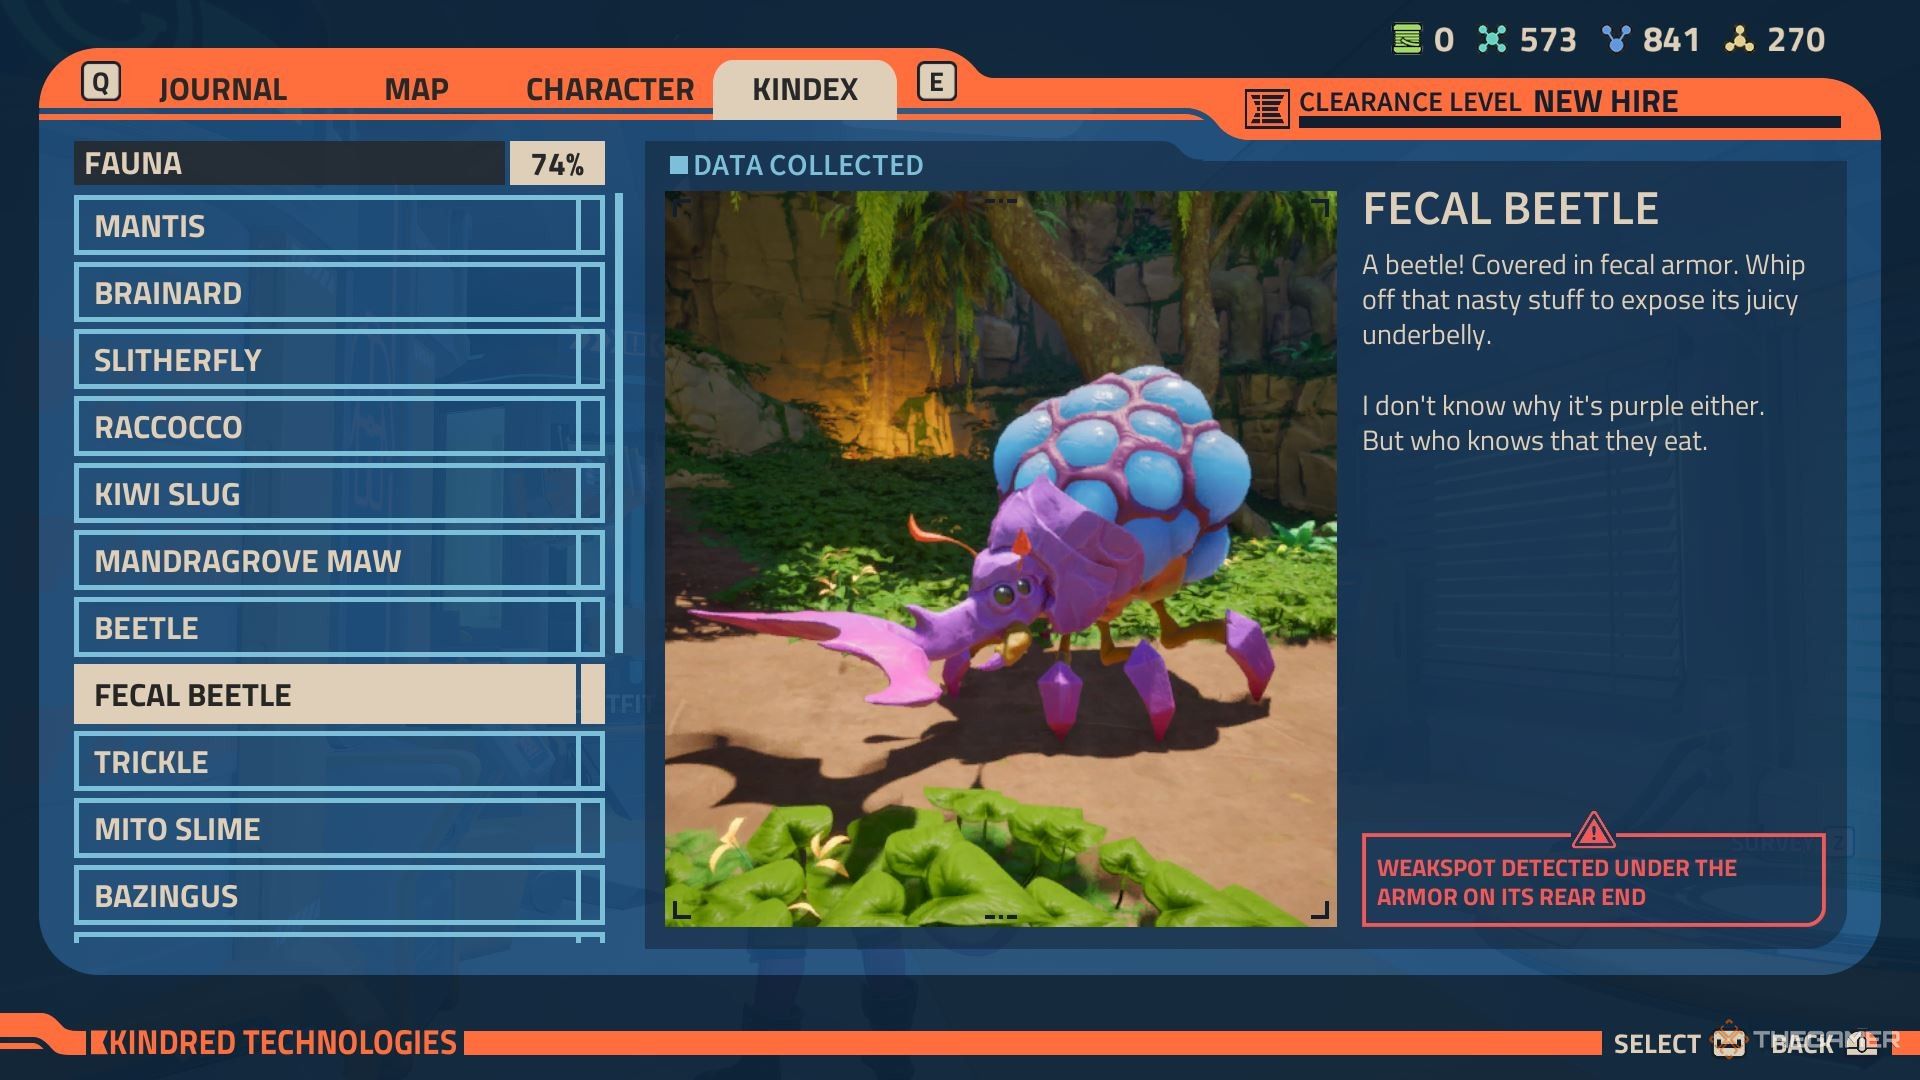
While you’ve been encouraged to scan the environment, don’t forget about the enemies as well. Scanning foes is part of your journey to fill the Kindex, so be swift and thoughtful when documenting them.
Once you’ve scanned an enemy, you can read about it in the Kindex. While the action can be chaotic, take the time to learn from these entries during quieter moments.
Many enemies may not have straightforward strategies for defeat, often needing upgraded tools or environmental advantages. For example, the slimes you encounter early on are unaffected by regular attacks, but after you unlock the spray nozzle upgrade, you’ll find that they dissolve in water, making it easier to deal with them.