Select Language:
Preparing for the Shasarazade Base in Suikoden 1 HD Remaster
The Shasarazade base is the second-to-last dungeon in Suikoden 1 HD Remaster. While it’s not an extensive dungeon, it features two formidable boss battles, which can catch unprepared players off guard.
Getting ready is crucial here. If you don’t come prepared, you might face a game over. Fortunately, we’ve got the tips to help you succeed.
Getting Ready for the Shasarazade Base
There are a couple of key points to keep in mind. First, you’ll encounter two bosses, and you won’t have the opportunity to rest between these battles. Therefore, stock up on Mega Medicine before diving into the action. Both bosses unleash a magic attack that affects the entire party, so consider assembling a team that can endure these magical onslaughts.
Including party members with Lightning or Thunder runes can be advantageous for the fight against the Venus Shell boss. Characters like Luc, Crowley, and Tengaar boast high MAG stats, which enhance their magic defense, making them solid choices for this dungeon. Moreover, any character equipped with a lightning rune can withstand attacks from the Venus Clam, while those with a water rune can handle Sonya’s magic assaults.
Tip: Equipping a Flowing Rune on a character with decent magical skills is a smart move, as it features a spell that can revive fallen teammates. You should have obtained this rune from the Qlon Temple Cavern.
Exploring the Shasarazade Dungeon
The Shasarazade dungeon is rather short and straightforward. You’ll descend a staircase and find a Chaos Shield in a chest. Continue down the path, tackle another set of stairs, and you’ll reach a section containing a treasure chest with a Guard Ring and another with the Master’s Garb. All these items are easy to spot and not hidden away.
Note: The Master’s Garb is one of the best armor pieces available, so make sure to equip it on McDohl.
Proceed down another set of stairs, where you’ll encounter a fork in the path. Choose the western route to find more Mega Medicine in a chest. Backtrack and head down the southern path to reach the final room of the dungeon, which is guarded by a giant clam boss called the Venus Shell.
Boss Fight: The Venus Shell
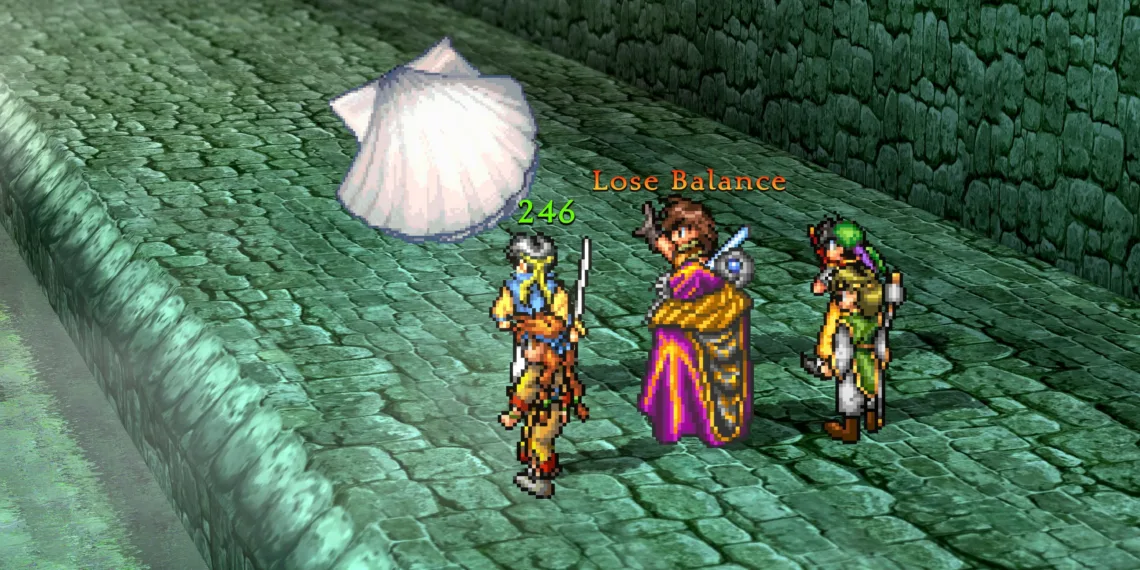
This boss battle is manageable, but treating it like a typical fight can lead to wasted resources and make the true challenge in the Shasarazade dungeon significantly harder. For this encounter, it’s best to hold back on using your most powerful spells. Instead, rely on unite attacks, skill runes, and regular attacks to whittle down the Venus Shell’s health.
The Venus Shell has two types of attacks: a single-target pearl shot and a lightning spell that hits all party members. Thus, loading up on Mega Medicine is essential. You need to inflict around 15,000 damage to defeat the Venus Shell, so select members capable of delivering strong unite attacks.
Some excellent candidates are Ronnie Bell and Pahn or Tai Ho and Yamkoo, who both have powerful unite attacks. While using these unite attacks may leave your characters momentarily unbalanced, this can work to your advantage since they can serve as healers during that time. Also, Tengaar and Hix make good choices as well, with their unite attack capabilities and Tengaar’s strong magic.
Bonus Tip: McDohl has an exceptional magic resistance, so you won’t need to prioritize healing him as much when dealing with magic attacks.
After defeating the Venus Shell, you’ll move on to the dam, where you can close it and collect a Thunder Rune from a chest. Then, backtrack through the Shasarazade dungeon before encountering General Sonya Shulen at the exit. This battle can be quite challenging, especially if the Venus Shell has used its lightning spell frequently, leaving your party drained.
Important Reminder: If you don’t step forward after defeating the Venus Shell, you can run back to heal before returning. This option can help you conserve resources for the upcoming fight with Sonya.
Boss Fight: Sonya Shulen
Similar to the Venus Shell, Sonya has two types of attacks. One is a physical strike that deals significant damage to a single target, while the other is a water magic attack that affects the whole party. She is also quite adept at dodging and counter-attacking regular hits.
Therefore, avoid using regular attacks against her. Luckily, she only has about 8,000 HP, so powerful spells, especially McDohl’s Final Judgment, can deal heavy damage despite her resistance to many other magic types.
In this battle, focus on strikes using Runes and Unite Attacks. Refrain from using basic attacks; you want to maximize your chances of winning. If your resources are low going into the fight, you’ll want to rely on the hope that Sonya won’t frequently unleash her magic attacks. A party member equipped with a Flowing Rune, capable of healing, can also provide a buffer against her strong magic attacks.

