

Select Language:
007 First Light is now available, so you should gear up with your silenced pistol, put on your laser watch, and get ready to take down enemies in exotic locations. This game follows the early years of James Bond, where you’ll face off against a mysterious enemy worldwide.
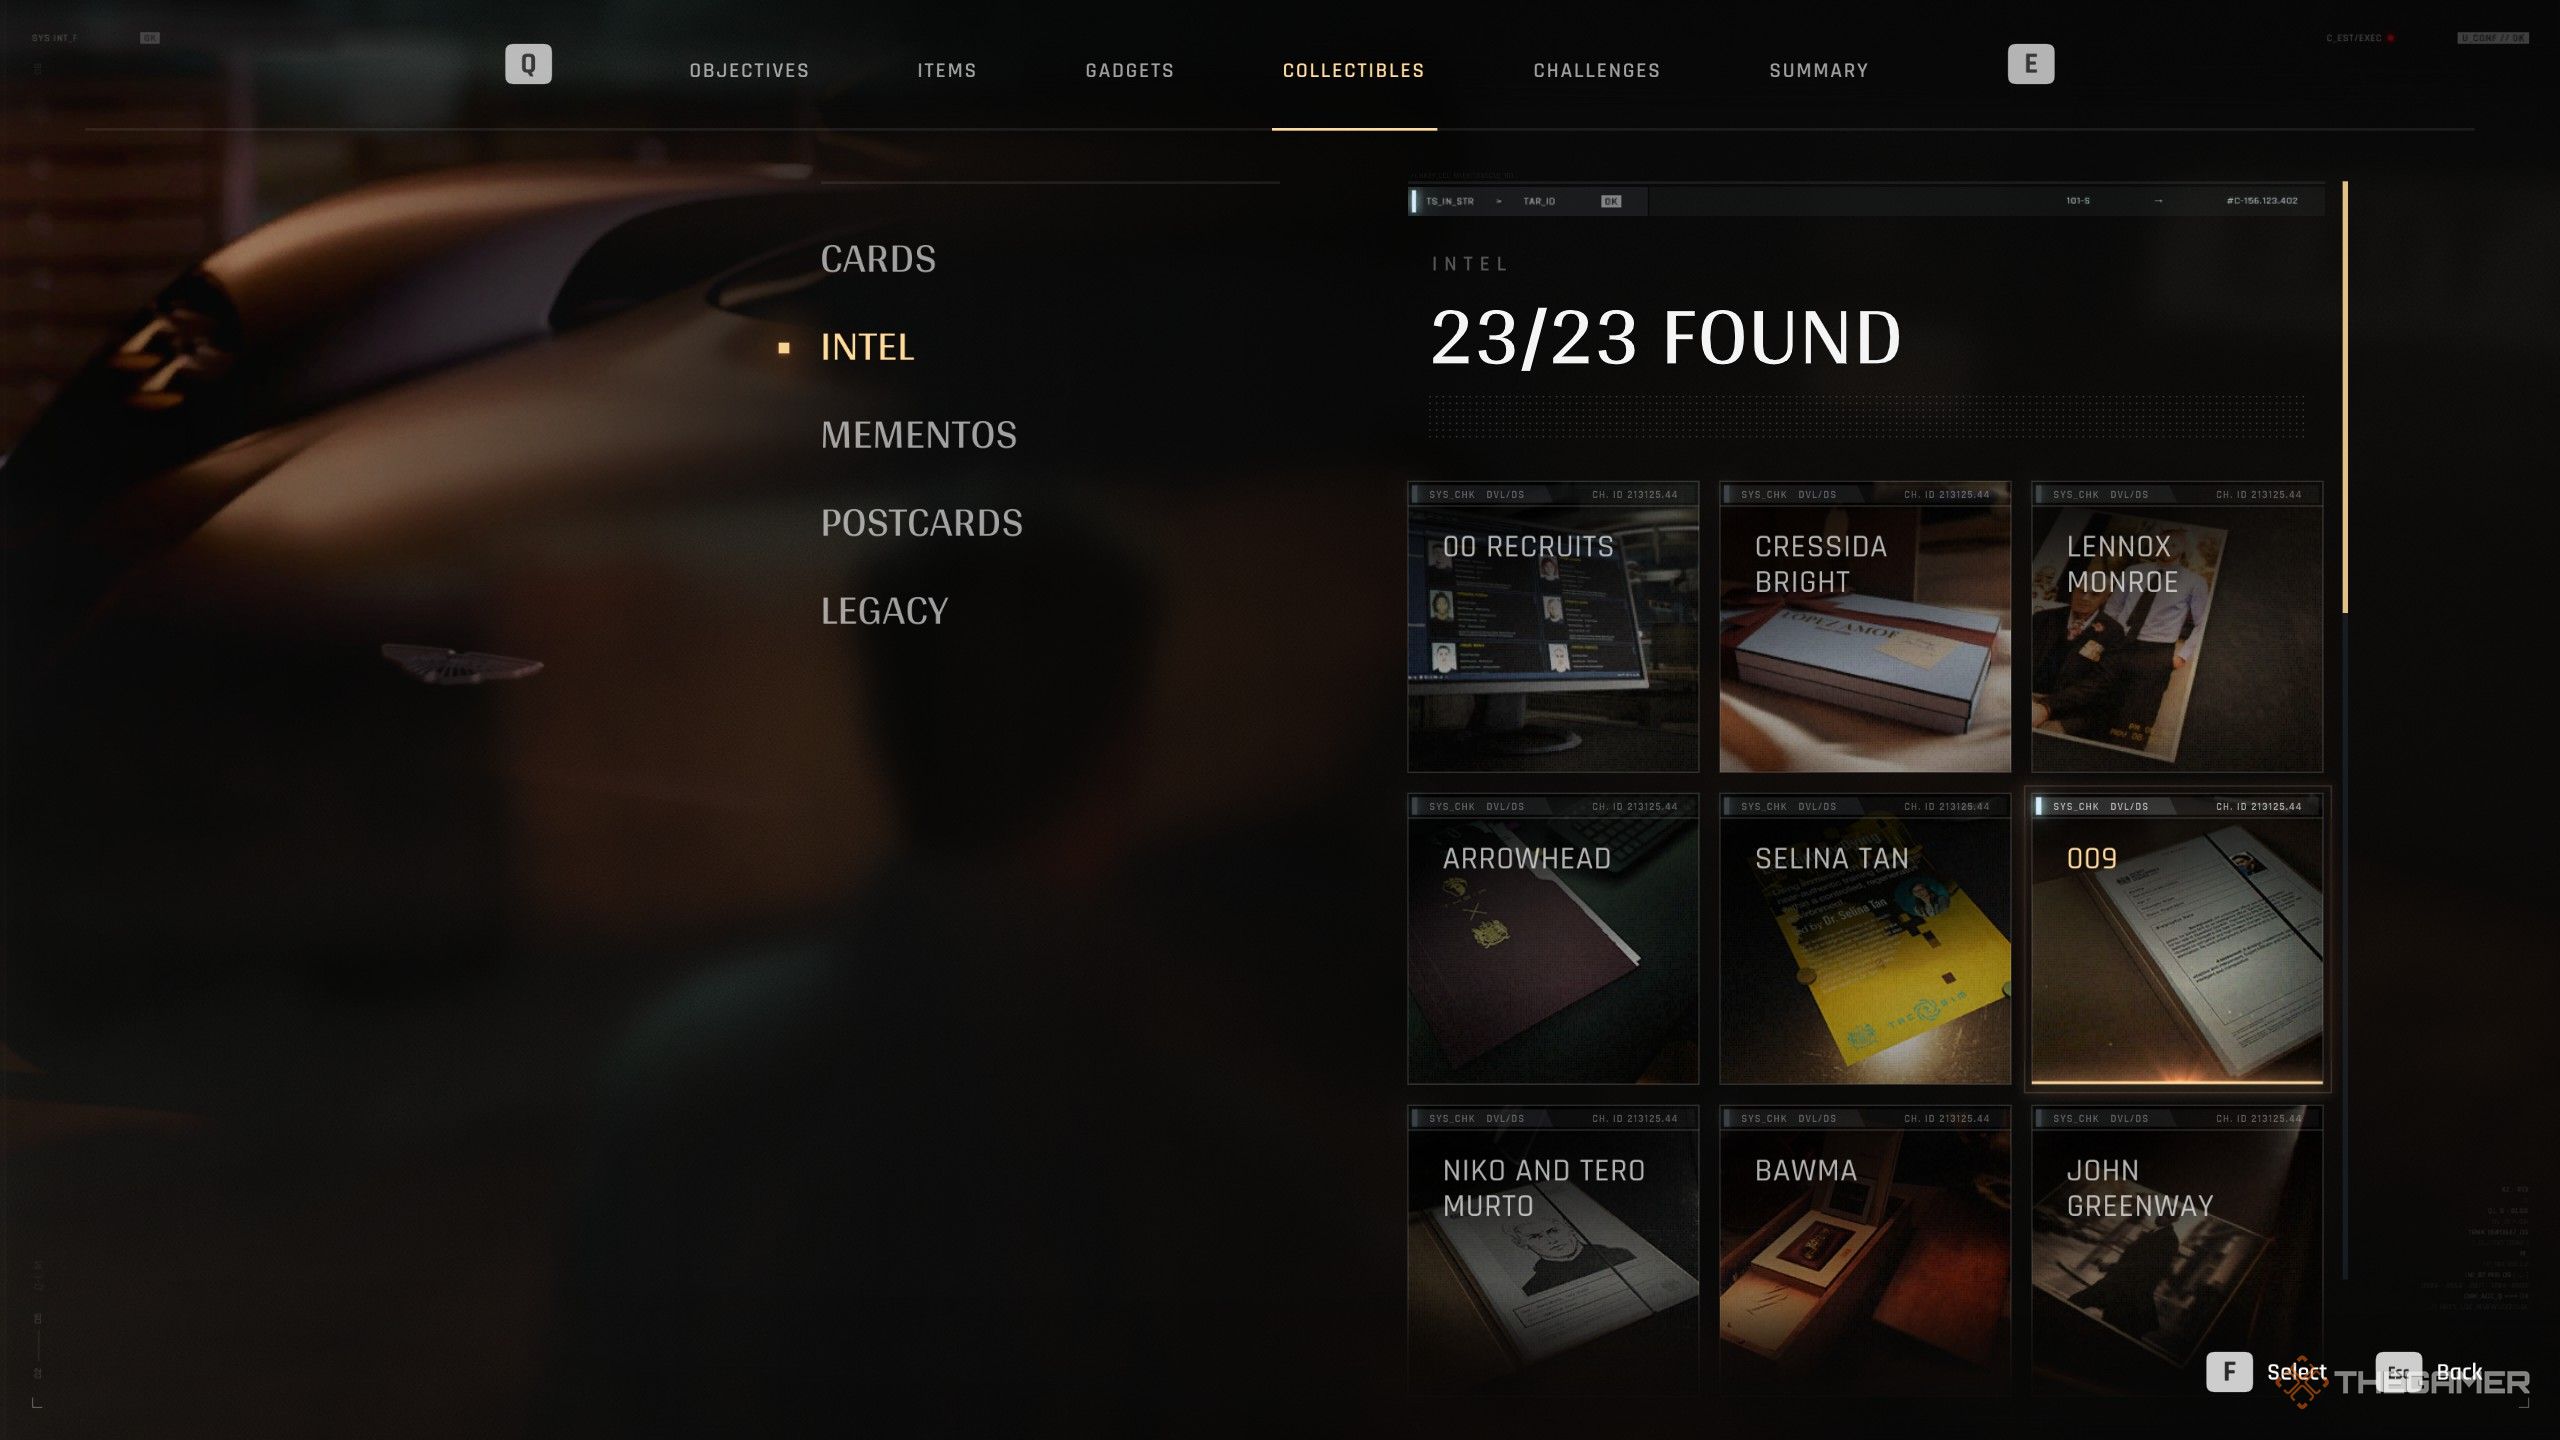
During your journey, you’ll find many collectibles, including playing cards and references from previous Bond films. One of the key collectibles are the MI6 Intelligence Files, which reveal important details about the characters you meet. Below is a complete guide to help you find all 23 MI6 Files in the game.
All MI6 Intel Locations
When collecting MI6 Files in 007 First Light, note that they won’t be physically picked up when you interact with them. Instead, they will be marked as collected in your menu without disappearing from the environment. These files don’t have a distinct appearance, so they can look like a computer screen, a folder, or even an unusual object like a giant wooden spoon. It’s best to interact with everything you see to ensure you don’t miss any.
Here is a detailed list of each MI6 File, which mission it belongs to, and a helpful image for locating it:
Heart of the Matter — 00 Recruits
First, play through the “Heart of the Matter” chapter until you can explore Q-Branch. After speaking with Q, go to the central podium and locate a computer terminal to the left of the SUV, on a desk behind the initial Q interaction. Interact with this computer to unlock the 00 Recruits file.
Image:
Location of MI6 file in Q-Branch
Note: Interacting with the file logs it as obtained but doesn’t remove it physically.
Heart of the Matter — Selina Tan
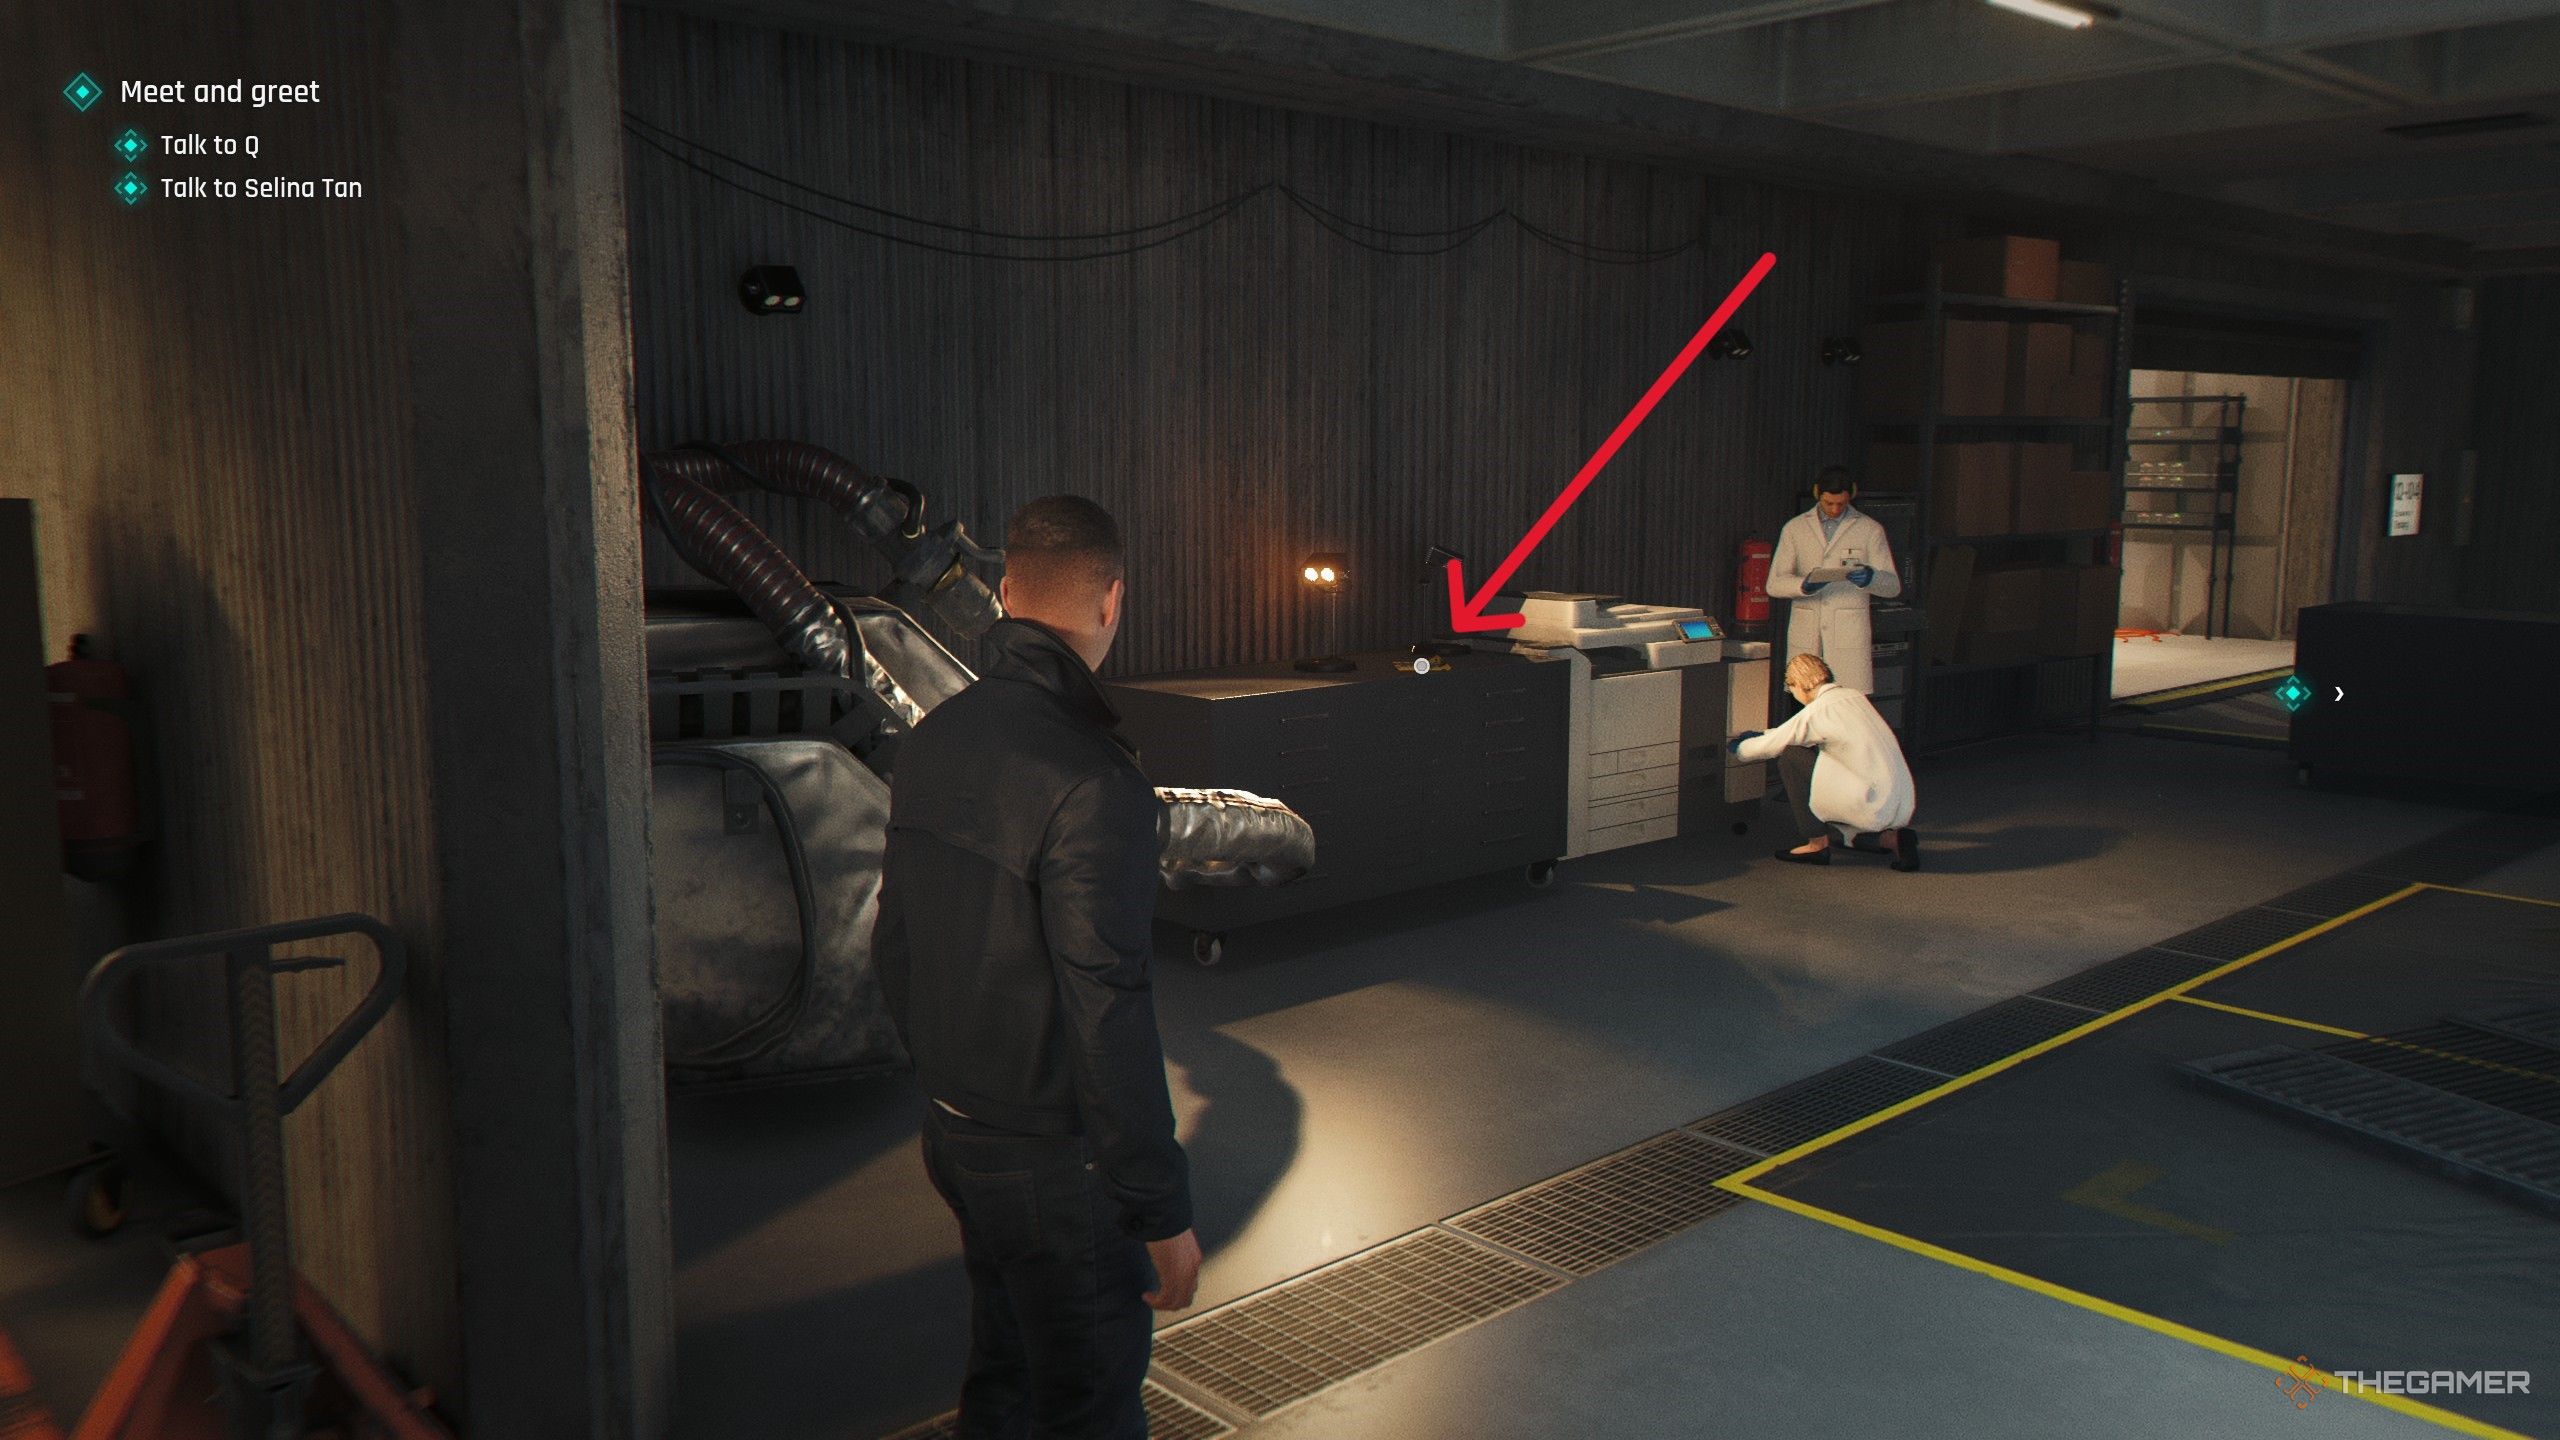
While exploring the Q-Branch, head to the back right corner of the room. Behind the SUV in the box, find a small table mounted along the wall. Interact with the yellow paper there, which is Selina Tan’s file, and add it to your collection.
Image:
Location of Selina Tan’s file
A New Home — Lennox Monroe
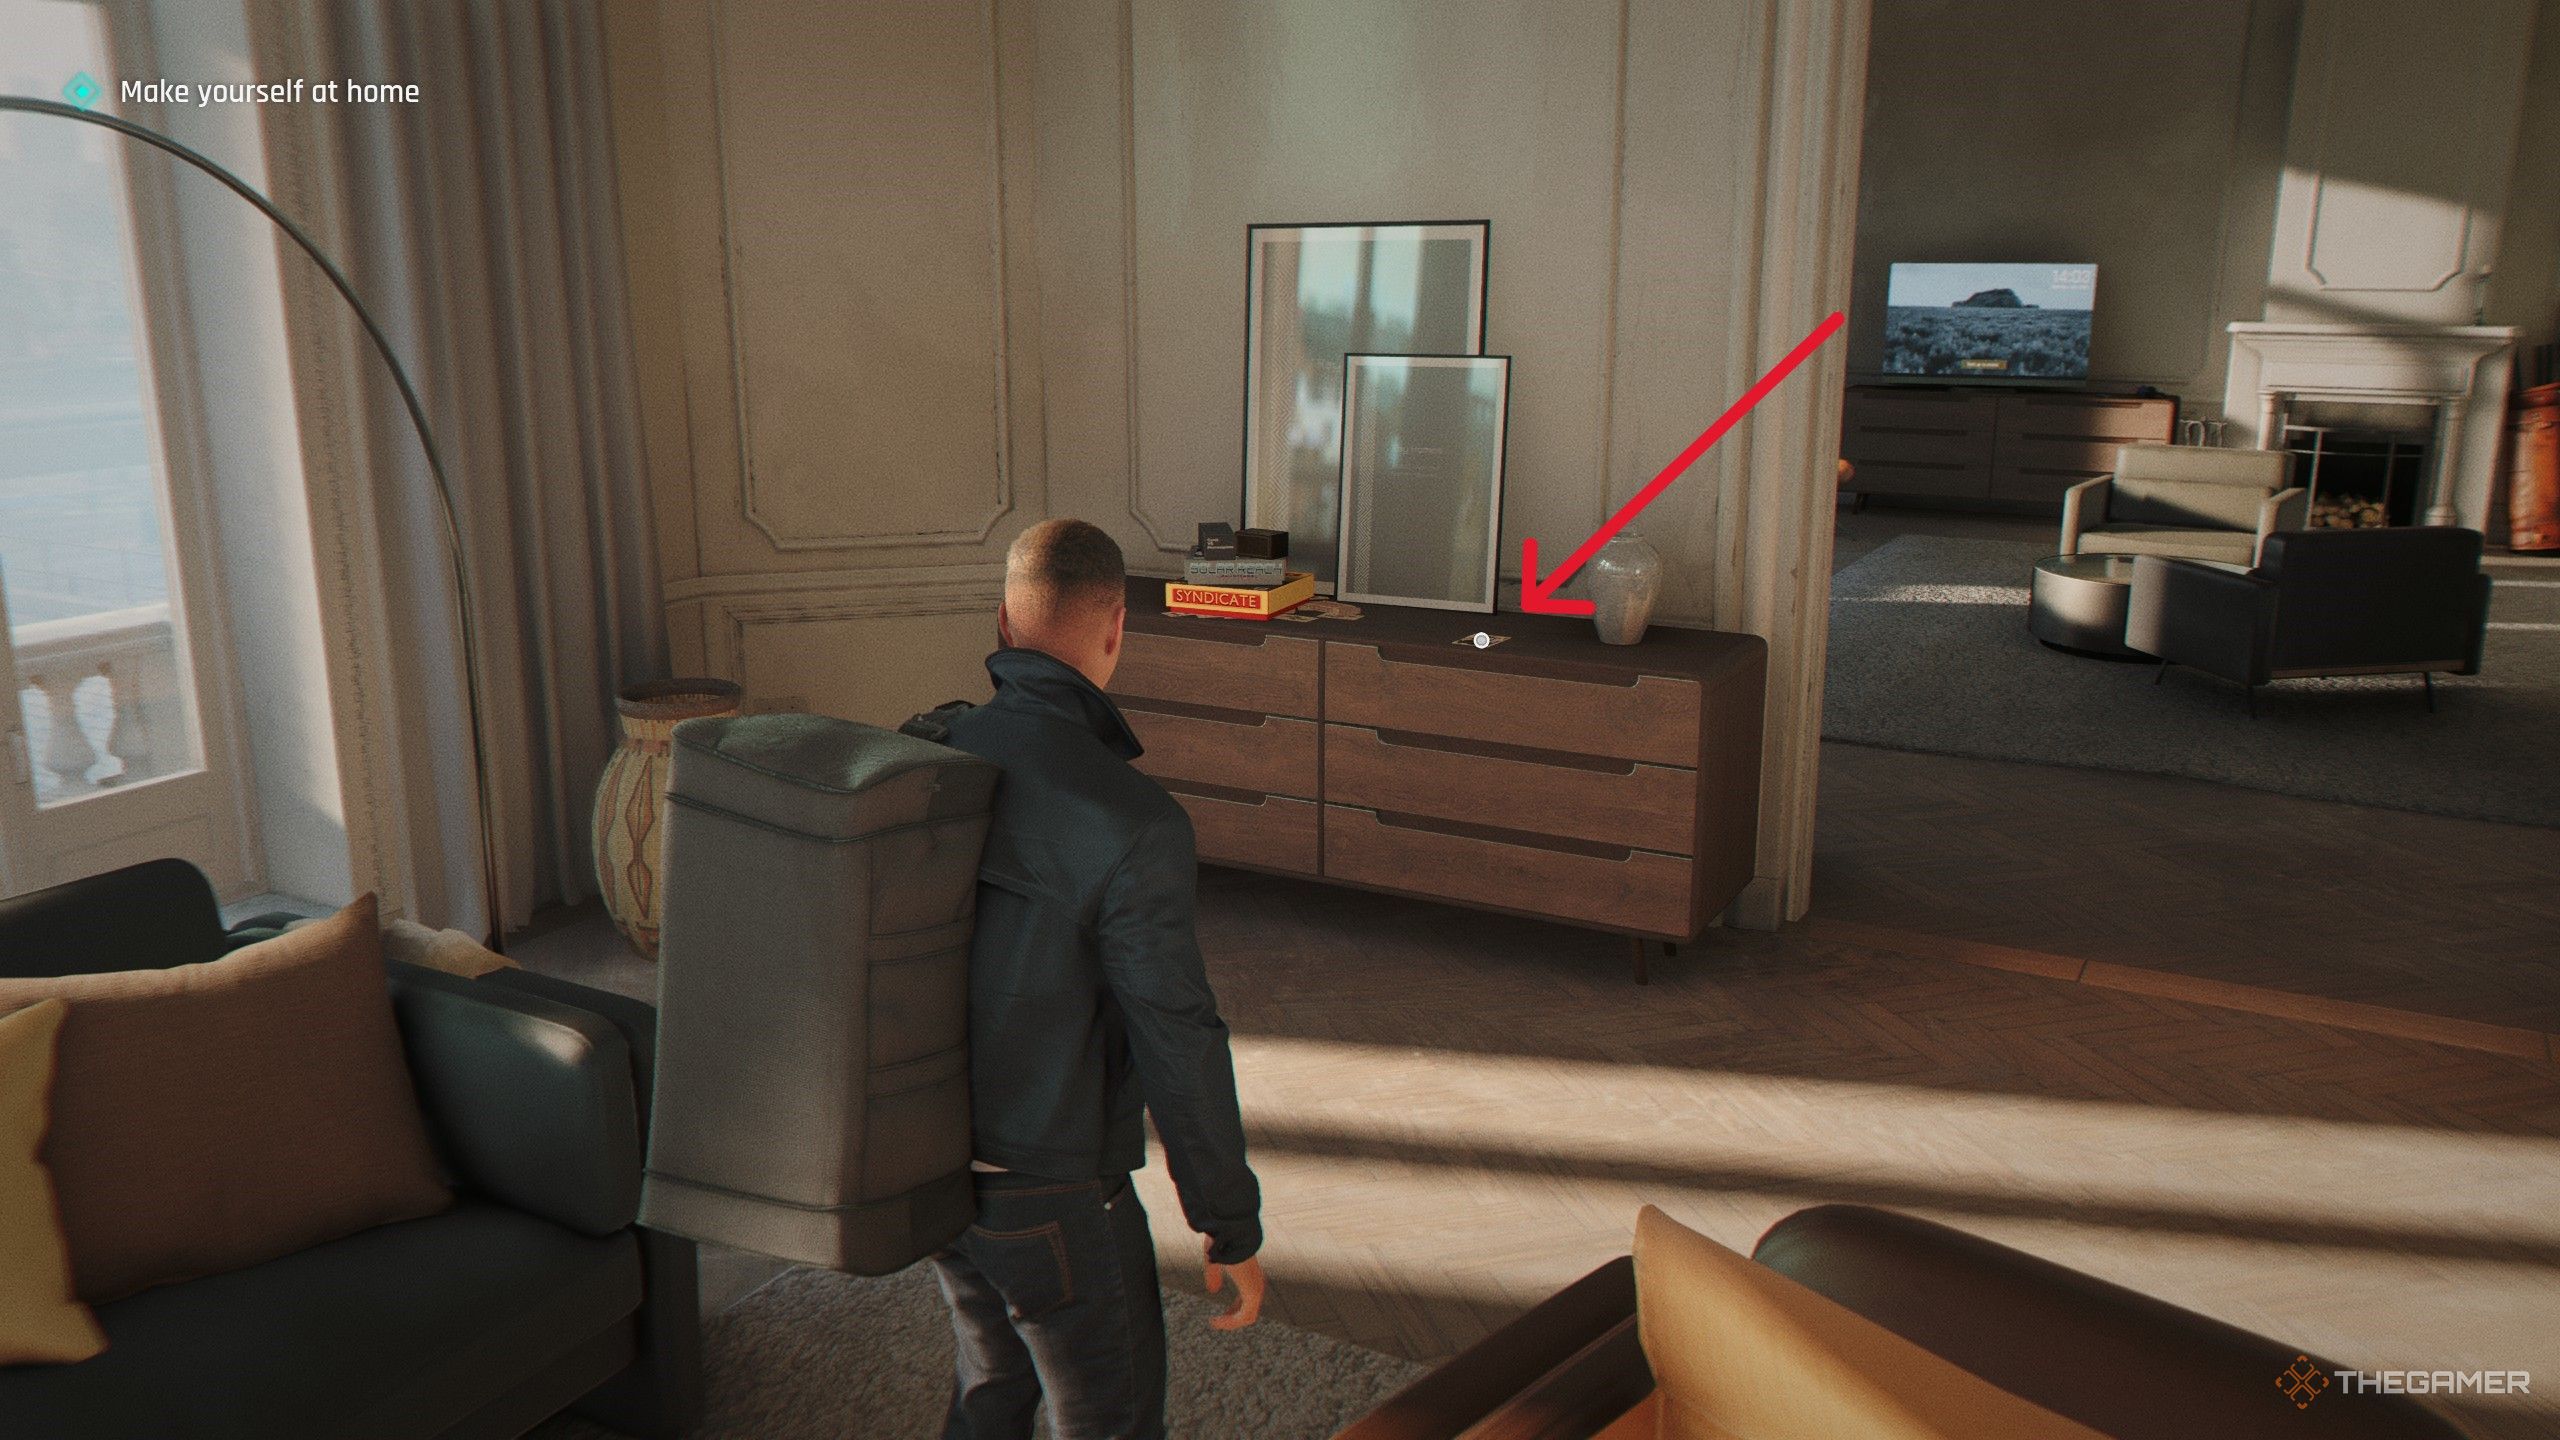
In the “A New Home” chapter, after arriving at your penthouse in London, move through the space to the living room. On a dresser near the door, there’s a family photo of Lennox Monroe. Flip the photo to add it to your MI6 Files.
Image:
Location of Lennox Monroe’s file
A New Home — Cressida Bright
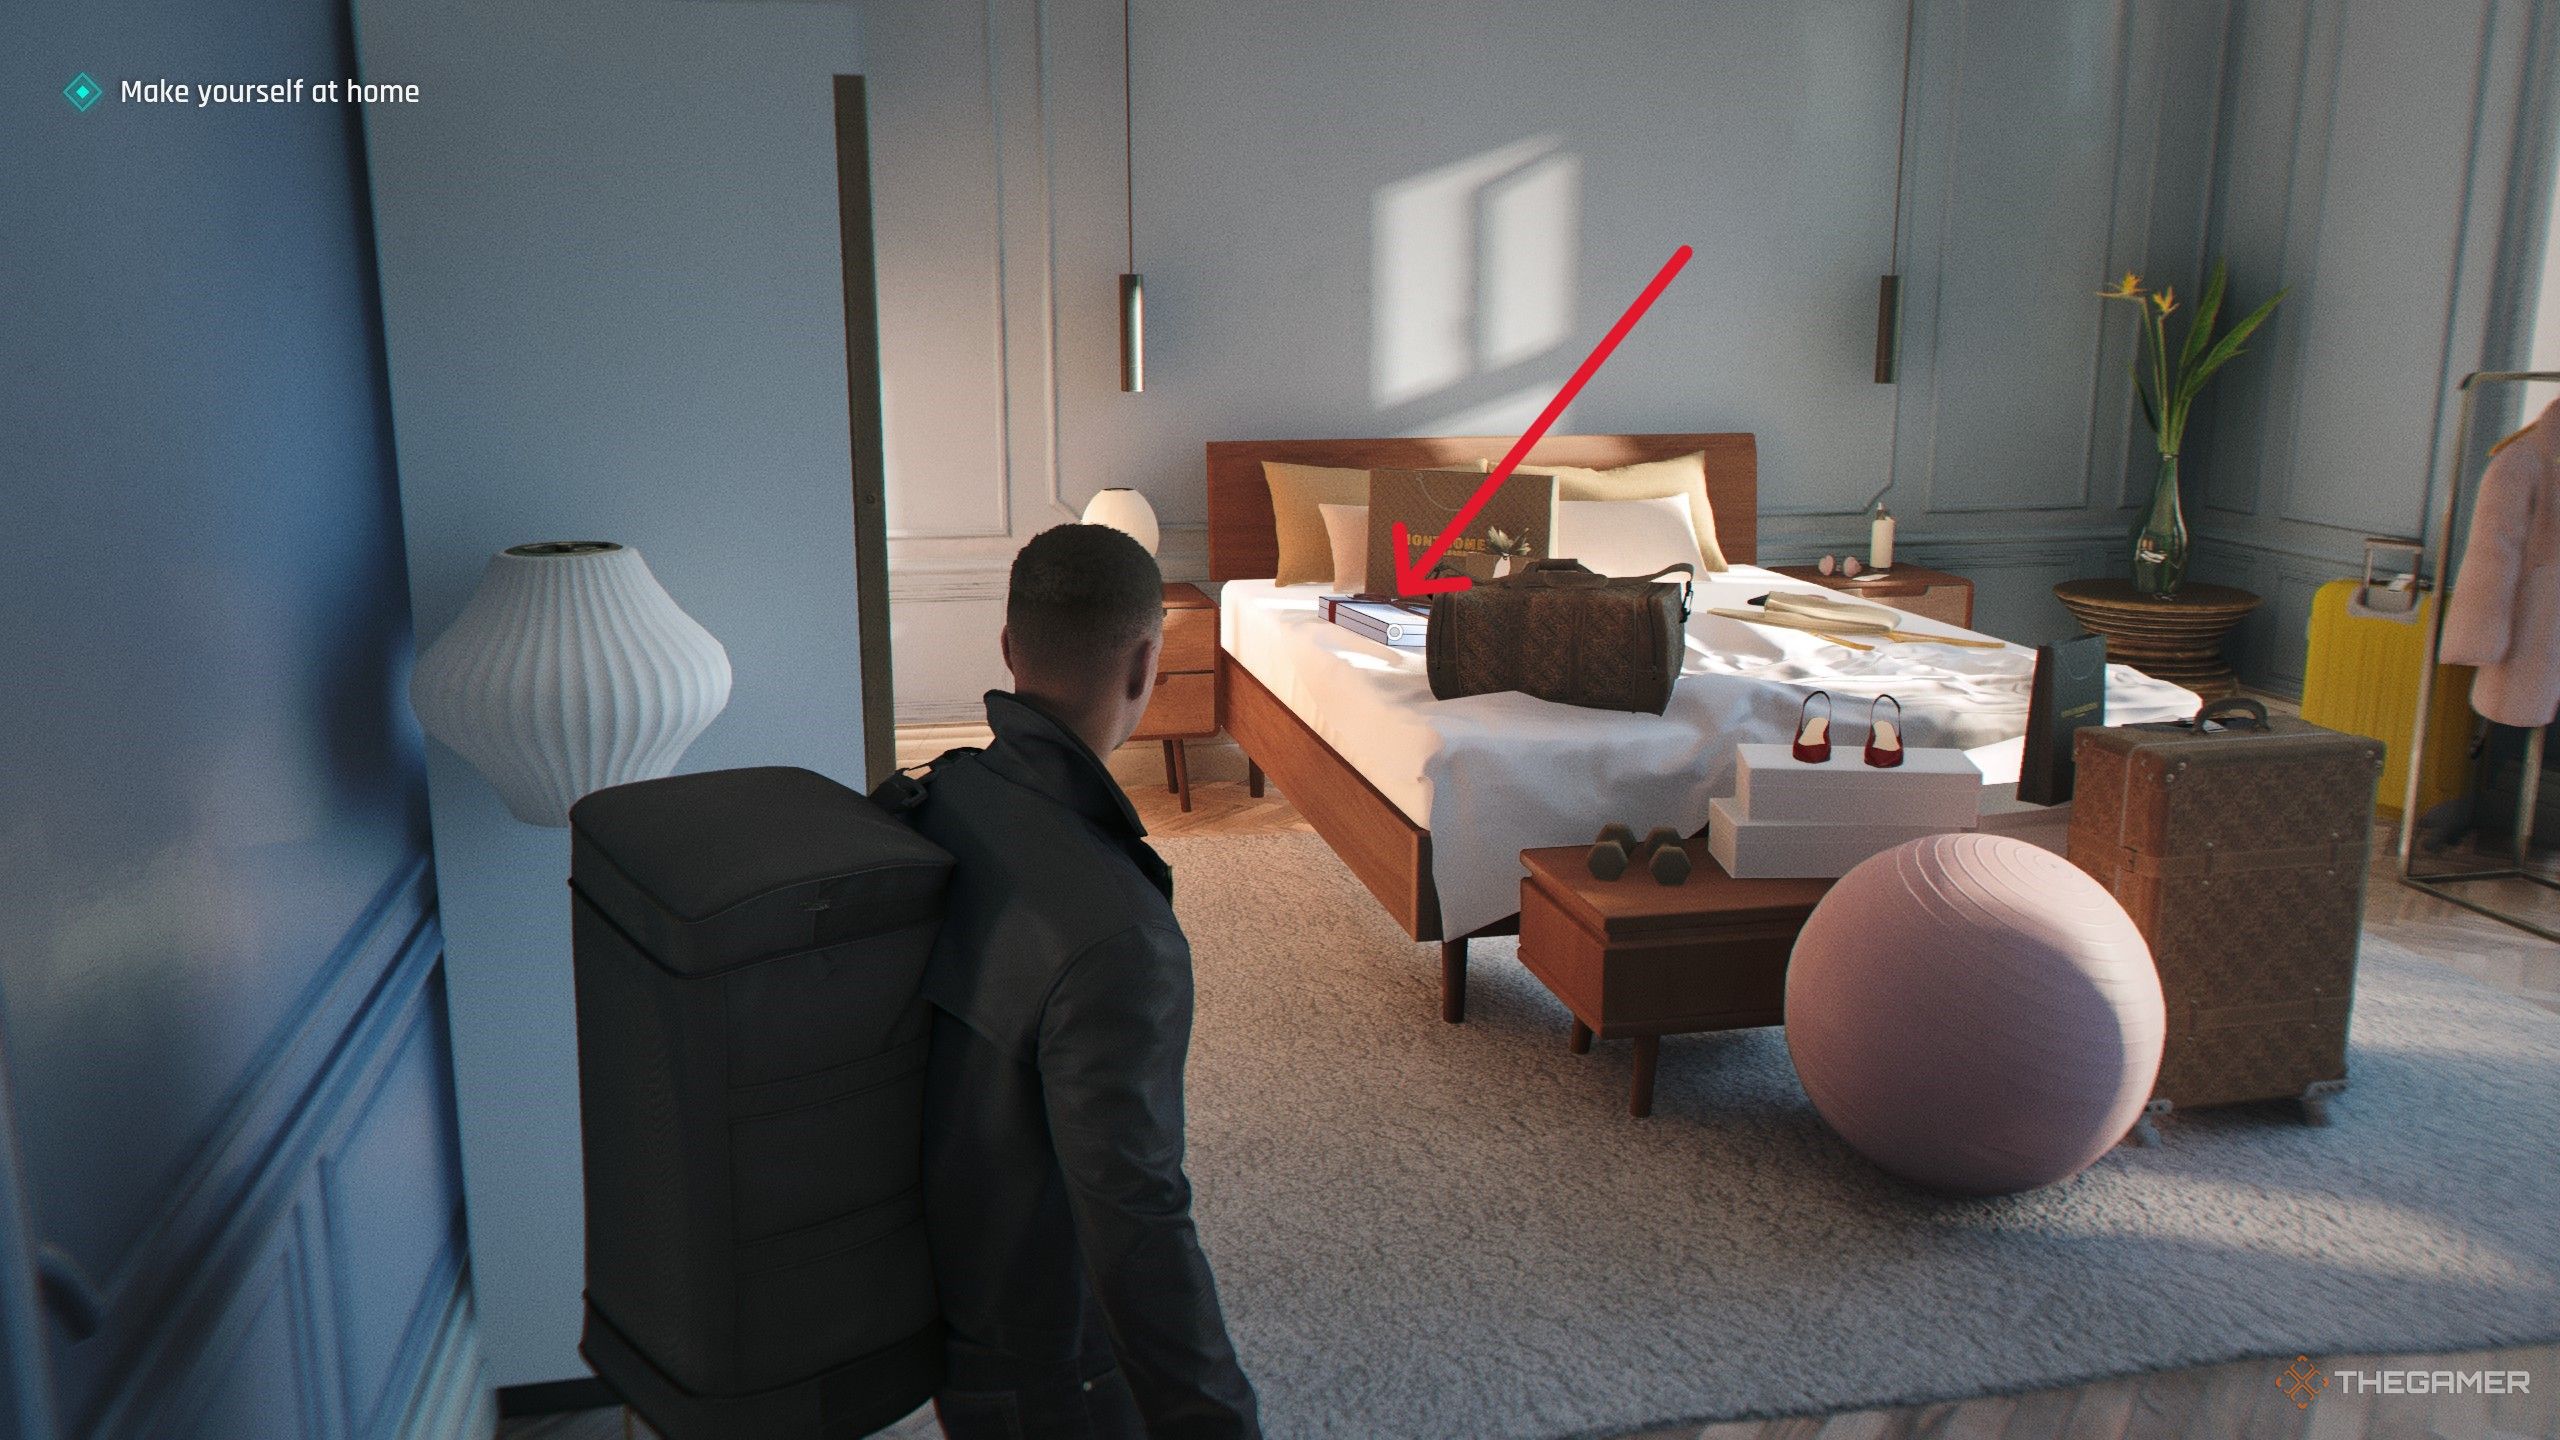
Inside the penthouse, go down the main hall and enter Cressida’s room through the second door on the right. She has a present box on her bed. Interact with the box to acquire her MI6 file.
Image:
Location of Cressida Bright’s file
The Past Never Dies — Niko and Tero Murto
During your third visit to Q-Branch and the Operations floor, after speaking to Q and receiving gadgets, go to the back of the floor. On a desk along the wall, there’s a file about the twins you fought at the hotel. Interact to collect it.
Image:
Location of Niko and Tero Murto’s file
The Past Never Dies — John Greenway
Once on 009’s boat in “The Past Never Dies,” enter the backroom. Inside, on a table, find a photo of John Greenway. Interact with it to add the file to your MI6 collection.
Image:
Layout in the boat
Uninvited — James Bond
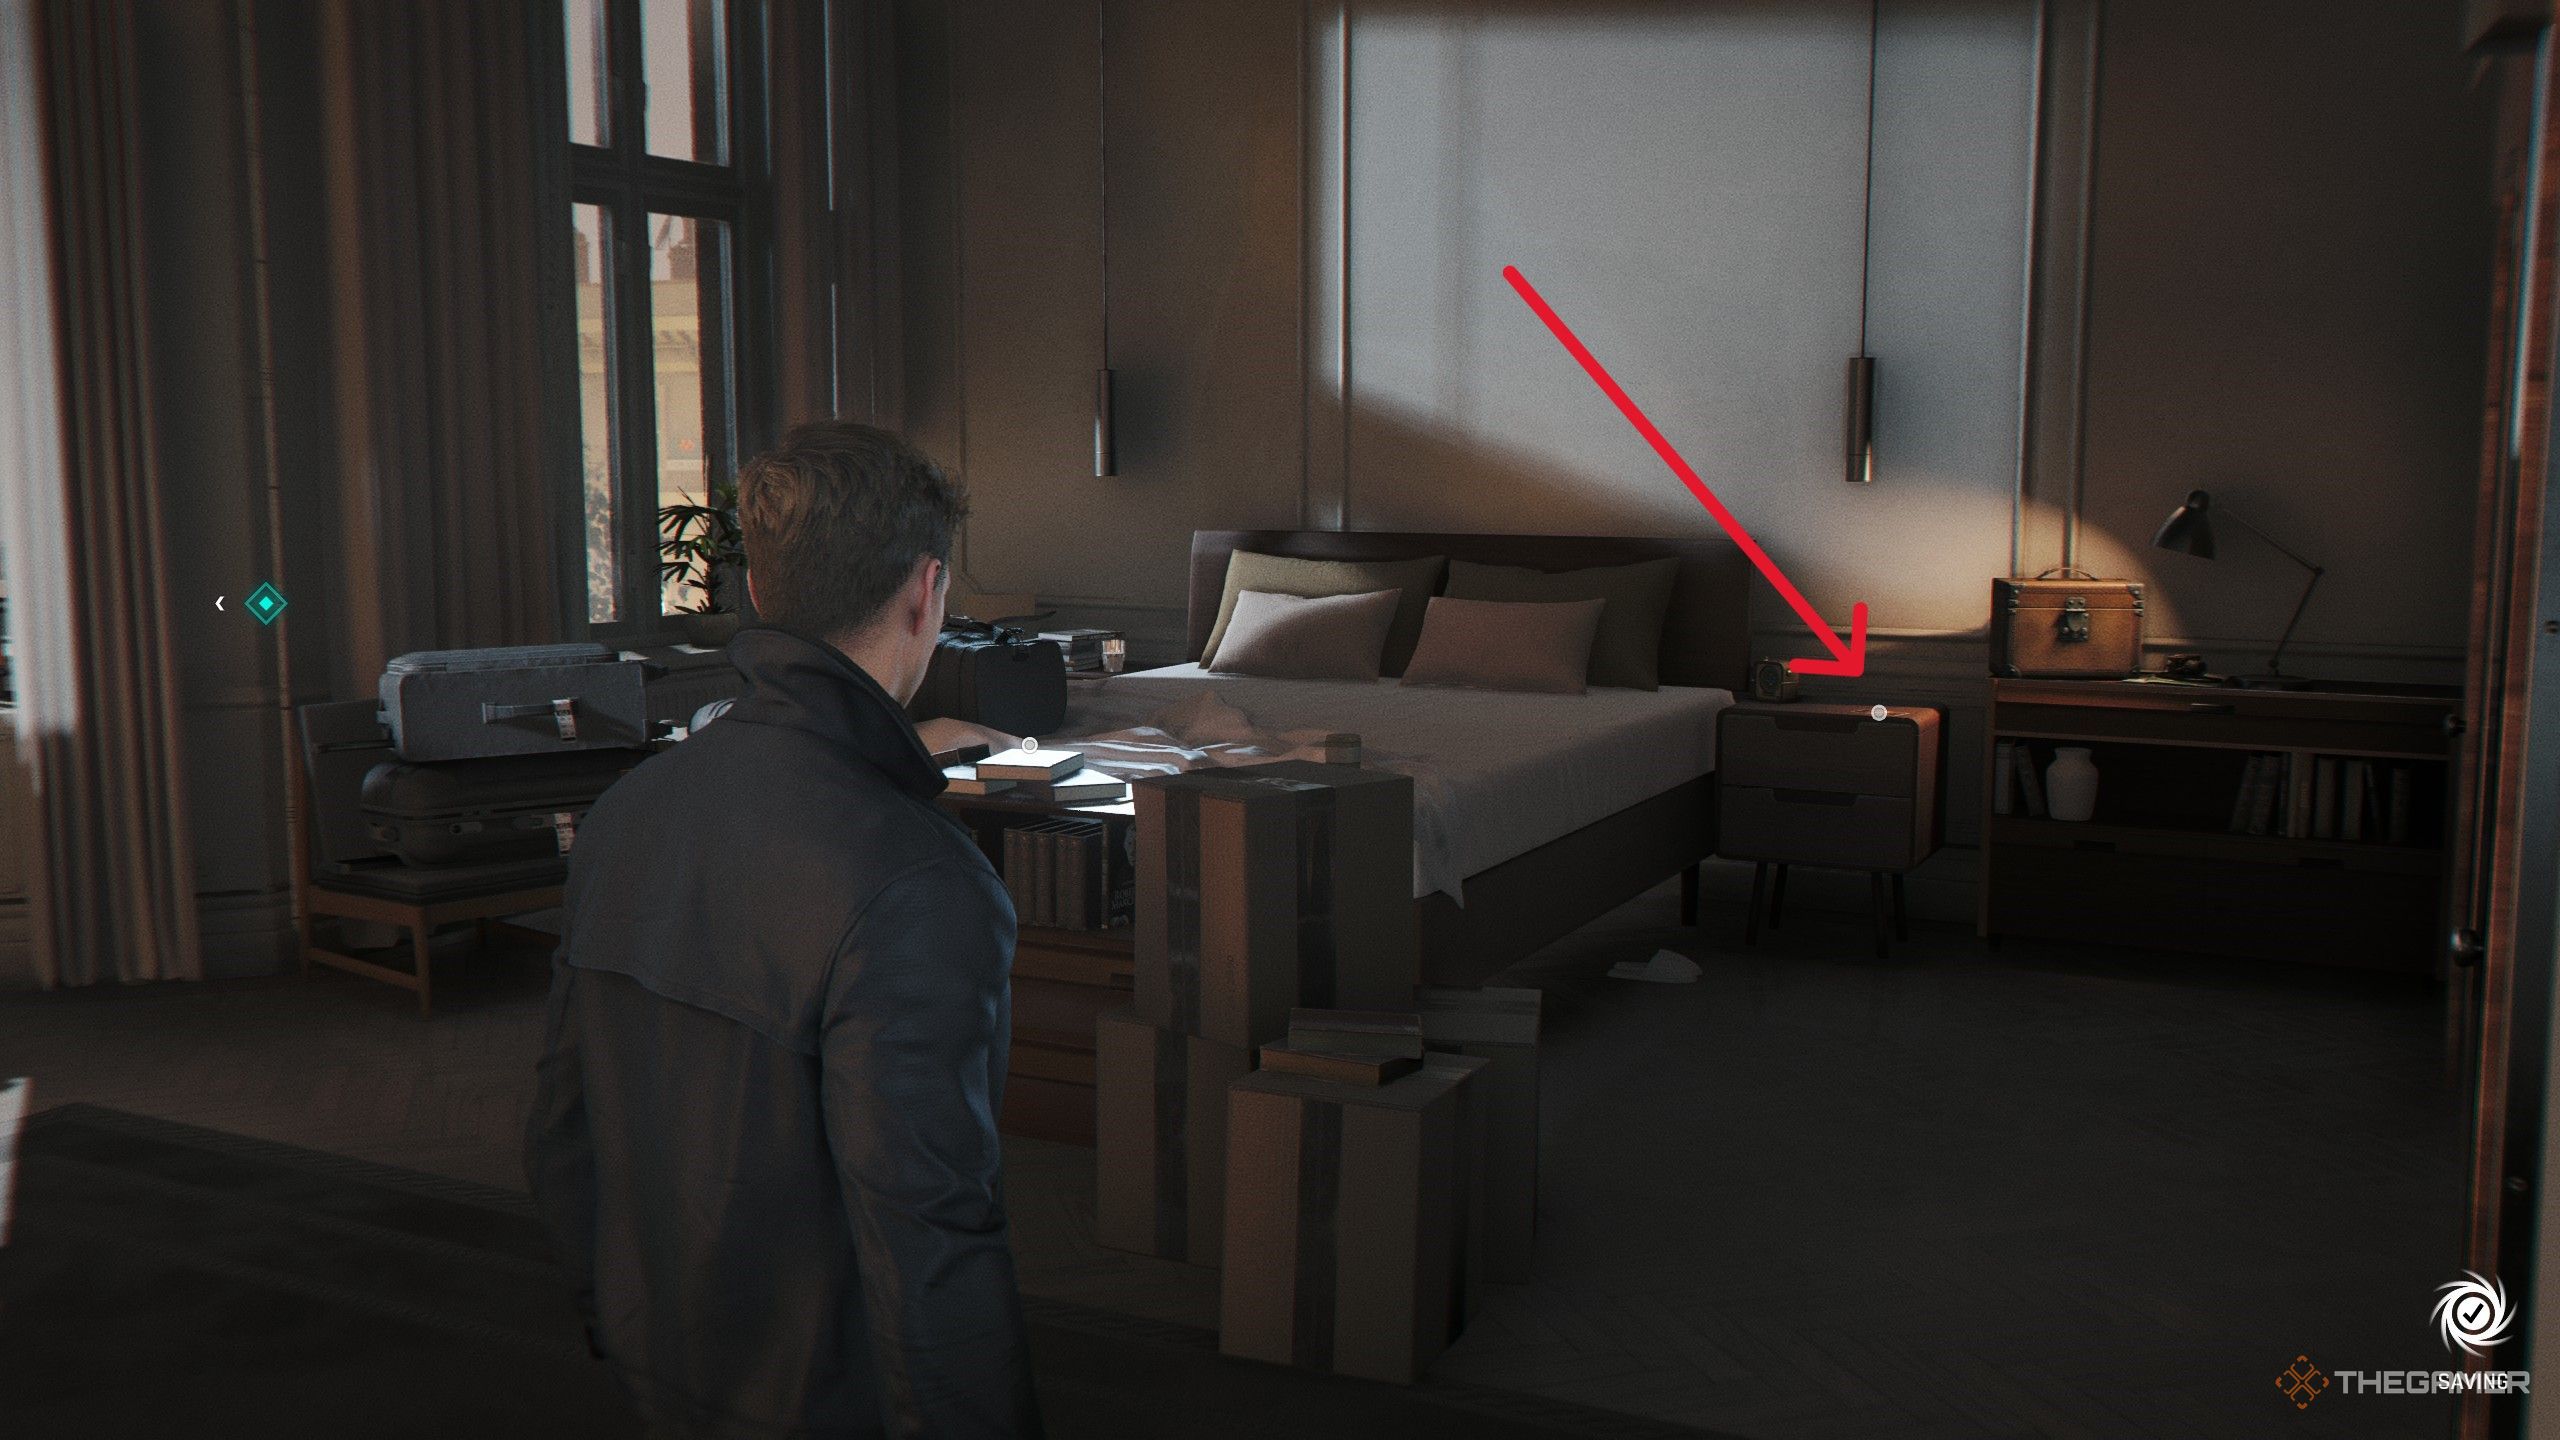
Back at Bond’s penthouse, go to his bedroom and interact with the photo on the nightstand. This will unlock the James Bond MI6 File.
Image:
Location in Bond’s bedroom
Uninvited — Webb Industries
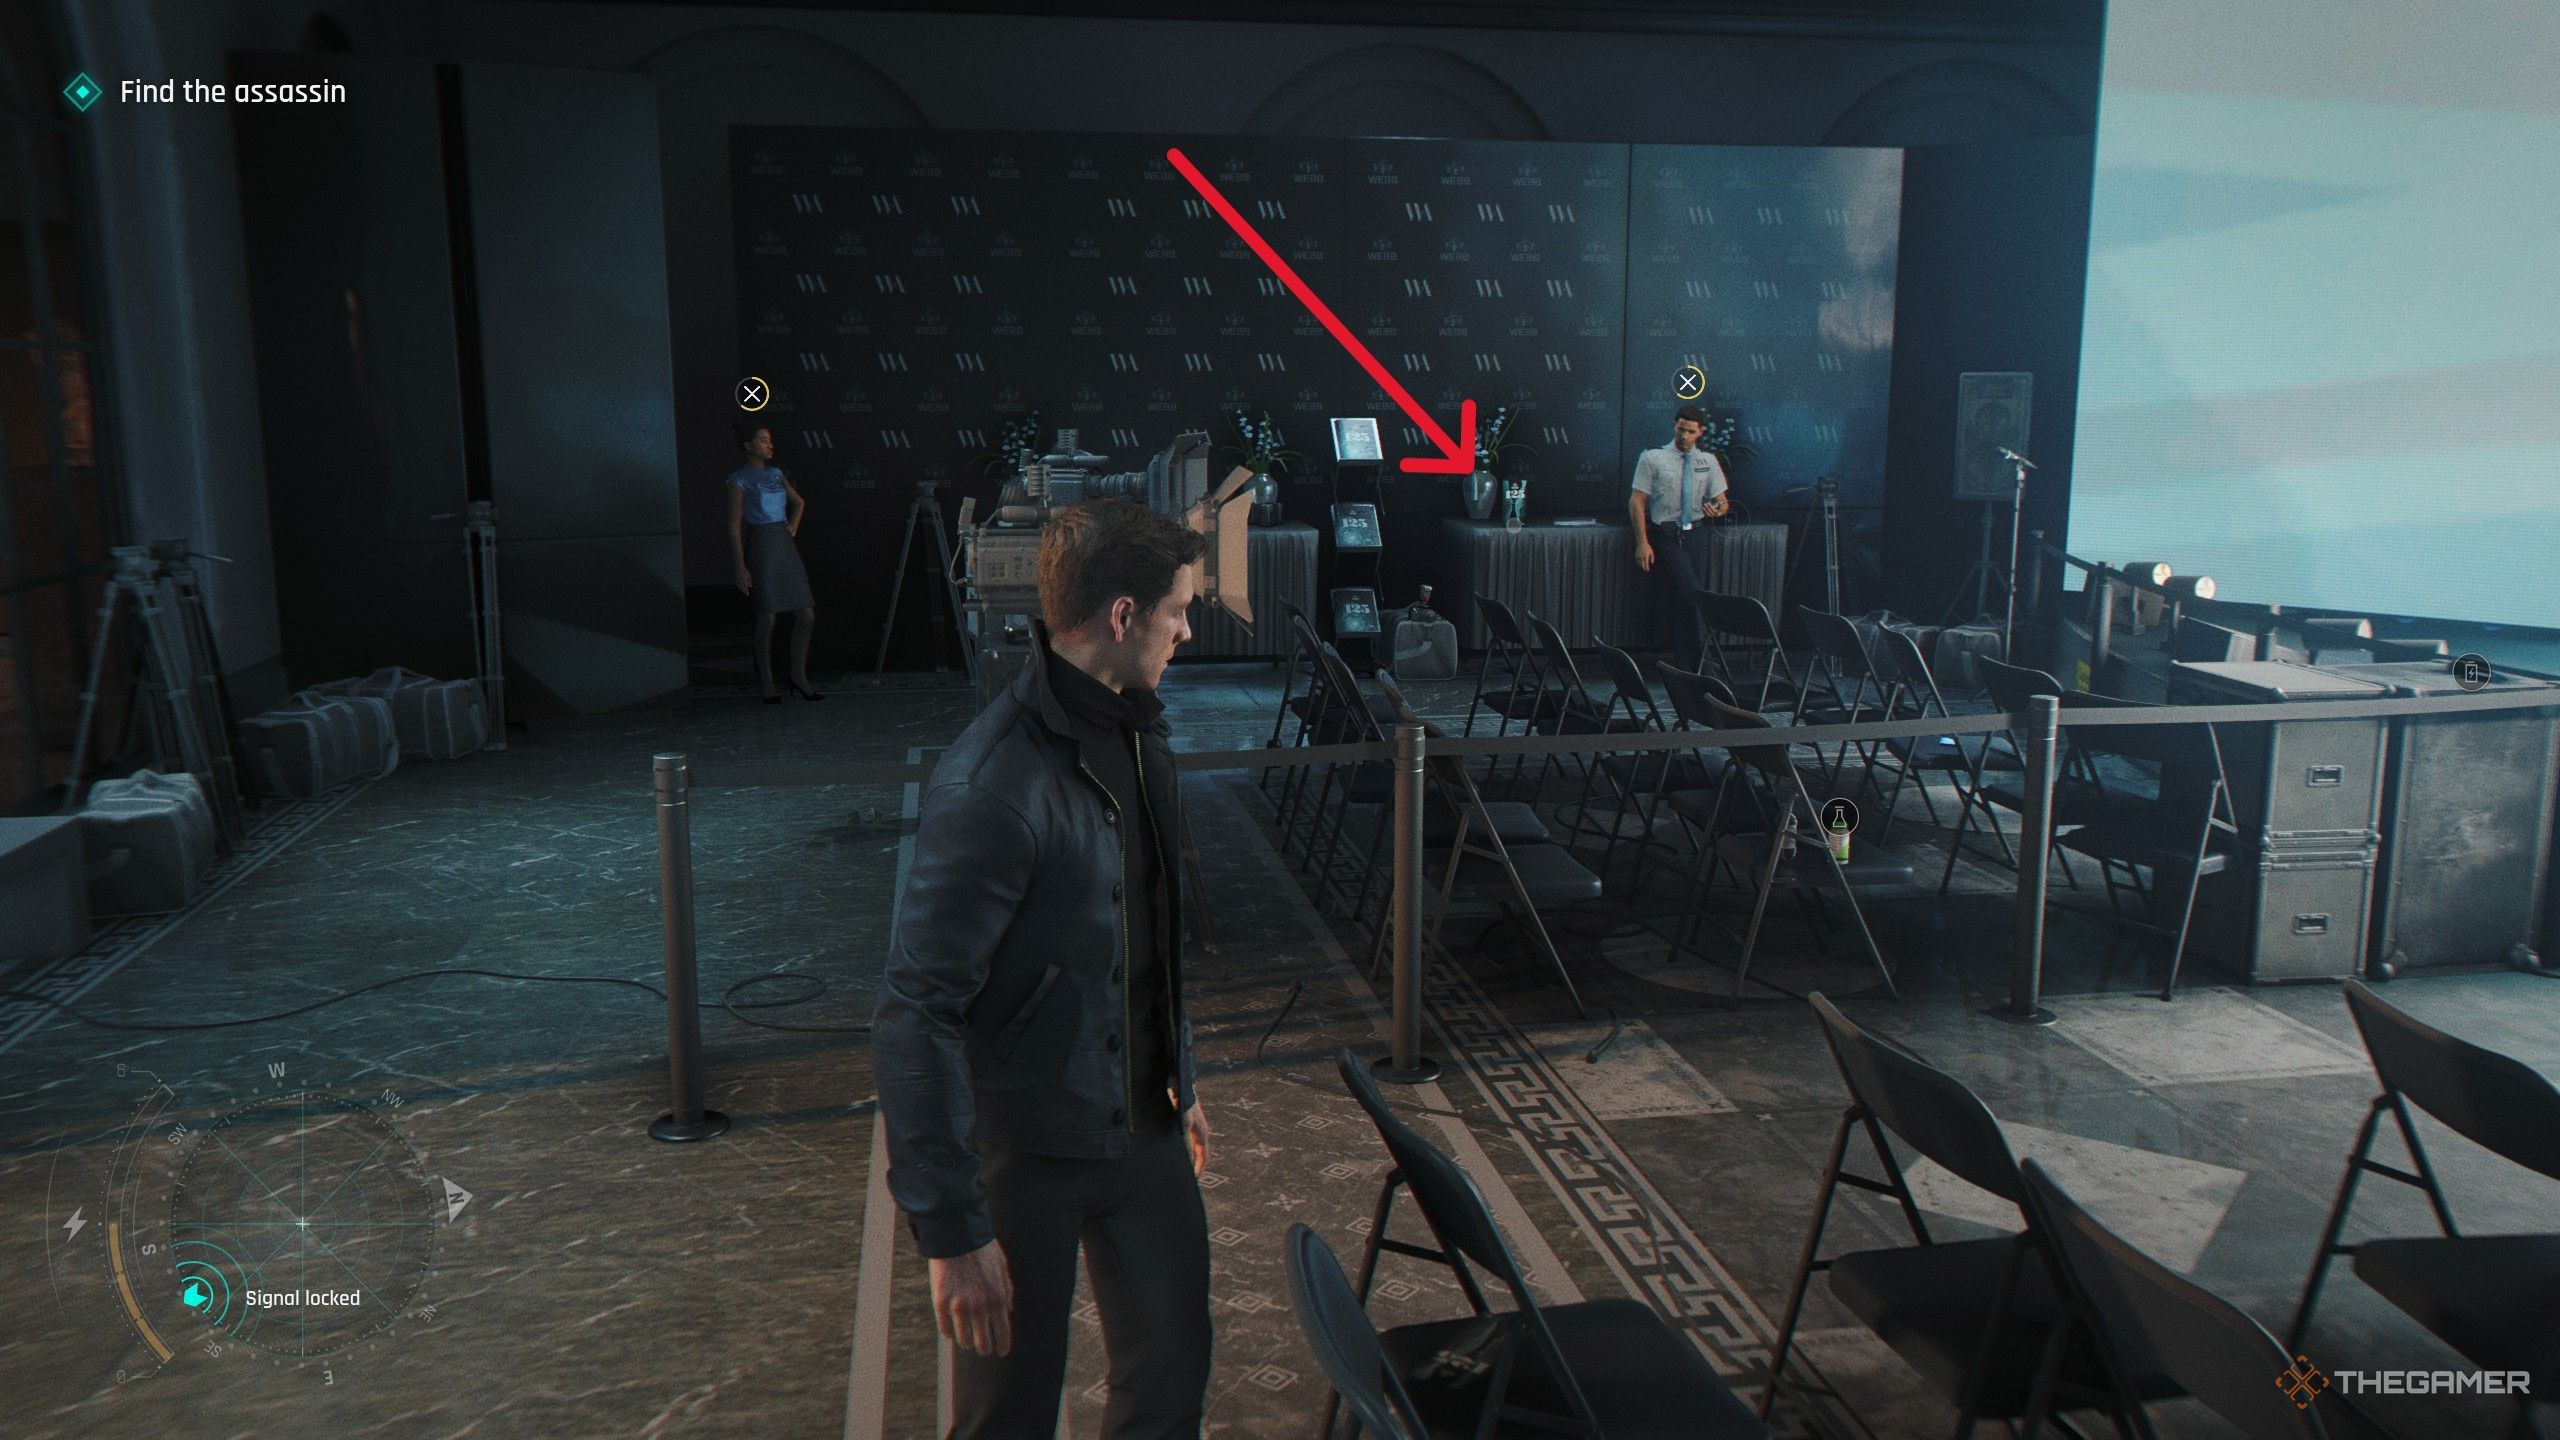
During the infiltration of the gala, after stealing the invite, enter the main room with a large bar. Go left into a room with empty chairs and a stage. Distract the guard at the entrance, then use the Bluff mechanic inside to stealthily grab the Webb Industries flyer from the table.
Image:
Interior of the gala
Uninvited — Stephen Bright
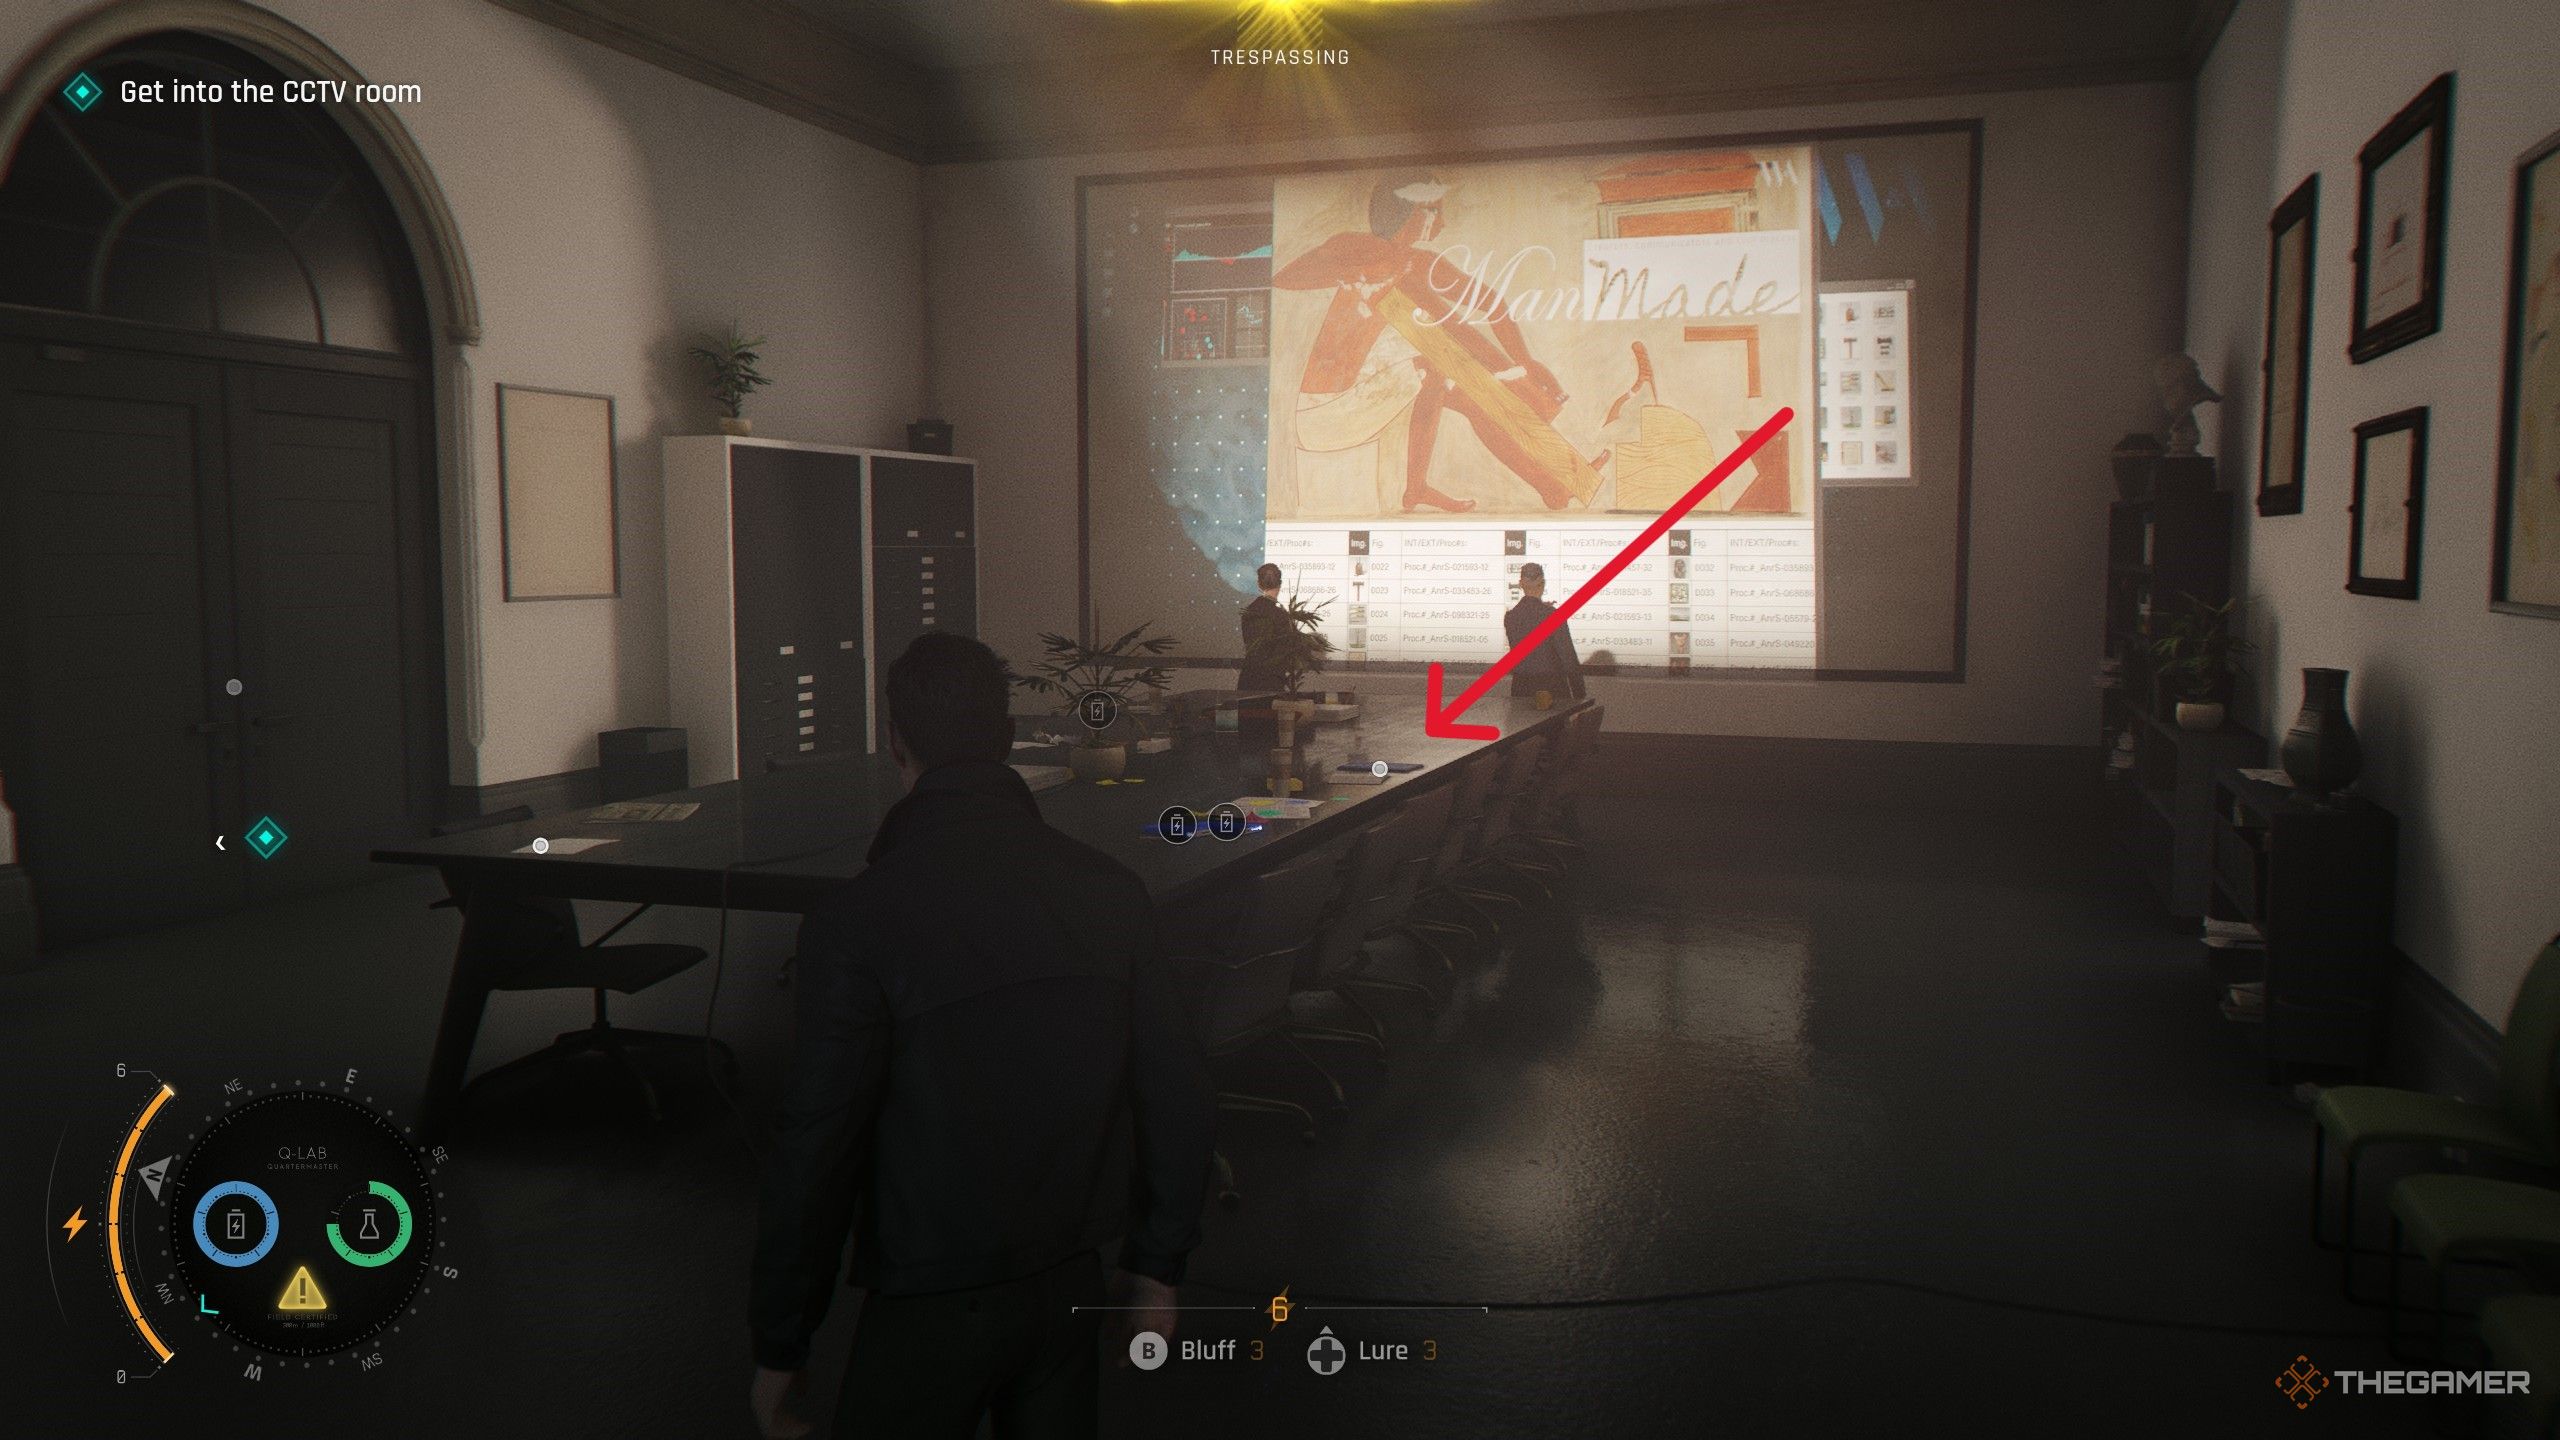
Inside the security room on the second floor, take the second door on the right into a conference room occupied by guards. Bond can convince them he belongs there, after which on the table in the center you’ll find Stephen Bright’s file.
Image:
Security room scene
Going Old School — Q
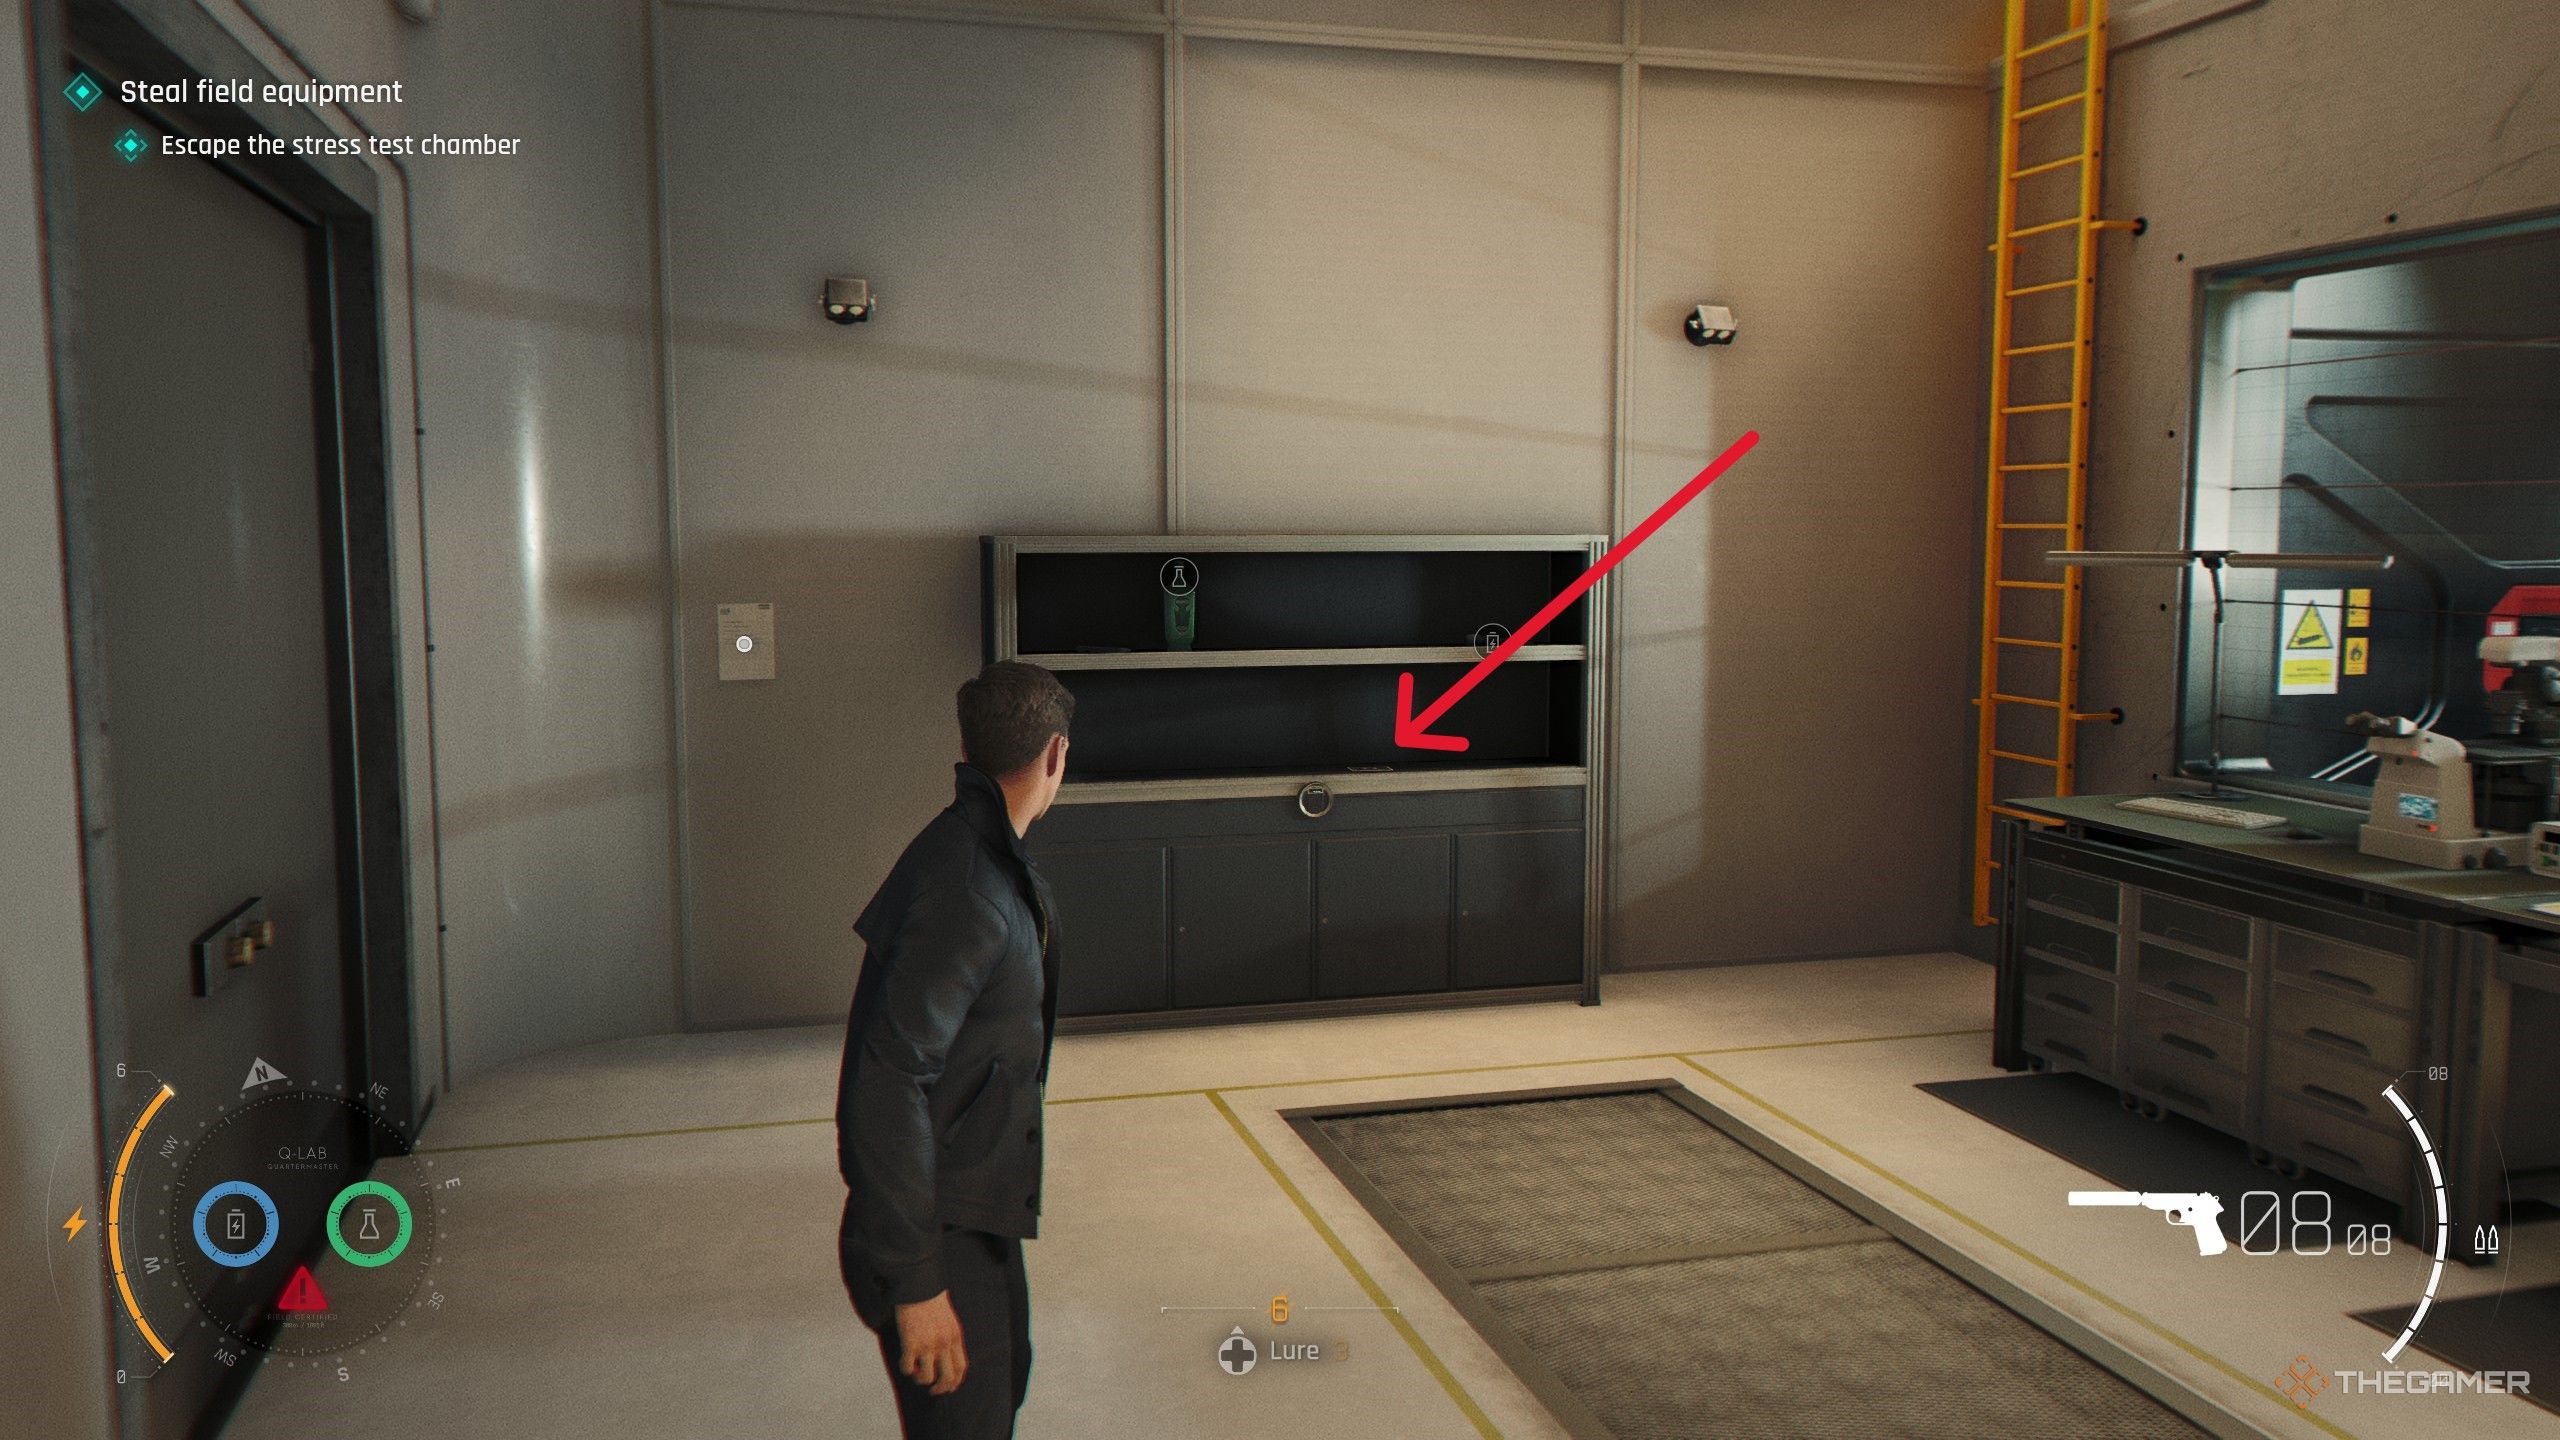
Near the start of “Going Old School,” visit Q-Branch. To the right of the car being repaired, interact with the driving gloves on a workbench. Picking them up will reveal the Q MI6 File.
Image:
Q-Branch workshop
Time to Die — Theresa Lorca
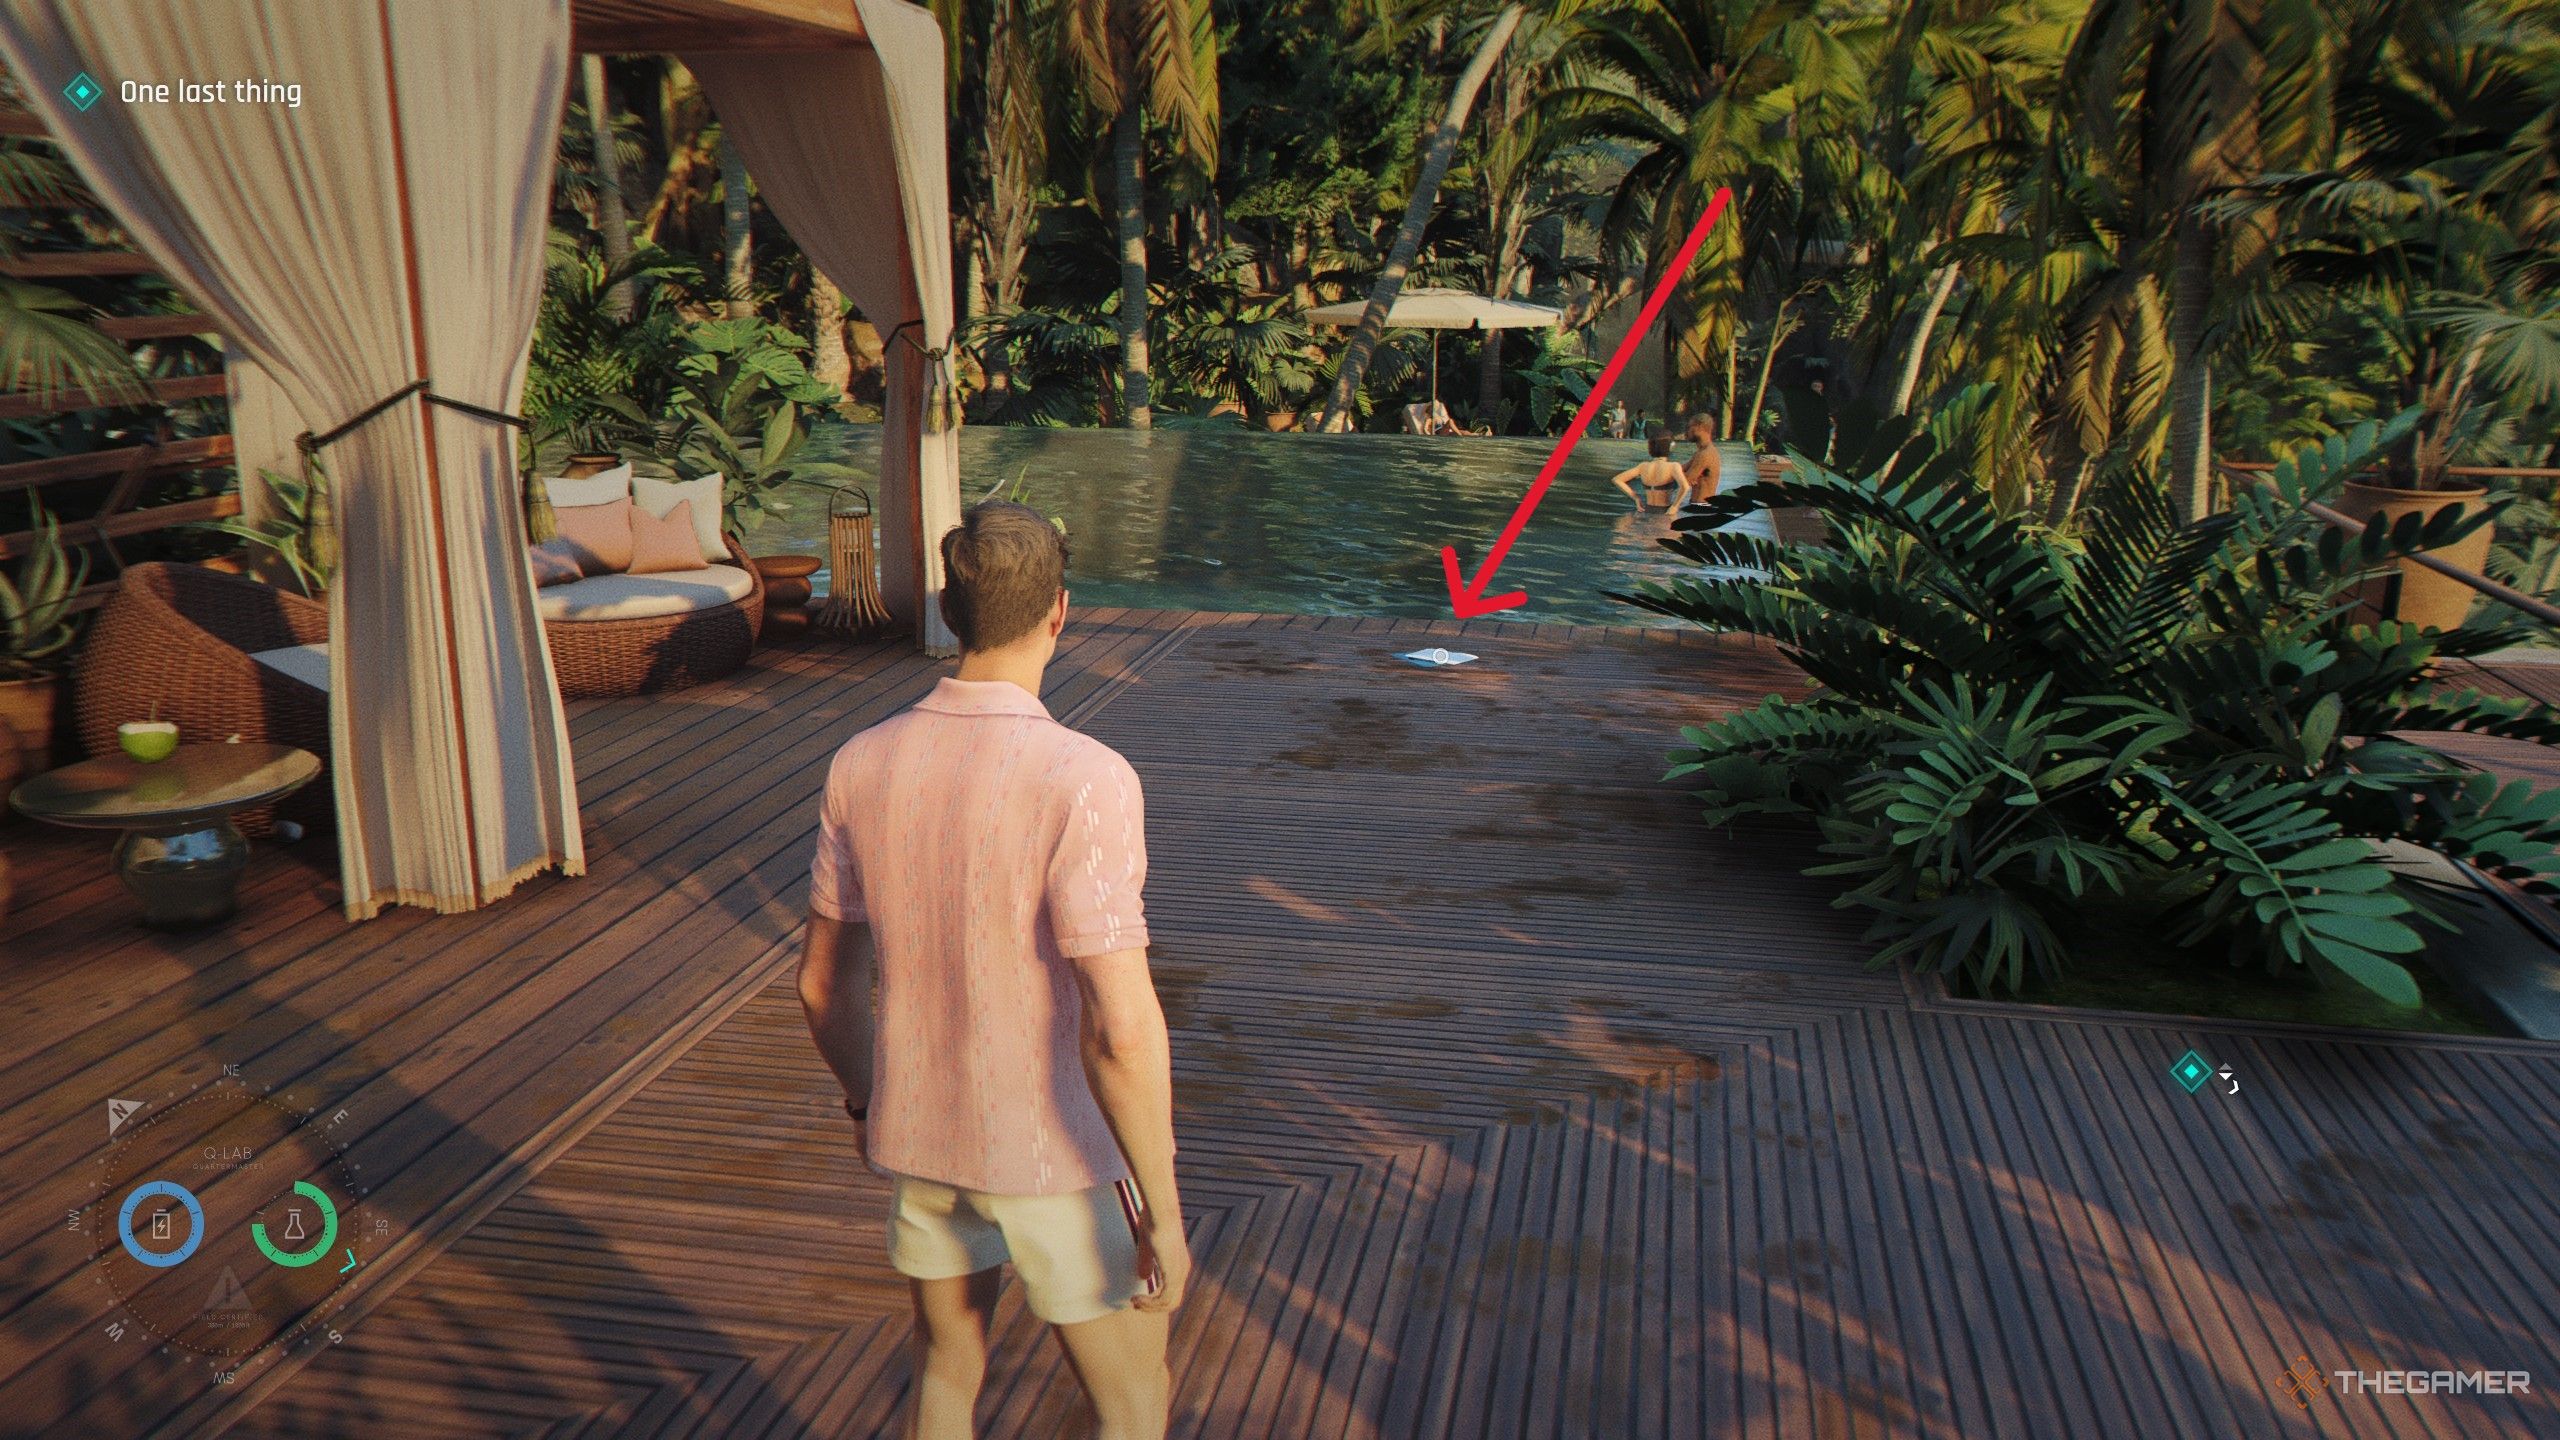
In the “Time to Die” mission, after meeting Lorca to plant a tracker, go to the Serenity Space. The MI6 File is on the ground in front of the loungers, near Lorca herself.
Image:
Scene with Lorca
Time to Die — Caliban
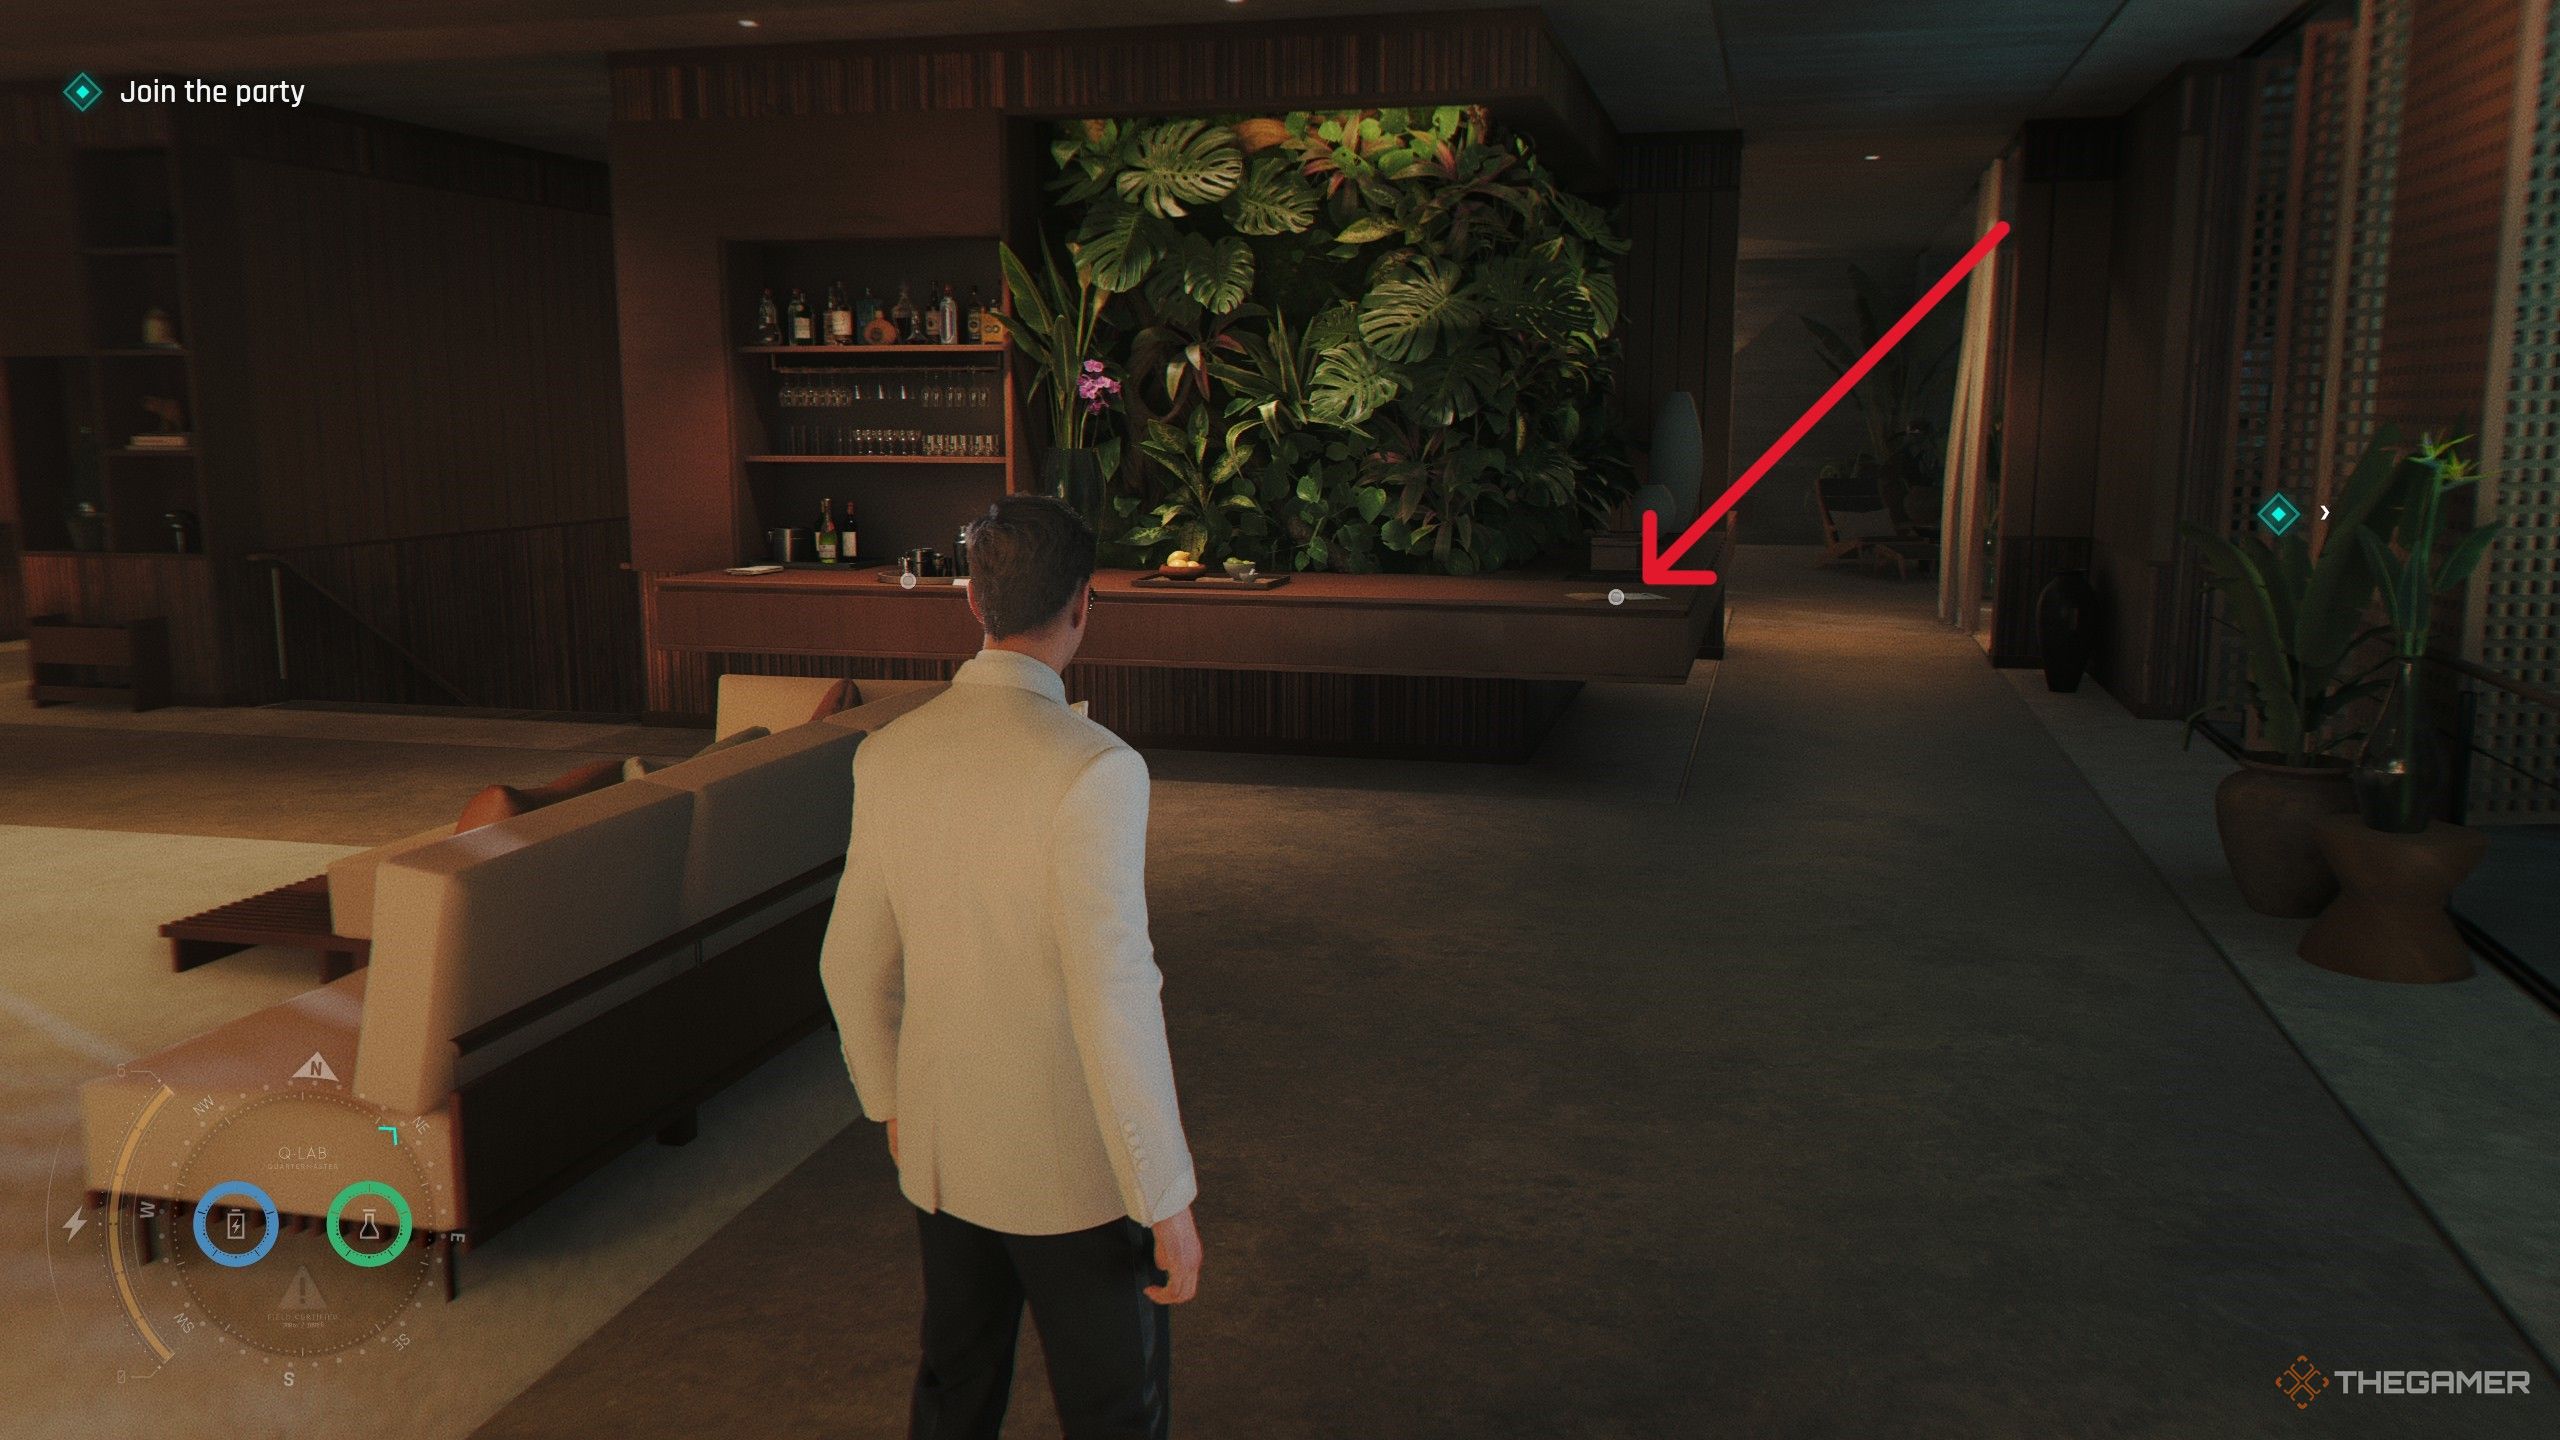
Post-mini-game where Bond helps put on his bowtie, go into the living room and interact with the file sitting on the desk to unlock this intel.
Image:
Living room scene
Wave of the Future — M
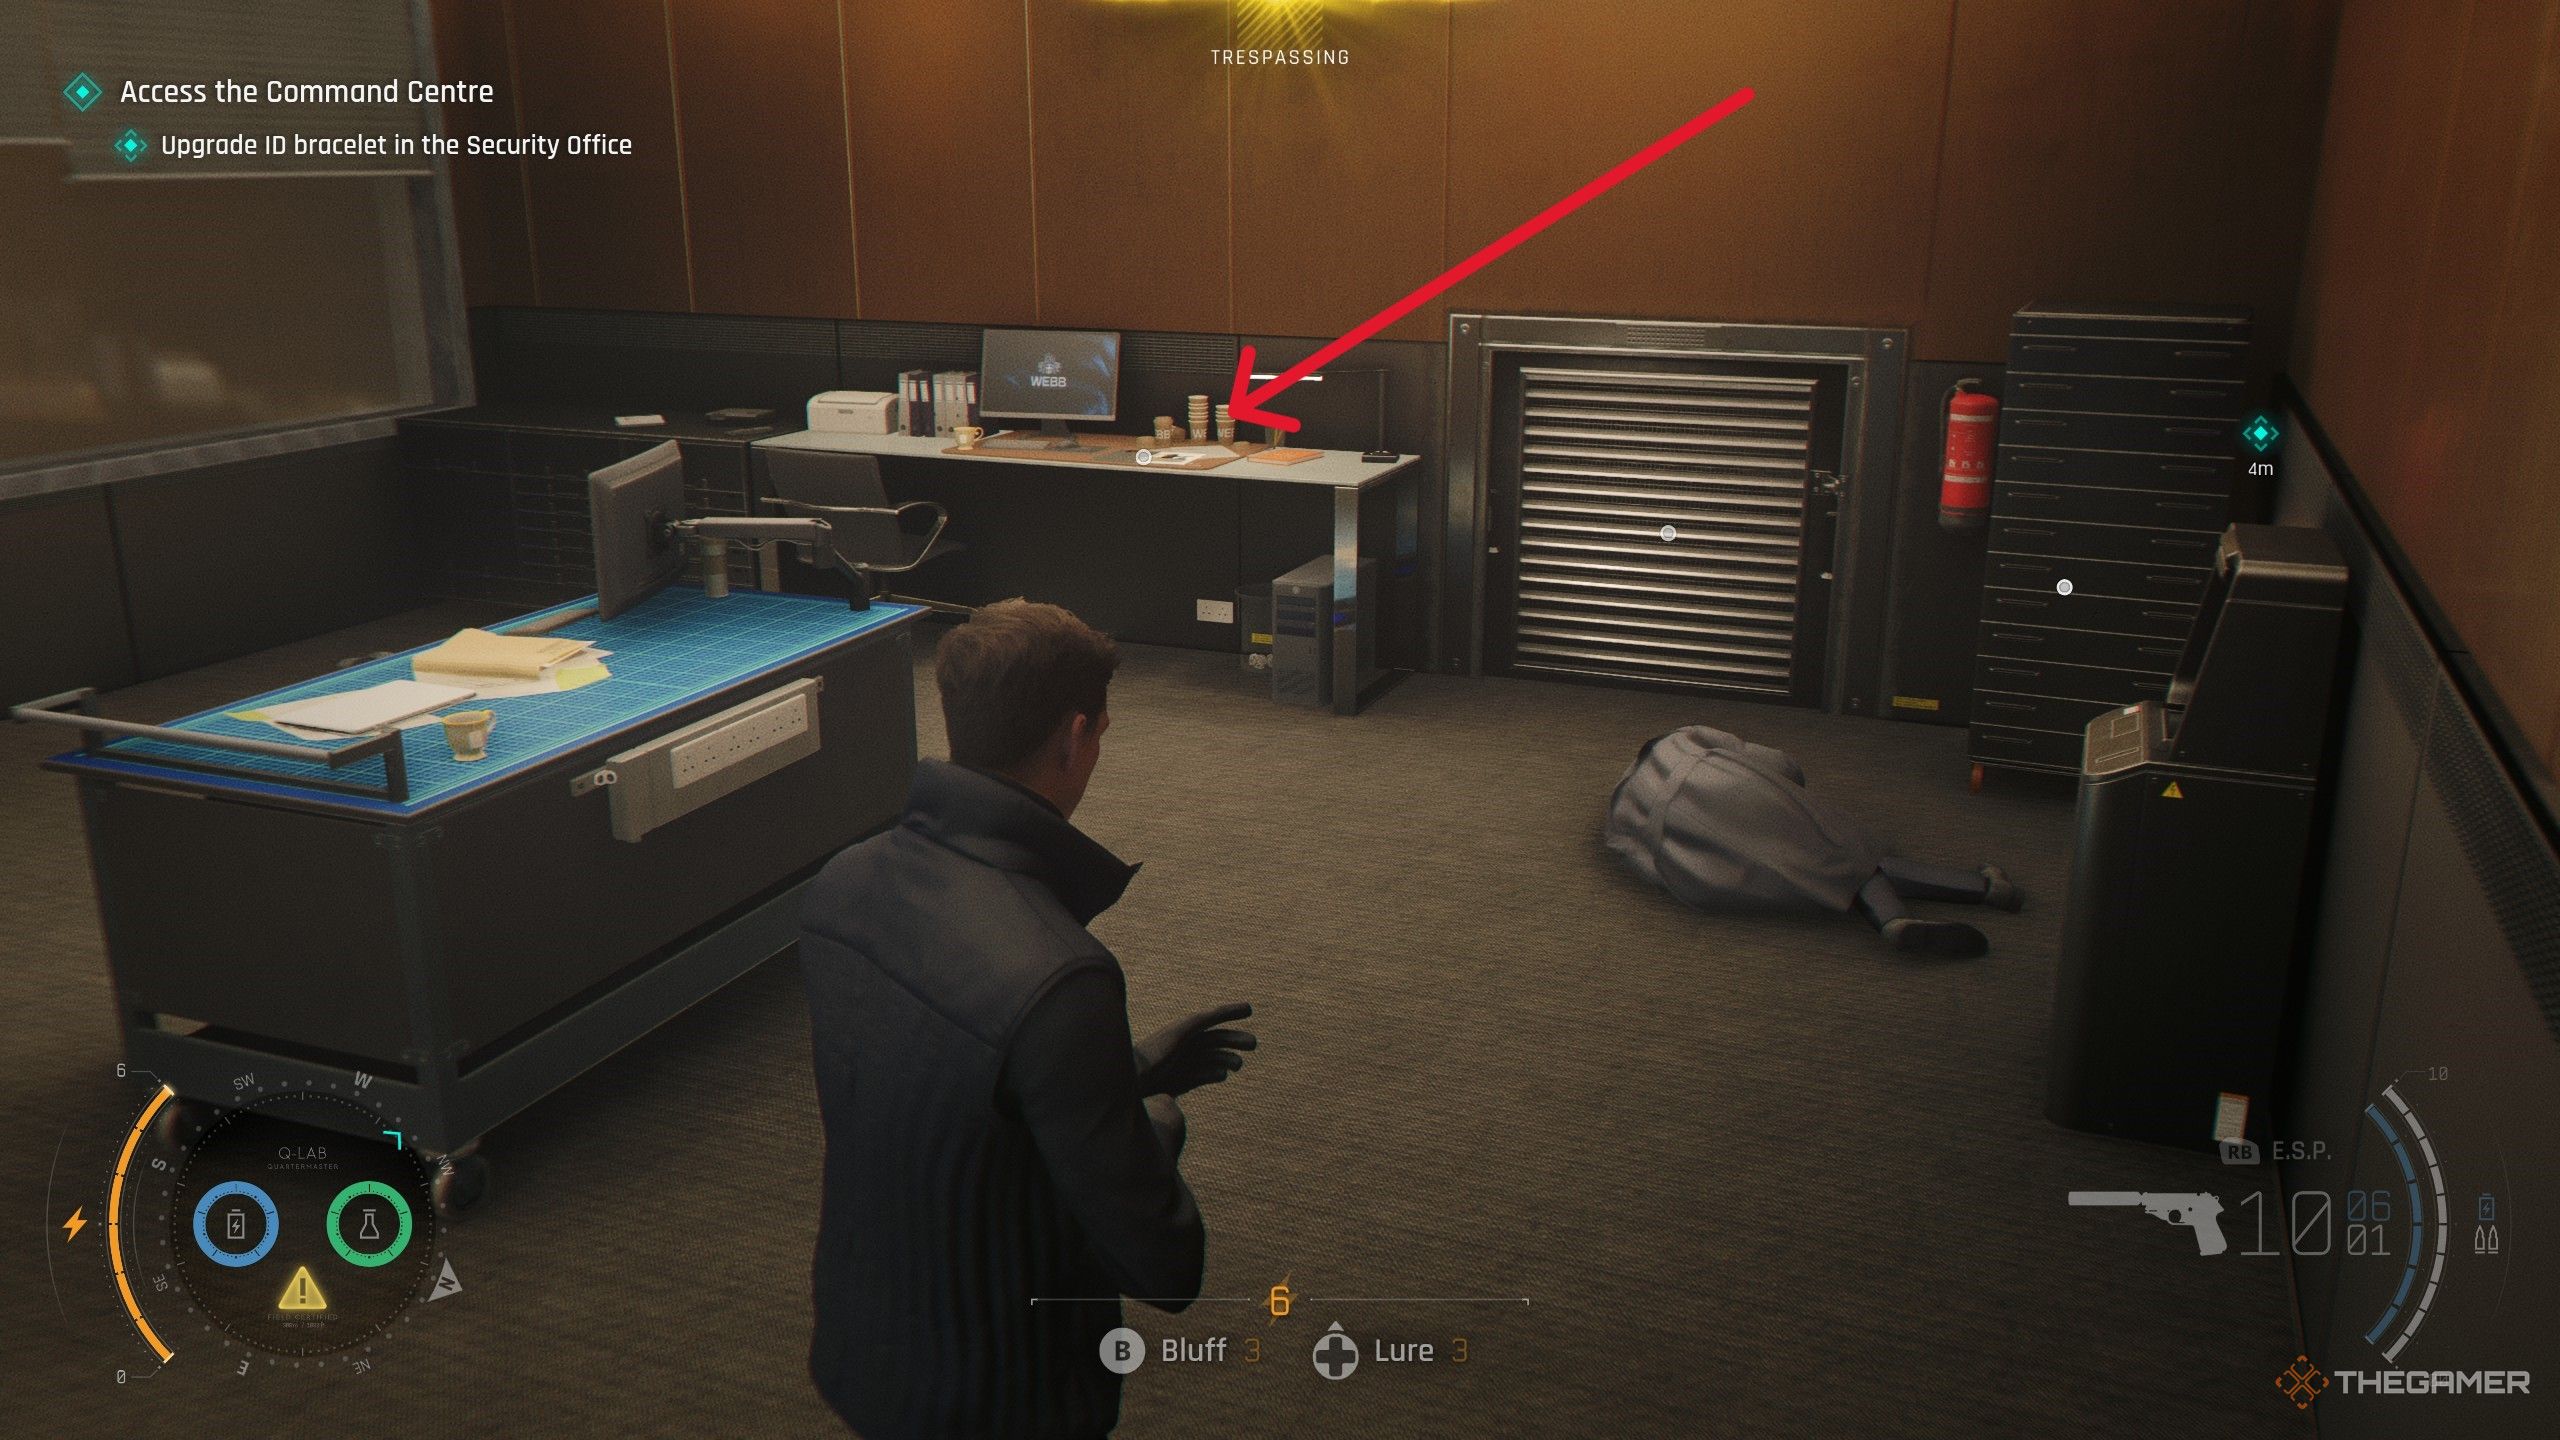
During the “Wave of the Future” mission, when upgrading your ID bracelet, enter the security room to find M’s profile sitting on a desk nearby.
Image:
Security room
Wave of the Future — Sir Nicholas Webb
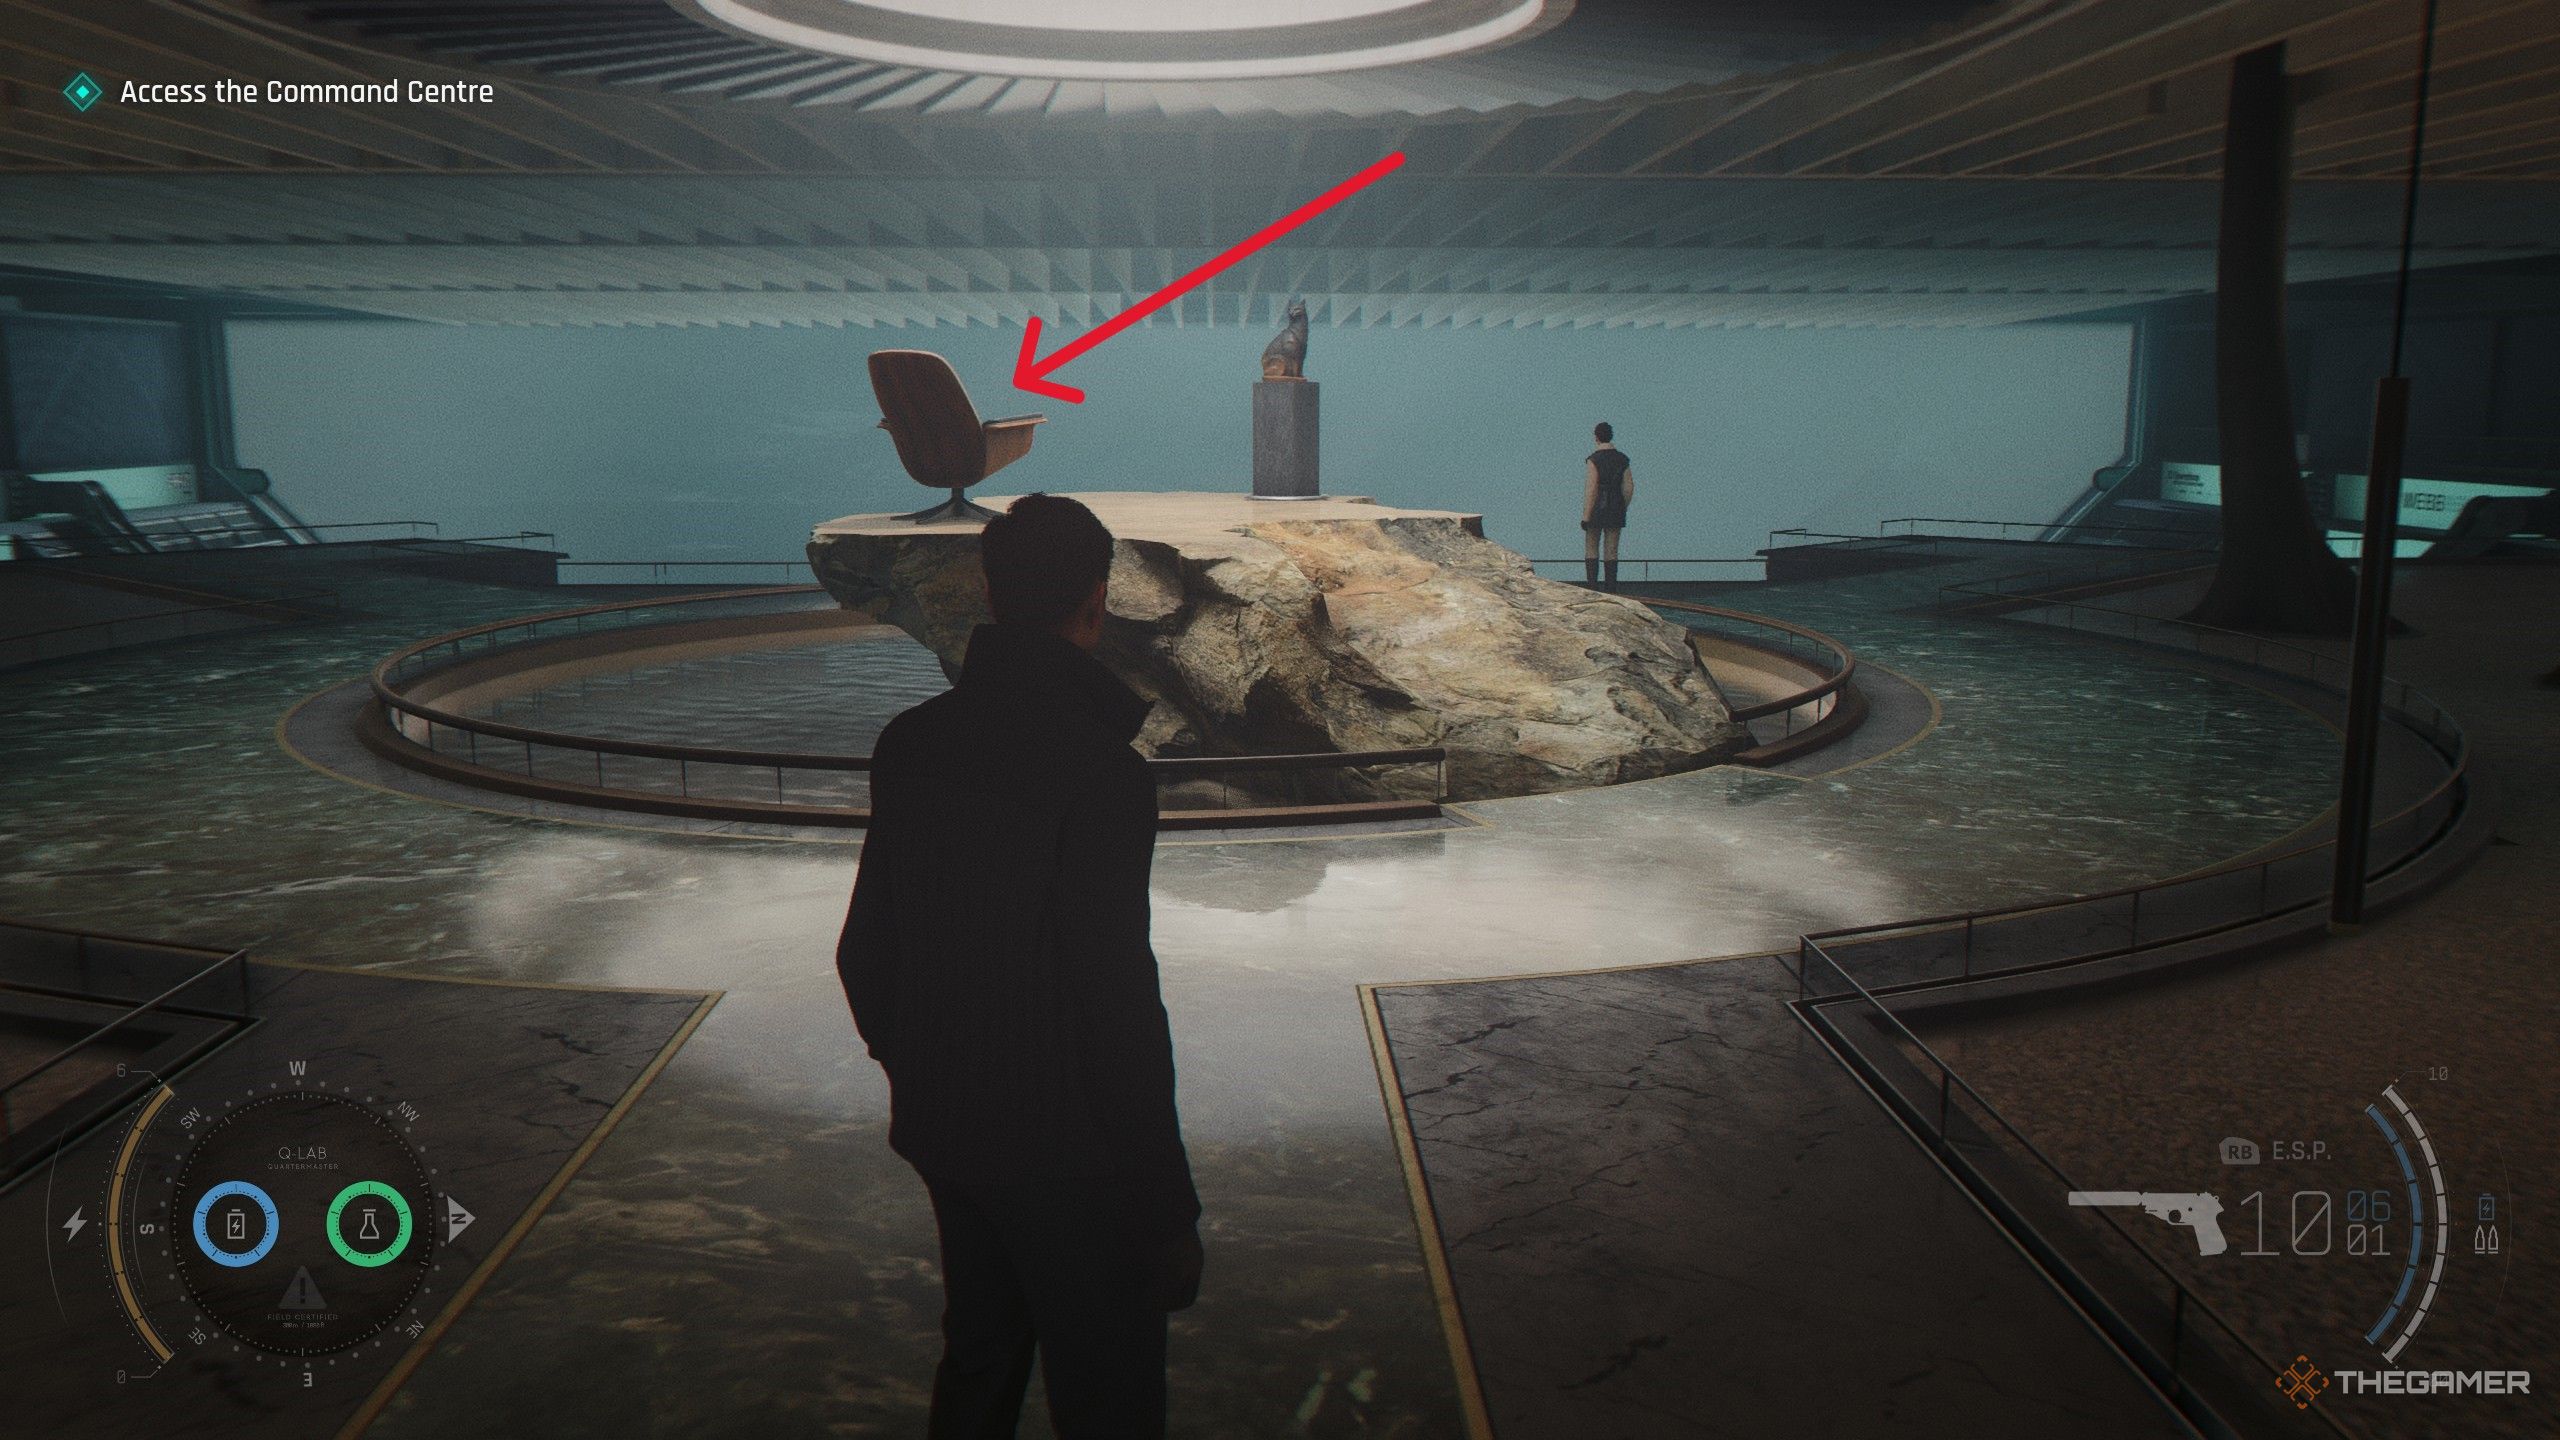
After upgrading your bracelet, follow Isola to an area with a chair and a cat statue. Near the chair, find the profile of Sir Nicholas Webb on a nearby rock.
Image:
Nearby area
Wave of the Future — Eve Moneypenny
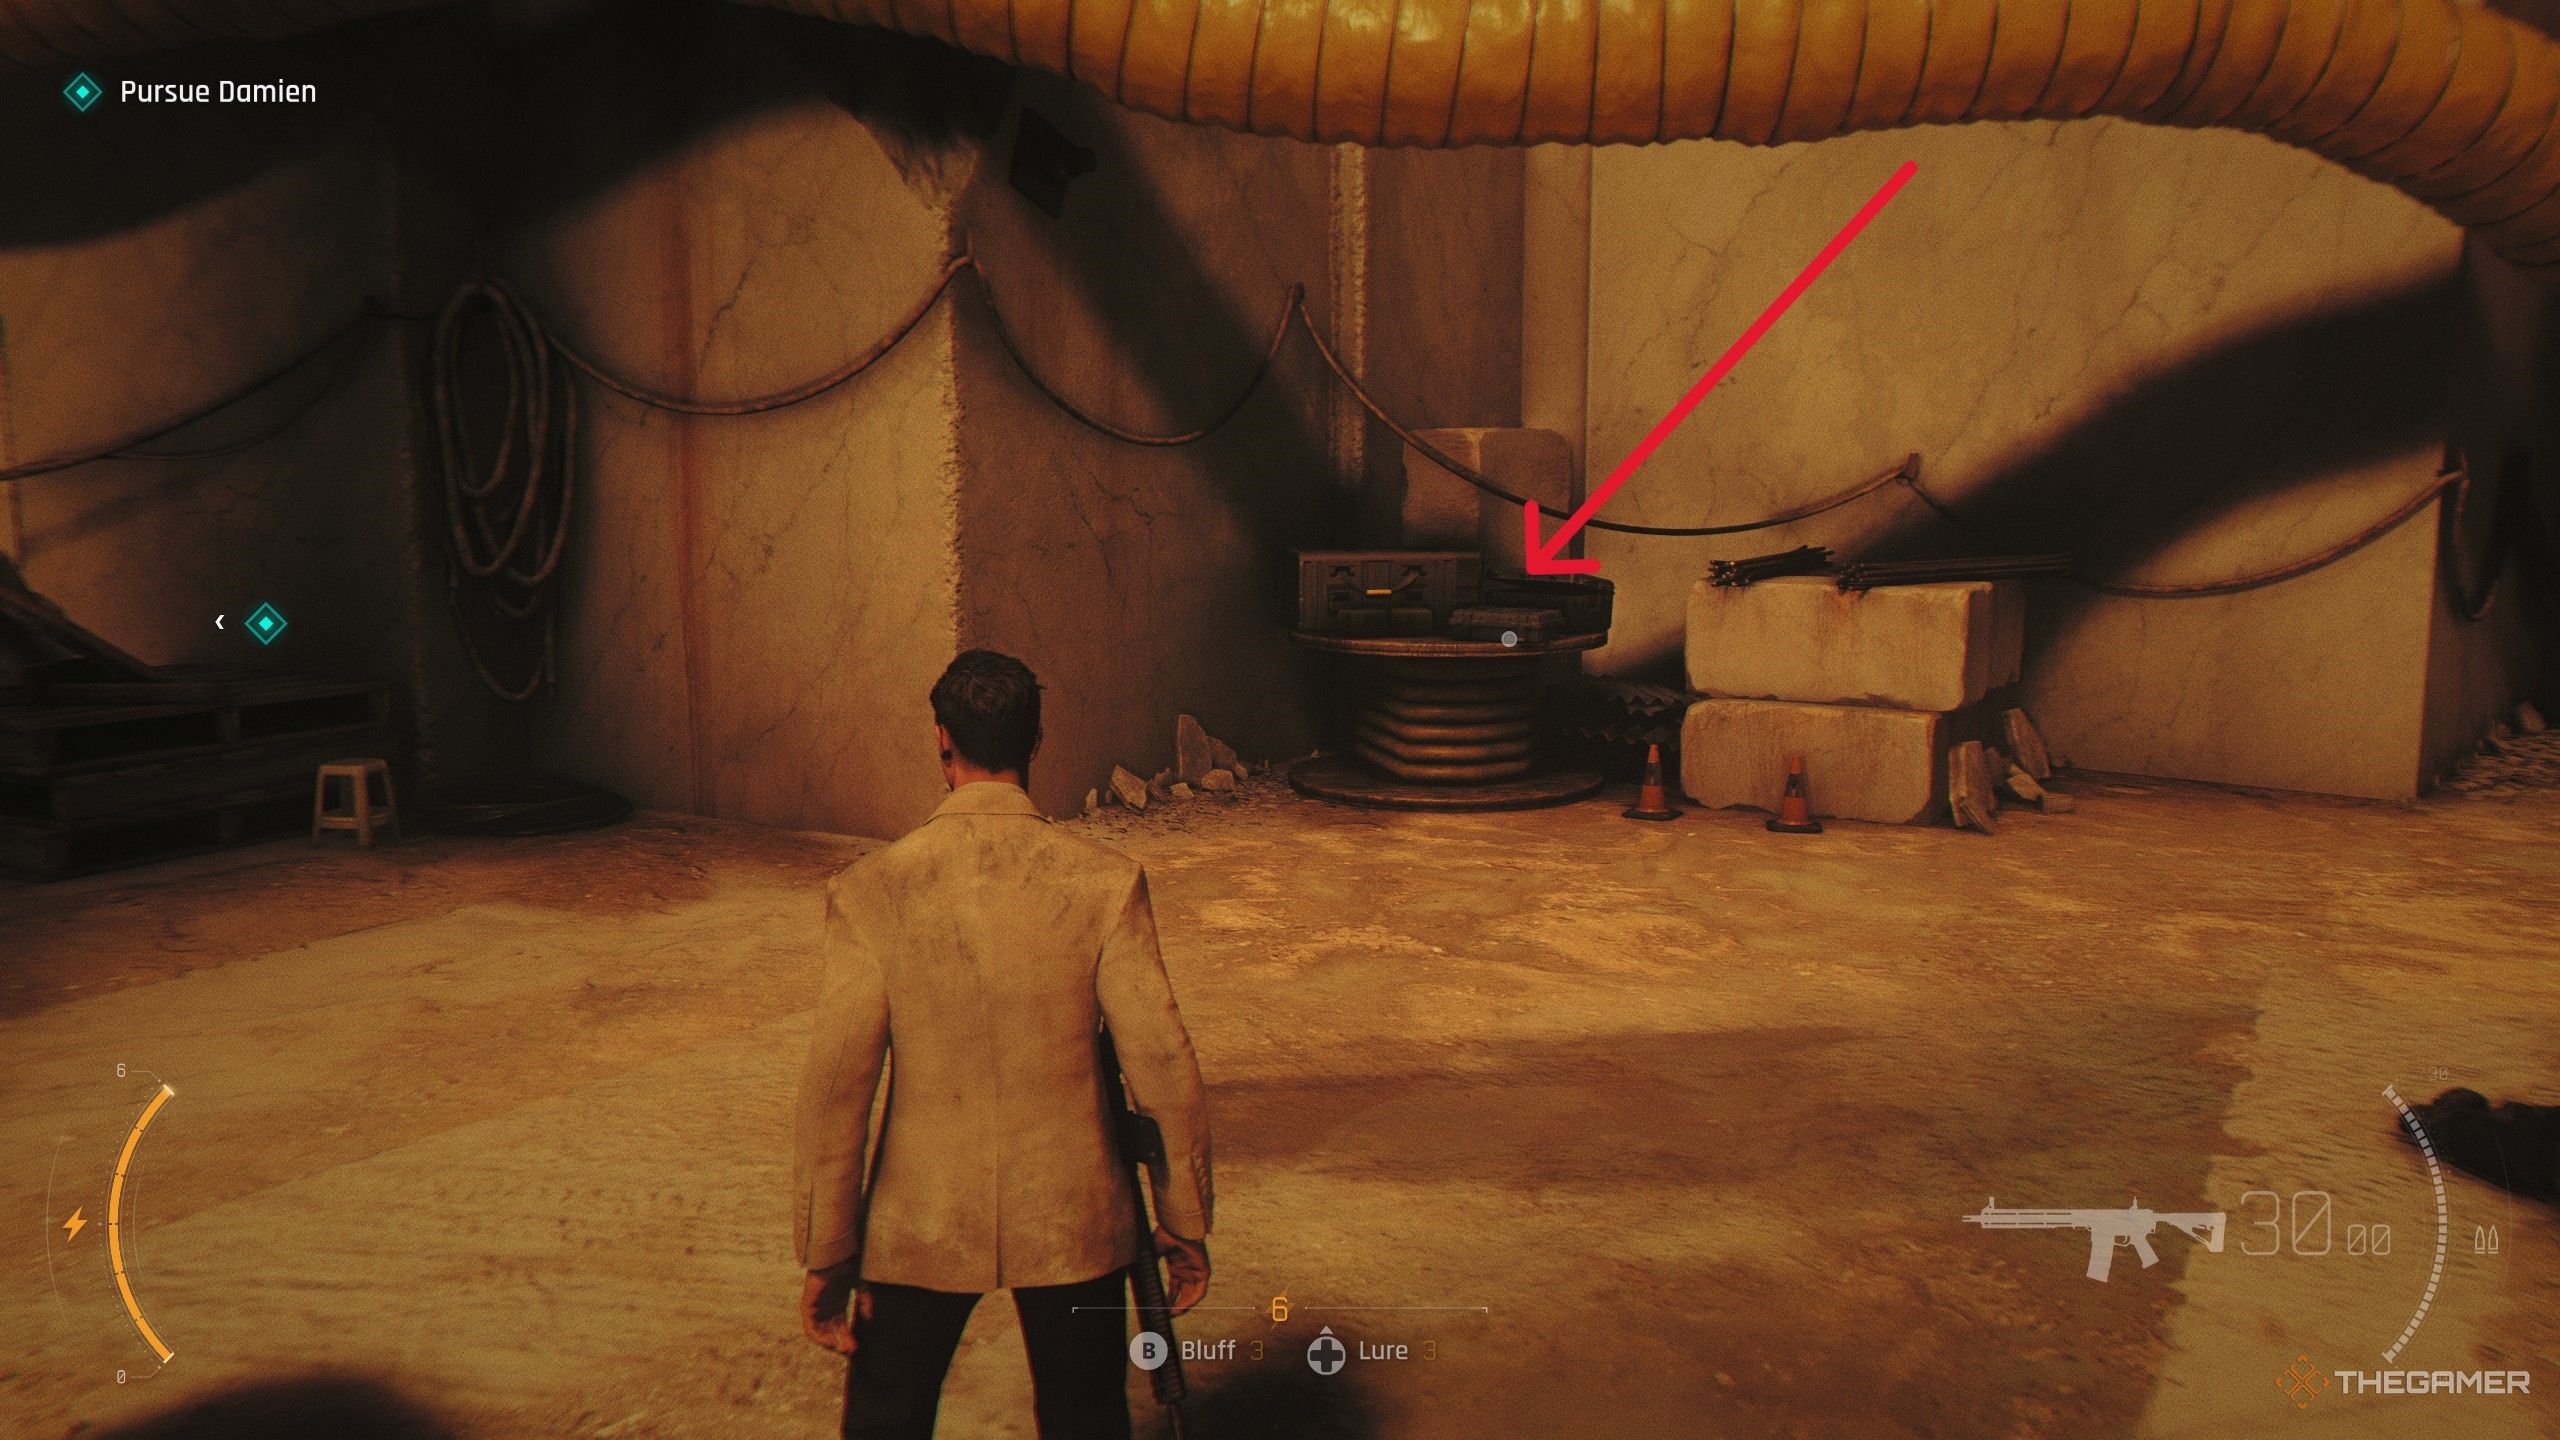
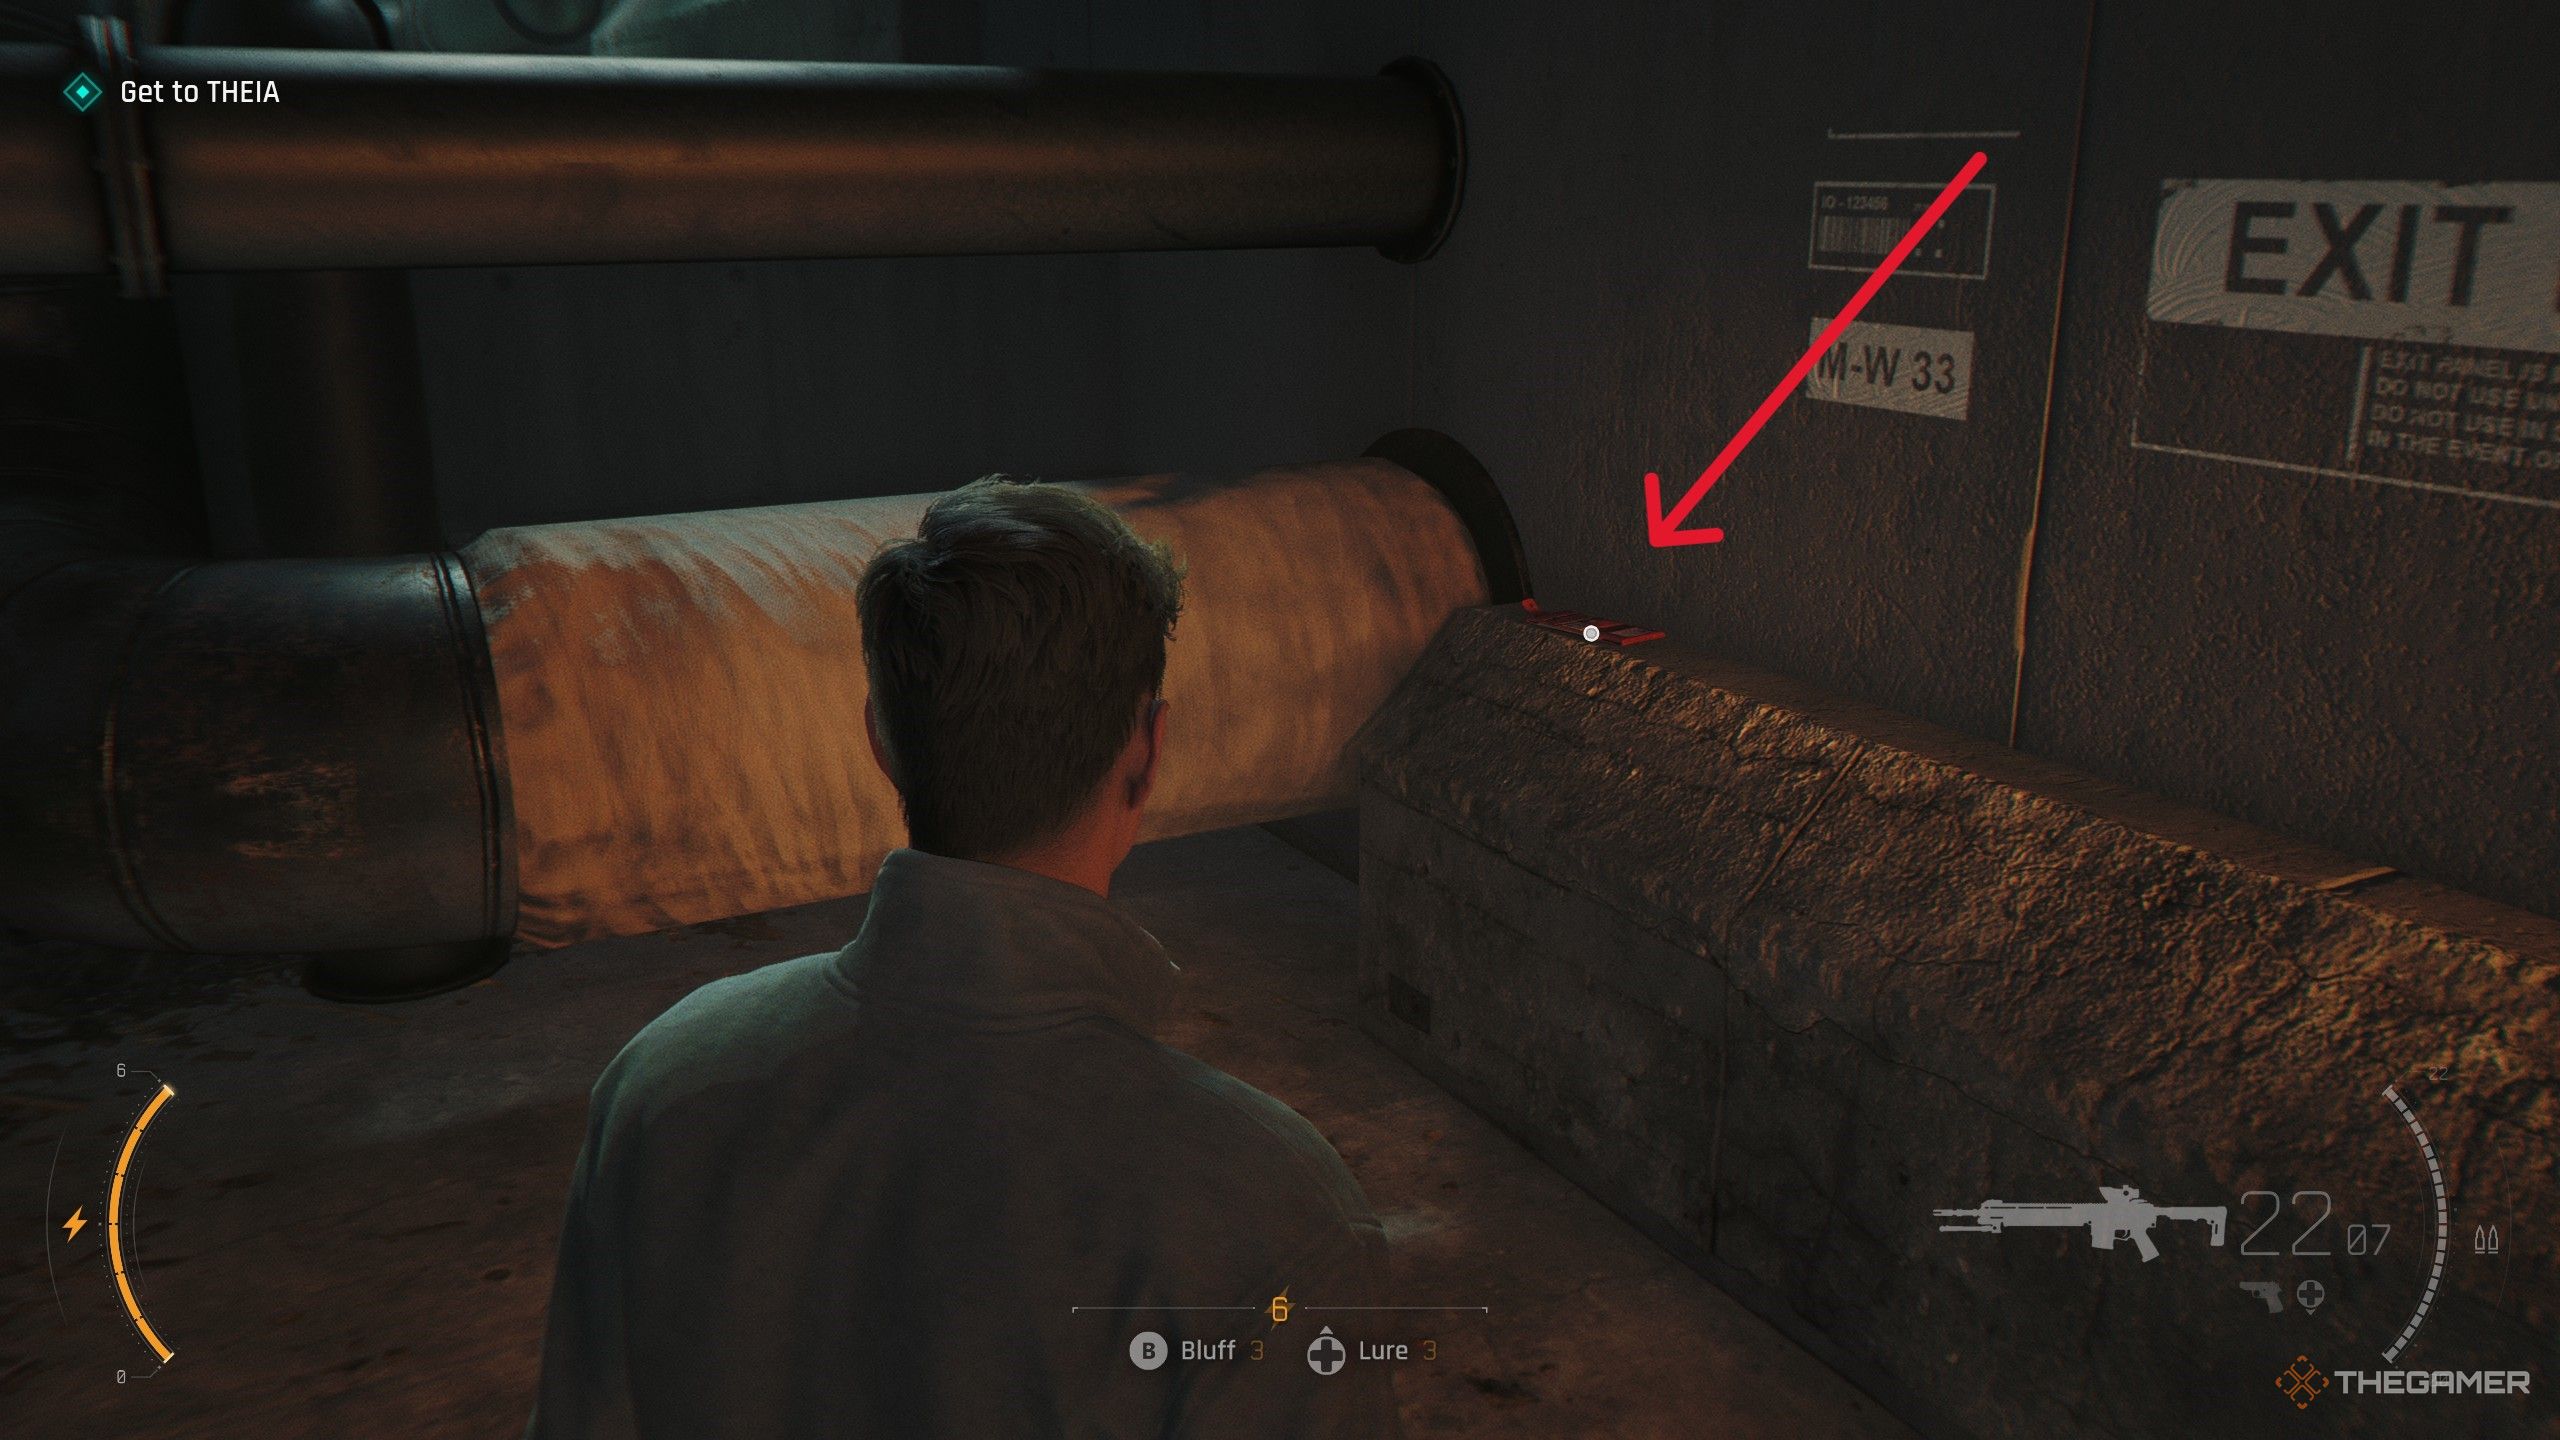
During the “For England” mission, after fighting outside Moneypenny’s office, enter the tunnels. In the maintenance area, her MI6 File is on the ground in the section with the pipes.
Image:
Maintenance tunnel
Wave of the Future — Riptide
Once reunited with Greenway after the sniper section, before moving on, find a black case on a bundle of cables. Interact with it to obtain the Riptide file.
Image:
Scene with cables
Wave of the Future — Rhys Beckett
After speaking with Q and entering the furnace room with the armored vehicle, look on the left wall for a locked cabinet. Use the four-digit code 4397, corresponding to the license plate number, then open it and interact with the photo inside.
Image:
Furnace room detail
Wave of the Future — Sir Nicholas Webb (again)
Right after upgrading your ID bracelet, follow Isola to a spot with a chair and statue. Nearby, find the profile of Sir Nicholas Webb sitting on a rock.
Image:
Location of Webb’s profile
Wave of the Future — Eve Moneypenny (again)
In the “For England” mission, after fighting outside her office, proceed into the maintenance tunnels. Her MI6 File is in a room with pipes, on the ground.
Image:
Scene with pipes
Wave of the Future — Caliban
Next, in the same mission, after upgrading your ID bracelet, go into the security room. Look on a desk near the vent for M’s profile.
Image:
Security room scene
Wave of the Future — Time to Die — Eve Moneypenny
During the final mission, once in her office, interact with her wallet located near some pipes to uncover her MI6 File.
Image:
Her wallet scene
Always interact with anything that looks unusual or out of place in the environment to ensure you collect all MI6 files. These files provide a deeper look into the characters and story, enriching your gaming experience.
 ChatGPT
 Perplexity
 Gemini AI
 Grok AI