
Select Language:
Generally speaking, Roku’s remotes are well-liked for their user-friendly design, especially those equipped with voice control features.
However, there’s a notable limitation—specifically, the four buttons at the bottom adorned with logos from popular streaming platforms.
Understanding Roku’s ‘Quick Access’ Buttons
These “quick access” buttons allow users to jump straight into apps like Netflix, Hulu, Disney+, and Amazon Prime Video with a single press—quite handy for those who subscribe to these platforms.
Nonetheless, many people don’t subscribe to all four streaming services, and those who do may not even use the ones featured on these buttons (it’s worth noting that streaming services pay Roku for placement).
So, let’s get to the point: you cannot reprogram the quick access buttons on a Roku remote. You can disable them if you’re willing to use a screwdriver and take the remote apart, but altering their function isn’t possible otherwise.
Introducing Roku’s ‘Personal Shortcut’ Buttons
On the brighter side, Roku provides some remotes with “personal” shortcut buttons that you can customize.
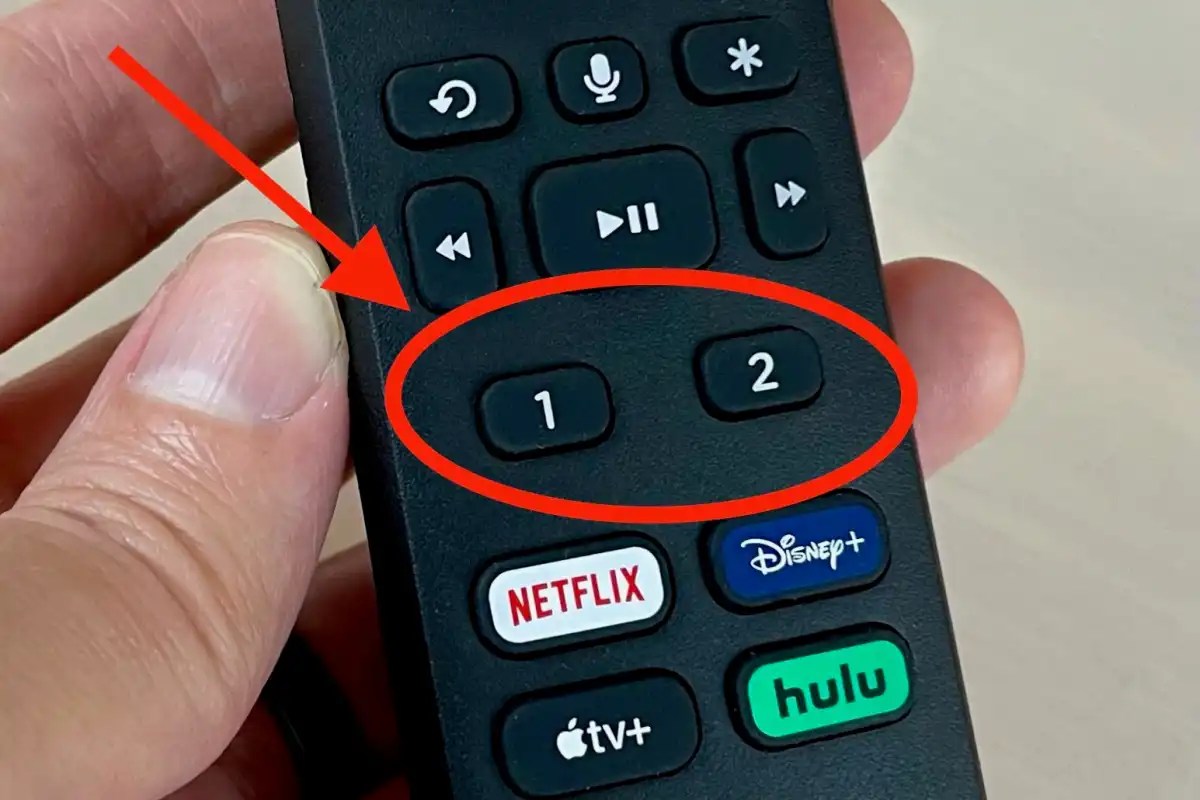
The original Roku Voice Remote Pro includes two personal shortcut buttons, marked “1” and “2,” positioned just above the branded keys. These programmable buttons let you store any voice command—like “Open Max”—for easy access later with a single press.
In contrast, the newer second-generation Voice Remote Pro features one personal shortcut button but offers dual personalization options. While it requires an extra step compared to its predecessor, the functionality remains similar.
Which Roku Devices Feature Personal Shortcut Buttons?
The second-generation Voice Remote Pro—which includes one personal shortcut button—comes packaged with the latest Roku Ultra player launched in 2024, boasting enhancements like backlit buttons. You can also purchase this updated remote separately for $30.
The original Roku Voice Remote Pro lacks the backlight feature and has a slightly lower battery capacity but does have two personal shortcut buttons, making it more convenient by saving you a press. You can purchase this older model directly from Roku for $30.
There’s also the Enhanced Voice Remote, which, while sacrificing some Pro features (like the rechargeable battery and headphone jack), retains two customizable shortcut buttons.
The Enhanced Voice Remote was bundled with older Roku devices such as the 2022 Roku Ultra and the now-discontinued Roku Streambar Pro, and is not available for individual purchase.
Lastly, there’s the legacy Roku Touch tabletop remote, which unfortunately is no longer sold separately.
So, are you ready to set up your Roku remote’s personal shortcuts? There are two straightforward methods to do so.
Method 1: Create a Shortcut Using a Voice Command
The first way to program a personal shortcut on your Roku remote is simply to use a voice command.
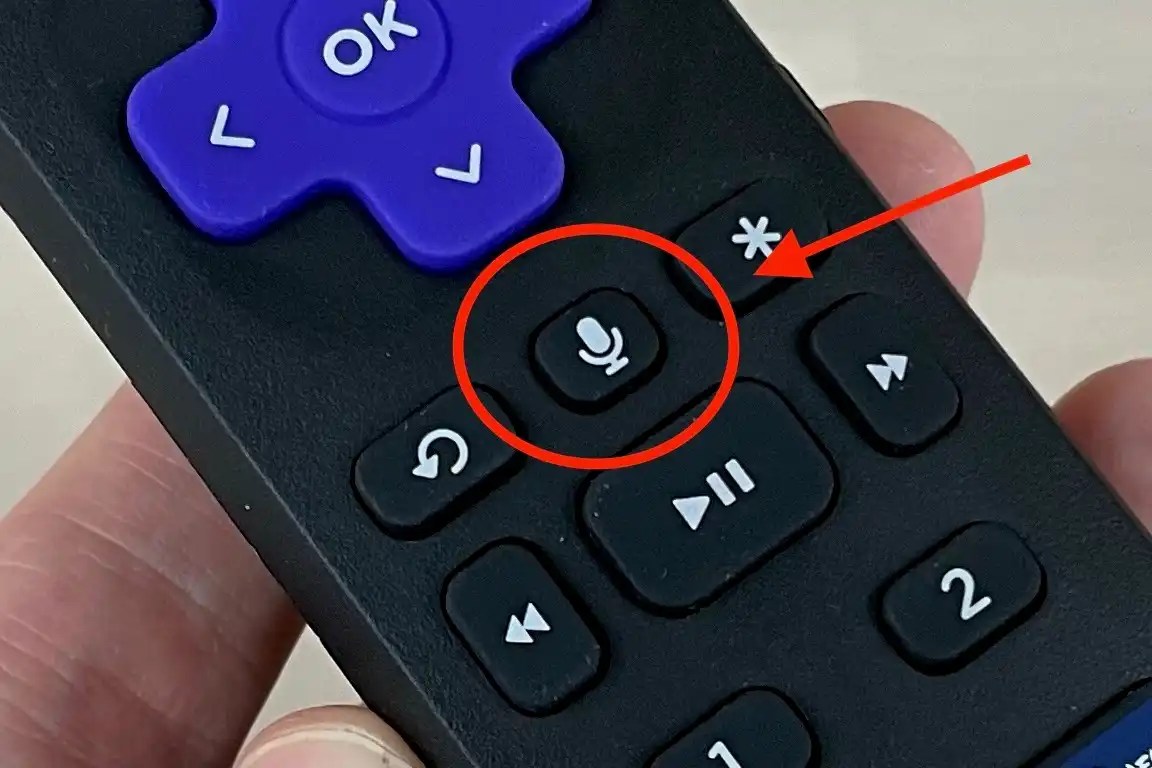
Press the remote’s microphone button and say a command, whether it’s “open Pandora,” “launch Paramount+,” or “find comedies.” If you’re reading this, you likely want to set a shortcut for a specific streaming app.
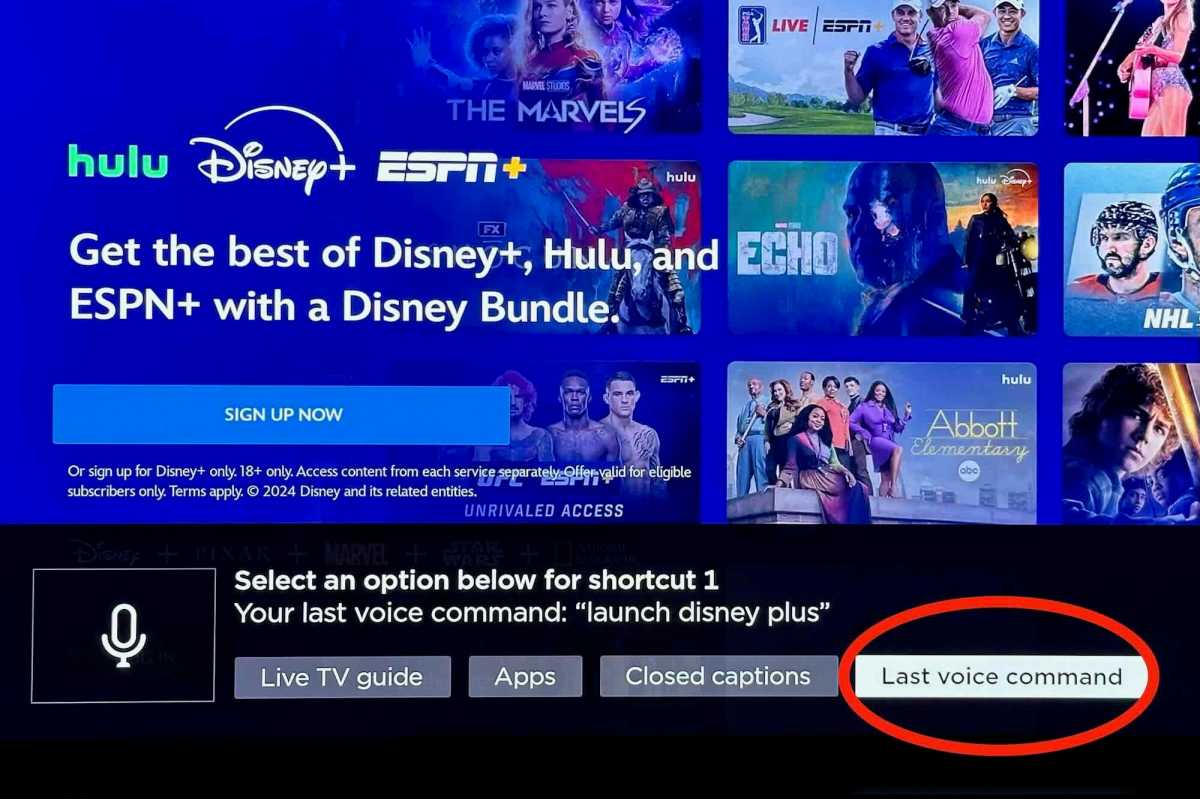
After your Roku player processes the command, press and hold the personal shortcut button you wish to assign. A screen overlay will prompt “Select an option below for shortcut 1,” assuming you pressed the “1” button on the original Voice Remote Pro, or selected the first personal shortcut slot on the second-gen version.
Then, using the remote’s arrow buttons, navigate to the right and select Last voice command. Soon after, a confirmation message will pop up.
Method 2: Assign Through a Shortcut Button
The second method involves starting with the shortcut button directly.
By pressing and holding a shortcut button, an overlay will emerge at the bottom of the screen showcasing various options, which may include Channel (for launching a streaming service like Netflix or Apple TV+), The Roku Channel, the Live TV Guide, sleep timer, or closed captions.

Select your desired option to be assigned to the personal shortcut you held down. A confirmation overlay will appear for you to review your selection. If everything looks good, wait for the countdown to conclude, or press the Back button if you’d like to make changes.

If you ever wish to reprogram an existing personal shortcut, just follow the same steps outlined above.