Select Language:
Legendary drops are much less common in Borderlands 4, so during the early game, you’ll be exploring lots of purple fields. However, some bosses have a higher chance of dropping special, unique loot. One such boss is the Callous Harbinger of Annihilating Death.
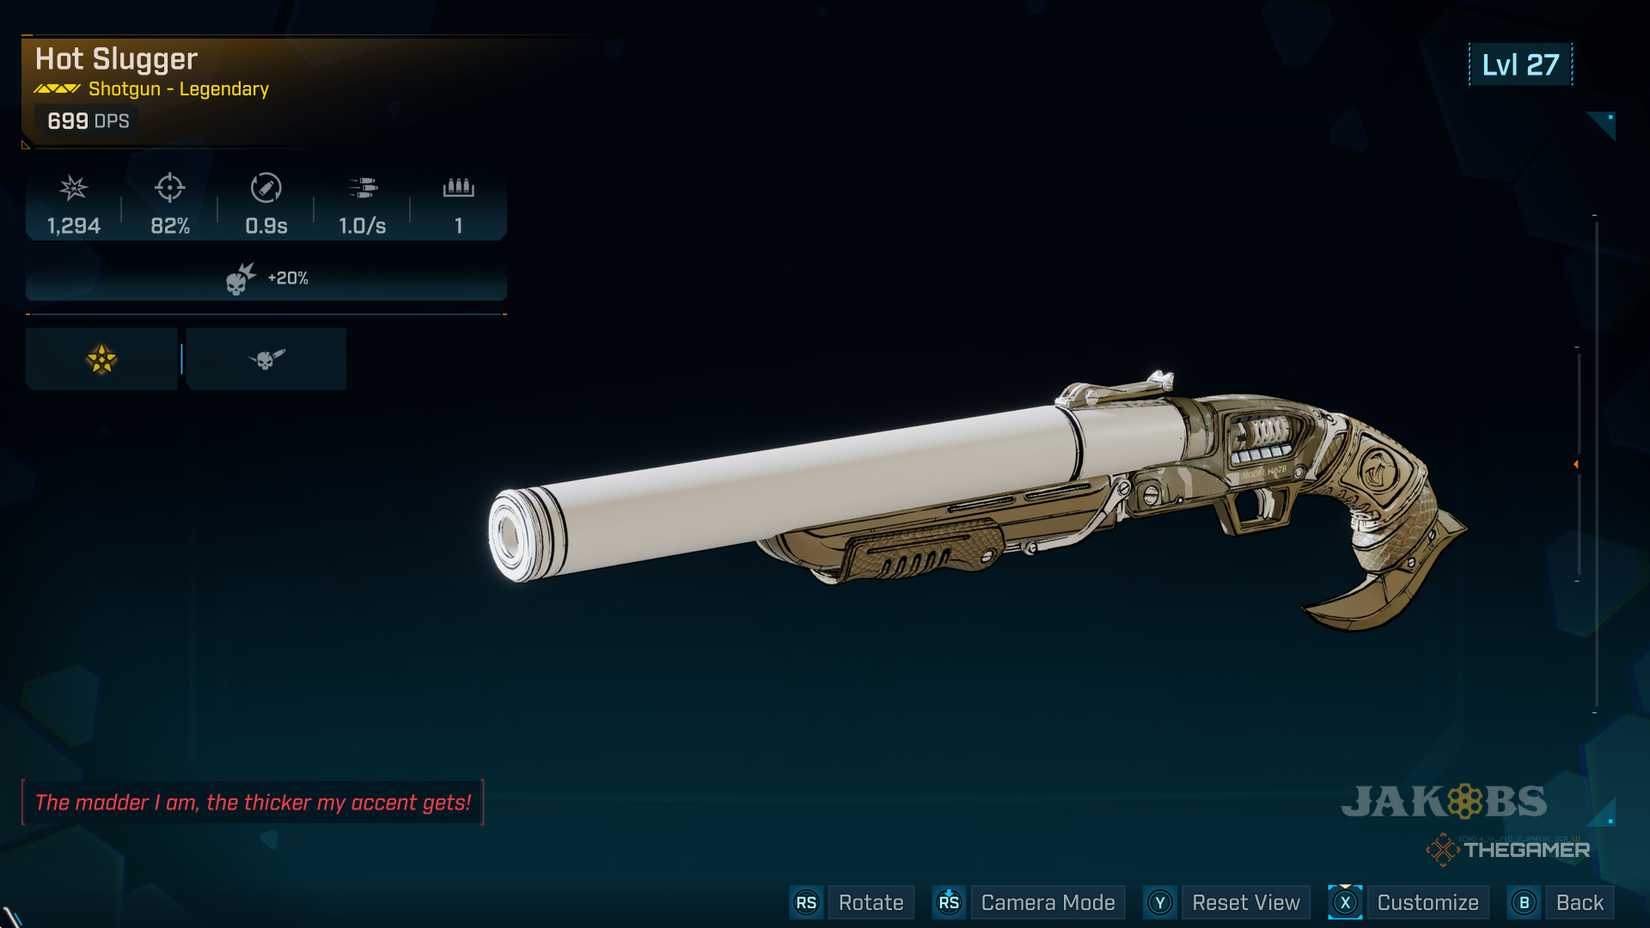
Don’t be intimidated by its name—this boss isn’t as dangerous as it sounds, and it’s fairly easy to find. Defeating it is worth the effort because it drops the powerful Hot Slugger shotgun, which is definitely worth a quick detour.
Where to Find the Hot Slugger in Borderlands 4
Before starting your search for this weapon, you need to progress through the campaign until you’re able to leave the Fadefields. The shotgun is located further out in the Terminus Range. On the map, look for the Craven’s Nook Order bunker, which is situated in the mountains to the east. Once you get close, it will appear on your compass, and your Echo-4 device can guide you through the cave system.
When you arrive at the bunker, you’ll see it’s locked by Order armor. Check the left side and you’ll notice a bio canister dispenser on a cliff edge. Pick one up, throw it at the door, and the bunker will open.
The bunker itself is typical Borderlands territory: fight through waves of enemies, moving from room to room—climbing vents and up elevator shafts—until you reach the boss, the Callous Harbinger of Annihilating Death. Defeating Callous gives you a chance to get the Hot Slugger, and you can keep fighting them multiple times through Moxxi’s Big Encore mode.
Though the exact drop rate isn’t clear, many players report getting the Hot Slugger after just one try.
What Are the Unique Effects of the Hot Slugger?
This shotgun is incredibly powerful, with a quick 0.9-second reload time. Its special feature is that each kill grants a +30% damage bonus, stacking up to three times. This bonus applies not just to gun damage but to all damage types, reaching a maximum of 90% increase. Like other Jakobs weapons, critical hits cause projectiles to ricochet to nearby enemies, increasing your damage potential. The main drawback is that you can only fire one shot before needing to reload.
How to Beat The Callous Harbinger of Annihilating Death
Weakness: Shock, Corrosive, Cryo
At first, Callous might seem overwhelming with its barrage of projectiles, but it’s actually a slow-moving, bulky target. This makes it easier to dodge attacks and land shots. The arena will also be filled with Order synth enemies during the fight.
Here’s a quick rundown of Callous’s attack patterns:
- Slam Attack: Callous raises both fists, glowing gold, then crashes them down, causing a shockwave. Jump to avoid damage.
- Charge Attack: Callous may lift its shield and charge at you. Dash out of the way and fire during the brief window to land hits.
- Missile Barrage: When the shield glows, it unleashes a volley of missiles in front of it. Seek cover to avoid this attack.
- Diamond Projectile Attack: Sometimes, the shield floats above Callous’s head and fires a laser, sending diamond-shaped projectiles in all directions. Hide behind cover and wait for the attack to pass.
- Energy Streaks: When raising fists, instead of a shockwave, Callous fires energy streaks outward. Jump through these gaps to continue firing at the boss.
- Poison Goo Puddles: At times, Callous summons pools of poison on the ground. Avoid standing in these areas.
- Mounted Turret: The shield also acts as a turret that periodically fires lasers from its back. Strafe around Callous in circles to make it stop firing and expose its weak points.
Staying mobile and understanding these attack patterns will help you overcome Callous and claim the Hot Slugger shotgun.