Select Language:
Unlike its earlier version, Returnal, the new Saros game by Housemarque lets players adjust the game’s difficulty to suit their preferences using the Carcosan Modifier system. Players can access these modifiers early in the game through the Passage, though many will be locked at first and need to be unlocked.
The Carcosan Modifiers are a great addition to the gameplay. They can make your journey easier or, if you’re looking for a tougher challenge, give experienced players a more intense experience similar to Returnal.
How to Unlock Carcosan Modifiers in Saros & How They Work
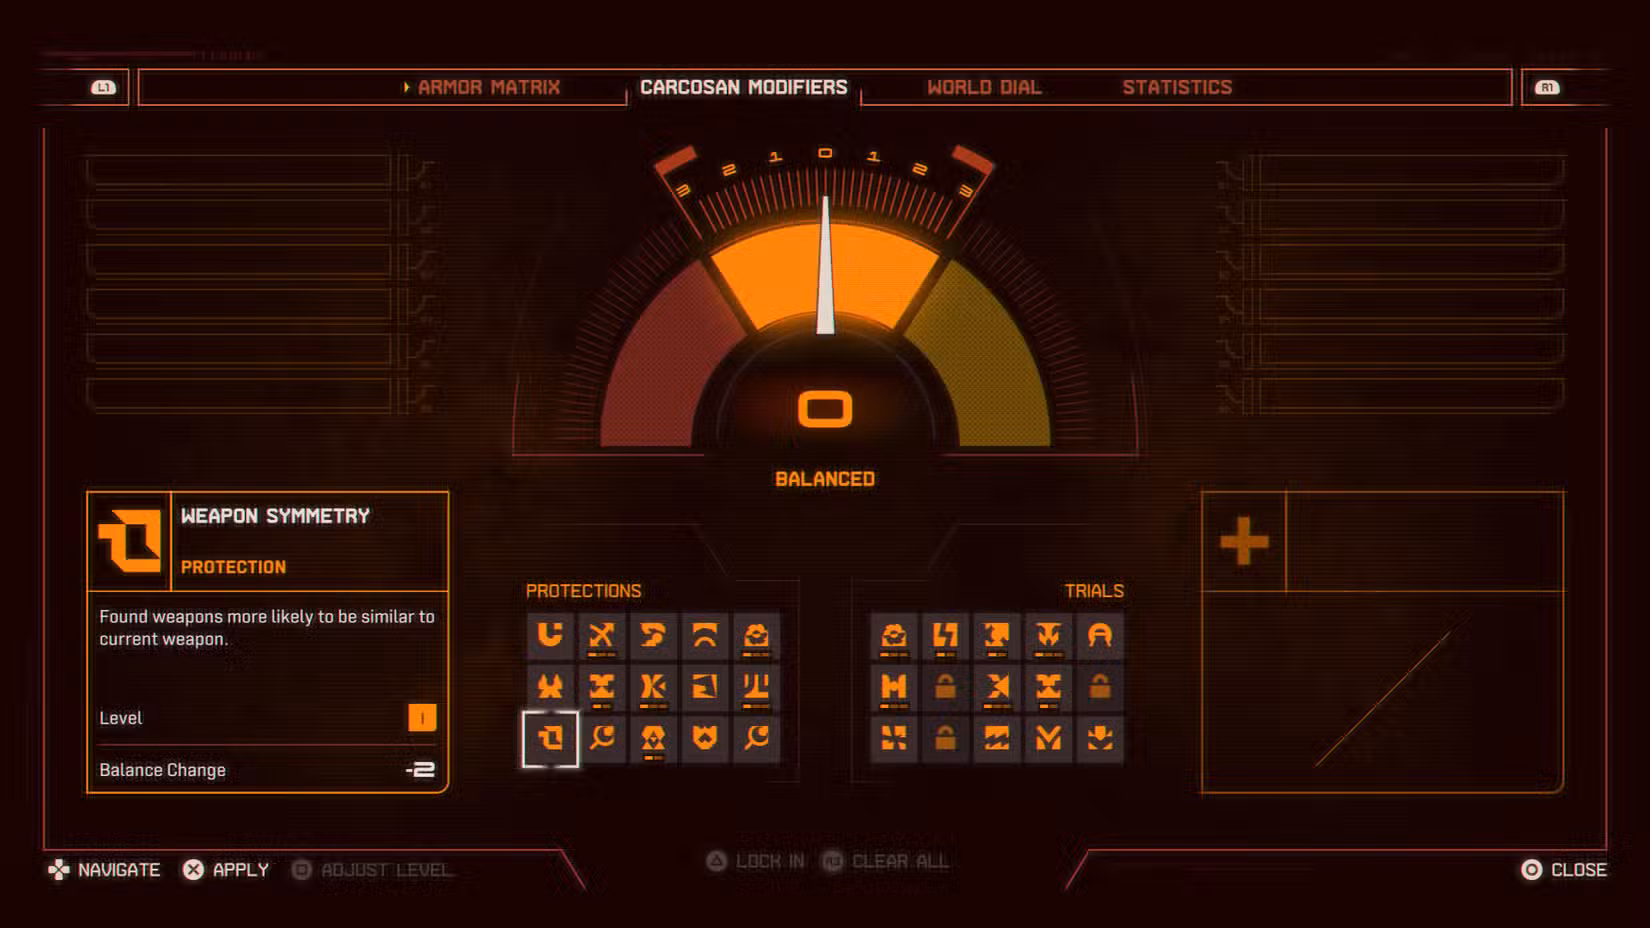
To use the Carcosan Modifier system, you need to understand how it functions. The system isn’t overly complicated. Carcosan Modifiers come in two types:
- Trials: These are challenges that increase the difficulty, such as faster Corruption buildup or disabling Second Chance.
- Protections: These improve your chances by providing buffs, like preventing Corruption effects on artifacts or dealing more damage to enemies.
The modifiers operate on a balancing scale, with a ranking that can go from -4 (underpowered) to +4 (overpowered). You need to keep the overall balance at least at -3 to lock in your selected modifiers. Protections decrease the gauge, making the game easier, while Trials increase it, making it harder. You can select up to six Protection and six Trial modifiers, but your total gauge must stay at or above -3 to be playable.
You can unlock more Protections and Trials as you progress, usually after completing each biome. Early in the game, you’ll have fewer options, but more will become available over time.
Note: Using overpowered modifiers doesn’t seem to give any extra benefits, like more Lucenite or stats.
Best Carcosan Modifiers and When to Use Them
Carcosan Modifiers are especially helpful when you’re stuck on a boss or a tough area, but they can also backfire if you’re not careful with your choices. If you’re defeating enemies easily and want a more challenging experience, you can add several Trials without Protections, pushing the gauge up to +22.
For mid to late-game ease, these combinations tend to offer the best benefits with minimal downsides (listed from most to least helpful):
Protections
- Artifact Immunity
- Damage Boost
- Corruption Reduction
- Lucenite Enrichment
- Artifact Enhancement
Trials
- Artifact Destruction
- Halo Removal
- Lucenite Devaluation
- Power Decelerator
- Hostile Aggression
I usually didn’t use all of these all the time, but Artifact Immunity and Damage Boost were especially useful across the game. Artifact Destruction and Halo Removal had the least negative impact while helping me balance the gauge. After clearing an area, I’d often run a Halo-focused game to upgrade my Armor Matrix.
Some protections and trials are particularly useful against certain bosses, depending on your playstyle and skill level—without spoiling specific details. For example:
- Nova Dash helps against late-game bosses that fire lots of Nova attacks, though it costs -4.
- Weapon Symmetry is great if you stick to one weapon, but avoid it if you want variety.
- Overlord Restoration costs only -1 and is useful if your health is low before a boss, especially if you’re out of Second Chances.
Overall, there’s no real downside to enabling Protections outside of the specific effects from Trials. Experimenting with the Carcosan Modifier system can help you find what works best for your gameplay style, whether that means making the game easier or more challenging.