Select Language:
Blacklime Bunker is a secure site located in the Fadefields area of Kairos in Borderlands 4. The entrance is close to The Launchpad, the main town nearby, but it’s locked behind heavy armor, making it impossible to get in until you have advanced far enough in the main story to find a way through.
Once inside, the bunker tests your skills as you explore its flooded lower levels. Repeatedly fighting the boss, called the Core Observer, is a good way to farm for loot. The fight takes place at the bottom of the bunker, and defeating the Core Observer multiple times can give you plenty of valuable gear.
How to Enter Blacklime Bunker
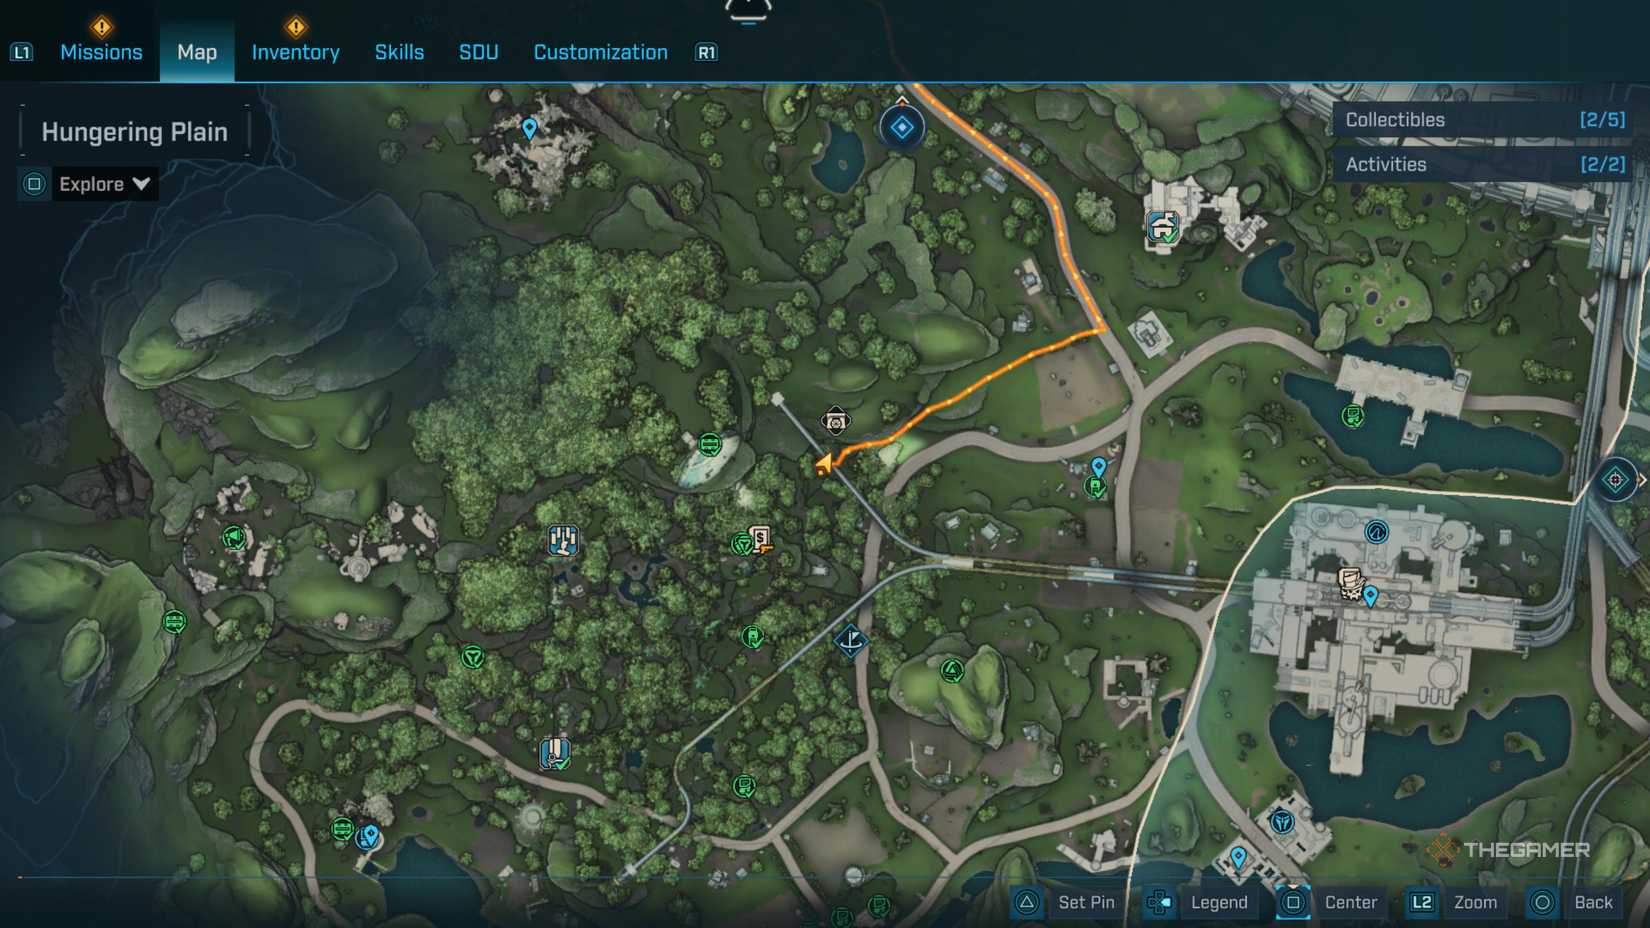
Blacklime Bunker is situated in The Howl, on the main road heading north from The Launchpad. Keep the forest on your left as you travel along the road. When the road veers to the right toward Shut-Eye Keep, look to the west into the woods. The bunker’s lit entrance is embedded into a cliff face, covered in bio-armor plates. If you haven’t completed the story mission “One Fell Swoop,” you won’t be able to open the door. Once that quest is done, the door will unlock, and you can return at any time.
You’ll notice a ledge on the west side of the entrance that you can climb onto. From there, you can glide across to the rocky outcrop on the east, directly in front of the bunker. After completing “One Fell Swoop,” the Locust Dispenser on that outcrop will be active. Use your Grapple Grabber to collect a Locust Canister and throw it at the bunker door. If the armor is hit within the blast radius, it will dissolve, opening the bunker for entry.
Getting Through Blacklime Bunker
The first two floors of the bunker are simple: eliminate the Order troops guarding each room, grab any loot, and move to the stairs to go deeper. On the third floor, some flooding appears, and the exit becomes less obvious. After clearing enemies, crouch behind a pipe on the west side of the main room to find hidden stairs behind it, leading to the next level.
This next level is completely flooded. Swim to the center platform and use it to jump up to the level above. There, you’ll find a console with a button that opens the western door. Follow the path, swimming through sections when needed, to reach the respawn point and vending machines. When ready, jump down the chute on the south side to face the boss, the Core Observer.
How to Defeat the Core Observer
The Core Observer uses strong laser attacks and sends out small drones. Use water tanks scattered around the room for cover from the lasers, and aim for its red central eye when it’s not attacking. The smaller drones can be bothersome in large numbers but are easy to handle and can be ignored unless they threaten your survival.
Because the Core Observer and its drones can fly, it’s best to use a heavy weapon instead of grenades for your Ordnance slot. The boss has three health bars: a shield, armor, and a second shield. It’s most vulnerable to Shock and Radiation damage on shields, and to Corrosion and Cryo against armor. Using weapons that cause status effects will help you deal damage even when you’re under cover. When the boss reaches its final phase, it spins and ricochets bullets back at you. Inflicting Electrify or Irradiate effects toward the end of its armor bar usually deals enough damage over time to finish it off, reducing the need for direct shooting.
Repeating the Fight
After defeating the Core Observer, loot its remains and open the nearby chest. You then have two options: grapple the purple orb to return to the vending machine room, where a Moxxi’s Encore machine allows you to respawn the boss, or take the elevator back to the surface. Quickly returning to the Encore booth lets you fight the Core Observer repeatedly to farm for loot, helping you build your arsenal before moving on in Kairos.