Select Language:
Quick Links
Marvel Rivals offers thrilling experiences, whether you’re outmaneuvering foes or executing a winning combo. There’s no shortage of moments to celebrate. So, how can you save those impressive plays without searching through endless menus? That’s the purpose of the highlight-saving feature.
This guide will show you easy steps to keep your standout moments so you can show them off later. Learning how to use this feature will let you share, review, or revisit your best plays anytime you want. Ready to get started? Let’s go, because if you’re planning to boast, you’ll need the proof. Your highlight reel isn’t going to create itself!
How to Save Highlights
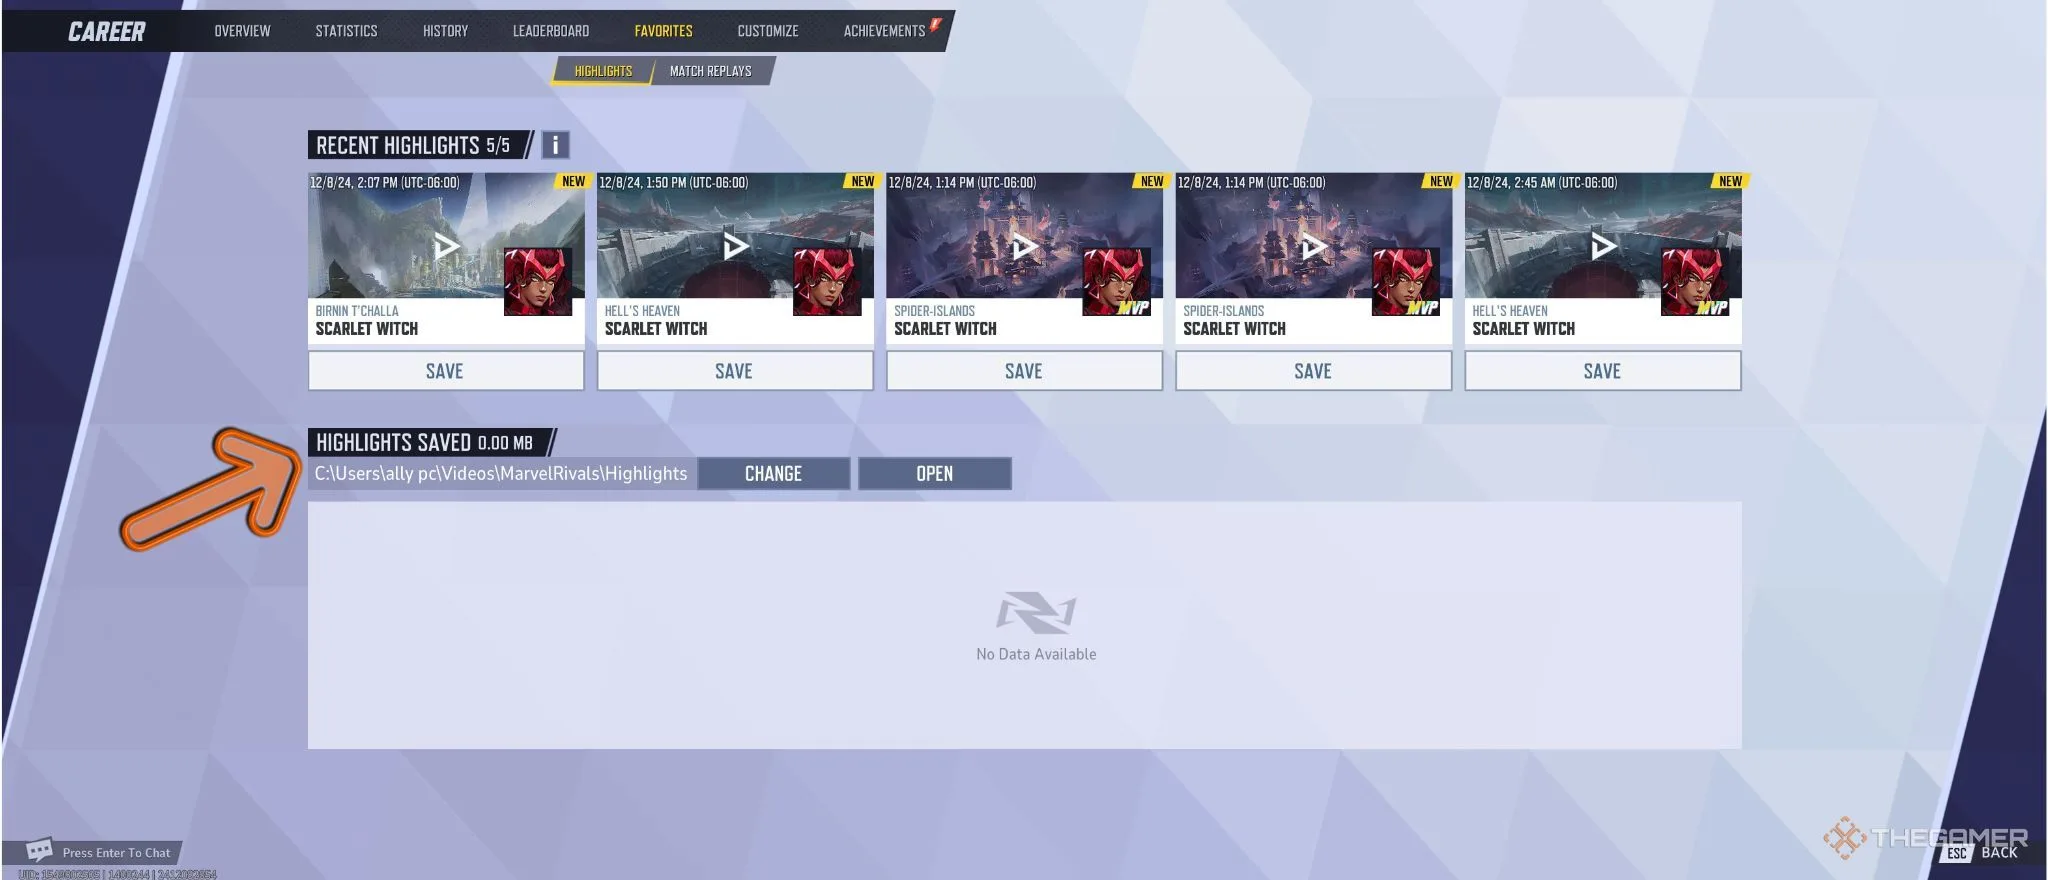
First, go to the main menu and click on your profile icon located at the top right corner. This will open your profile or ‘Career’ page. Once there, choose the ‘Favorites’ tab from the top menu bar, where you’ll find your five latest highlights listed.
Find the highlight you’d like to save and click the ‘Save’ button underneath it. You will then have the chance to adjust several settings, including the highlight’s name, resolution, and frame rate.
Keep in mind, opting for higher quality settings may slow down the saving process as more data is being handled.
After making your adjustments, confirm your settings and the game will take you to a loading screen while your highlight is saved.
Where Are My Highlights Stored?
By default, saved highlights will be located in your computer’s ‘Videos’ folder or your console’s media library, depending on which platform you’re using. If you’re on PC and want to change where your highlights are saved, click the ‘Change’ button in the ‘Highlights Saved’ section and choose your preferred destination folder.