Select Language:
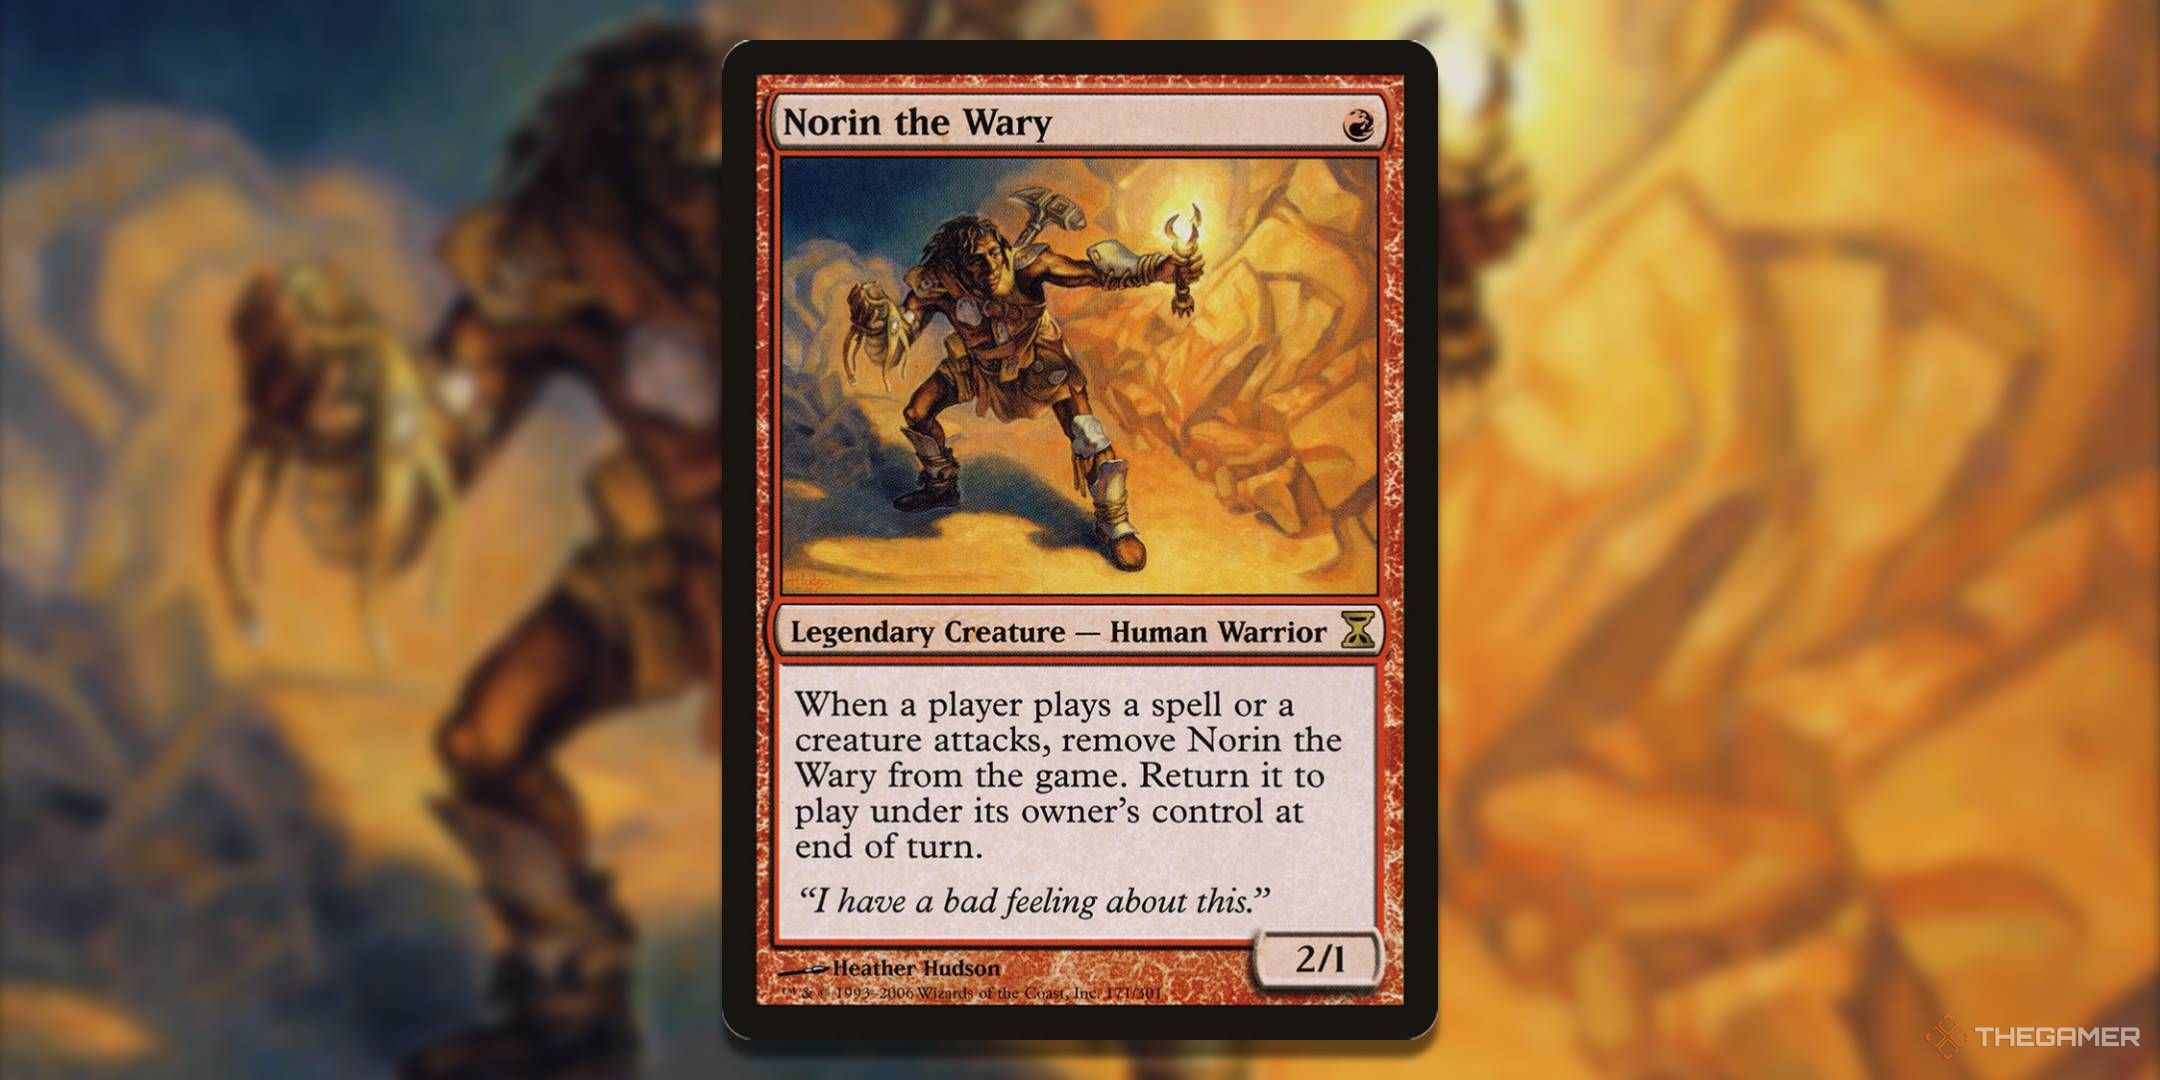
Norin the Wary stands out as one of the more intriguing commanders in Magic: The Gathering. Its main feature is its elusive nature, rarely remaining on the battlefield. Instead, it continually enters and exits to bewilder opponents and deal damage.
What sets Norin the Wary apart is the diverse ways to construct a Commander deck around it. In this guide, we’ll explore a hybrid approach combining burn and stax strategies. The aim is to disrupt your opponents’ deck utilization while gradually reducing their life totals, utilizing Norin the Wary’s ability as a blink effect.
Decklist
|
Commander: Norin the Wary |
|||||
|---|---|---|---|---|---|
|
Chandra, Awakened Inferno ADVERTISEMENT |
Agate Instigator |
Birgi, God of Storytelling // Harnfel, Horn of Bounty |
Dragonmaster Outcast |
Gimli of the Glittering Caves |
Grinning Ignus |
|
Iron Myr ADVERTISEMENT |
Irreverent Gremlin |
Krenko, Mob Boss |
Magus of the Moon |
Molten Gatekeeper |
Ojer Axonil, Deepest Might // Temple of Power |
|
Purphoros, God of the Forge |
Rose Room Treasurer |
Silent Arbiter |
Solemn Simulacrum |
Solphim, Mayhem Dominus |
Sunset Strikemaster |
|
Terror of the Peaks |
Torbran, Thane of Red Fell |
Twinflame Tyrant |
Witty Roastmaster |
Blasphemous Act |
Chain Reaction |
|
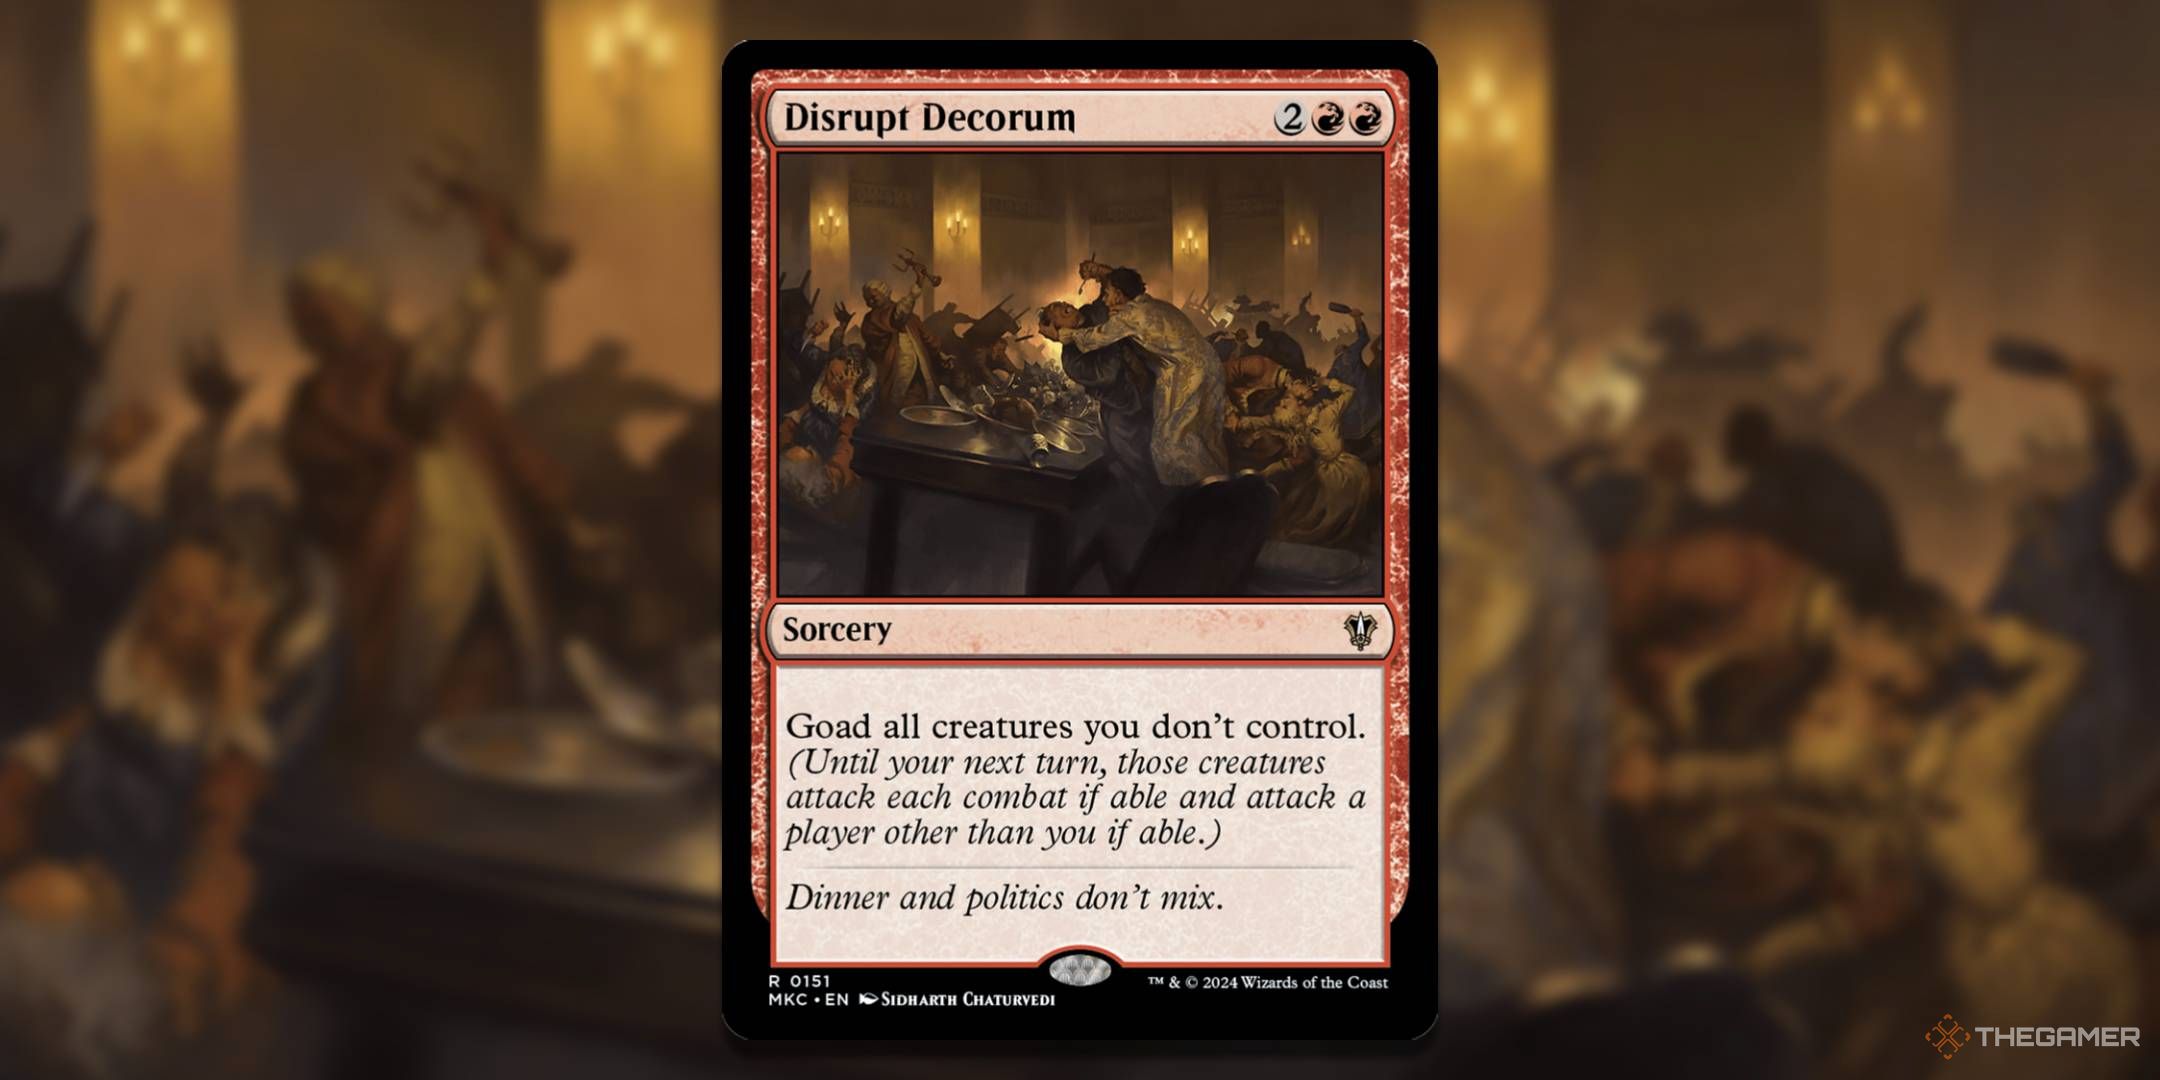
Disrupt Decorum |
Faithless Looting |
Ruination |
Chaos Warp |
Lightning Bolt |
Tibalt’s Trickery |
|
Wild Magic Surge |
Arcane Signet |
Chaos Wand |
Commander’s Sphere |
Crawlspace |
Cursed Mirror |
|
Fellwar Stone |
Fire Diamond |
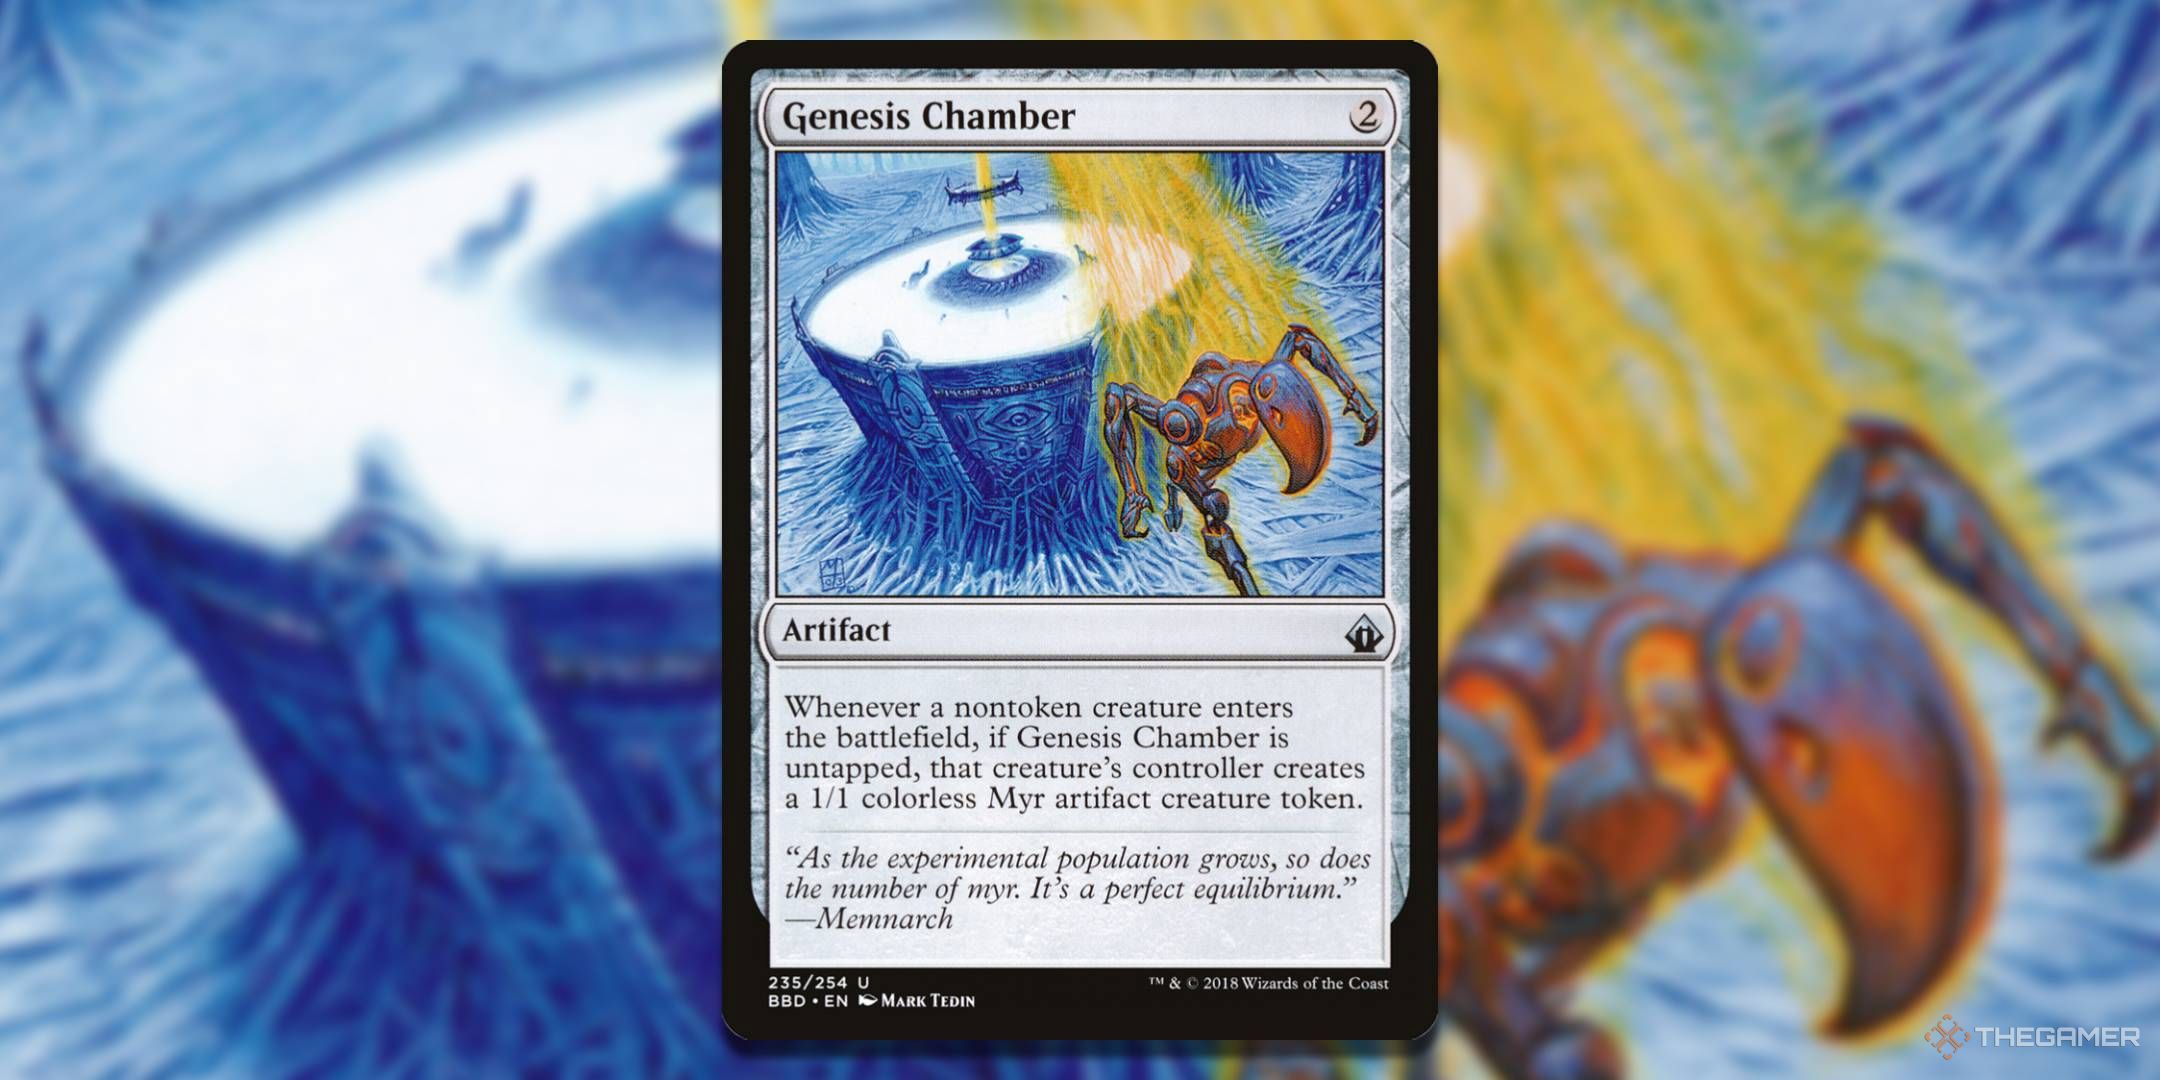
Genesis Chamber |
Hazoret’s Monument |
Meekstone |
Mind Stone |
|
Panharmonicon |
Ruby Medallion |
Sol Ring |
Thought Vessel |
Tome of Legends |
Urabrask’s Forge |
|
Wayfarer’s Bauble |
Blood Moon |
Burning Earth |
City on Fire |
Confusion in the Ranks |
Descent into Avernus |
|
Dictate of the Twin Gods |
Fiery Emancipation |
Furnace of Rath |
Impact Tremors |
Mechanized Warfare |
Outpost Siege |
|
Price of Glory |
Smoke |
Spiked Corridor // Torture Pit |
Warstorm Surge |
Cori Mountain Monastery |
Kher Keep |
|
Mines of Moria |
x28 Mountain |
Myriad Landscape |
Valakut, the Molten Pinnacle |
War Room |
|
The deck features one planeswalker, 22 creatures, five sorceries, four instants, 18 artifacts, 15 enchantments, and 34 lands. The strategy revolves around generating tokens, dealing damage upon creatures entering the battlefield, and enhancing damage output.
Key Cards
 Norin The Wary
Once you cast Norin the Wary, it will likely leave the battlefield soon. This is due to its tendency to be exiled more often than not, particularly as spells are commonly cast in Commander, triggering Norin almost every turn.
The only time Norin the Wary may remain on the battlefield is early in the game when opponents might not have plays for their first turn. Seize this chance to attack with Norin for some initial damage.
If Norin the Wary does manage to stay in play when it’s your turn again, be sure to attack with it before casting any spells. If you cast spells first, it will be exiled once more, costing you that free damage opportunity.
Gimli Of The Glittering Caves
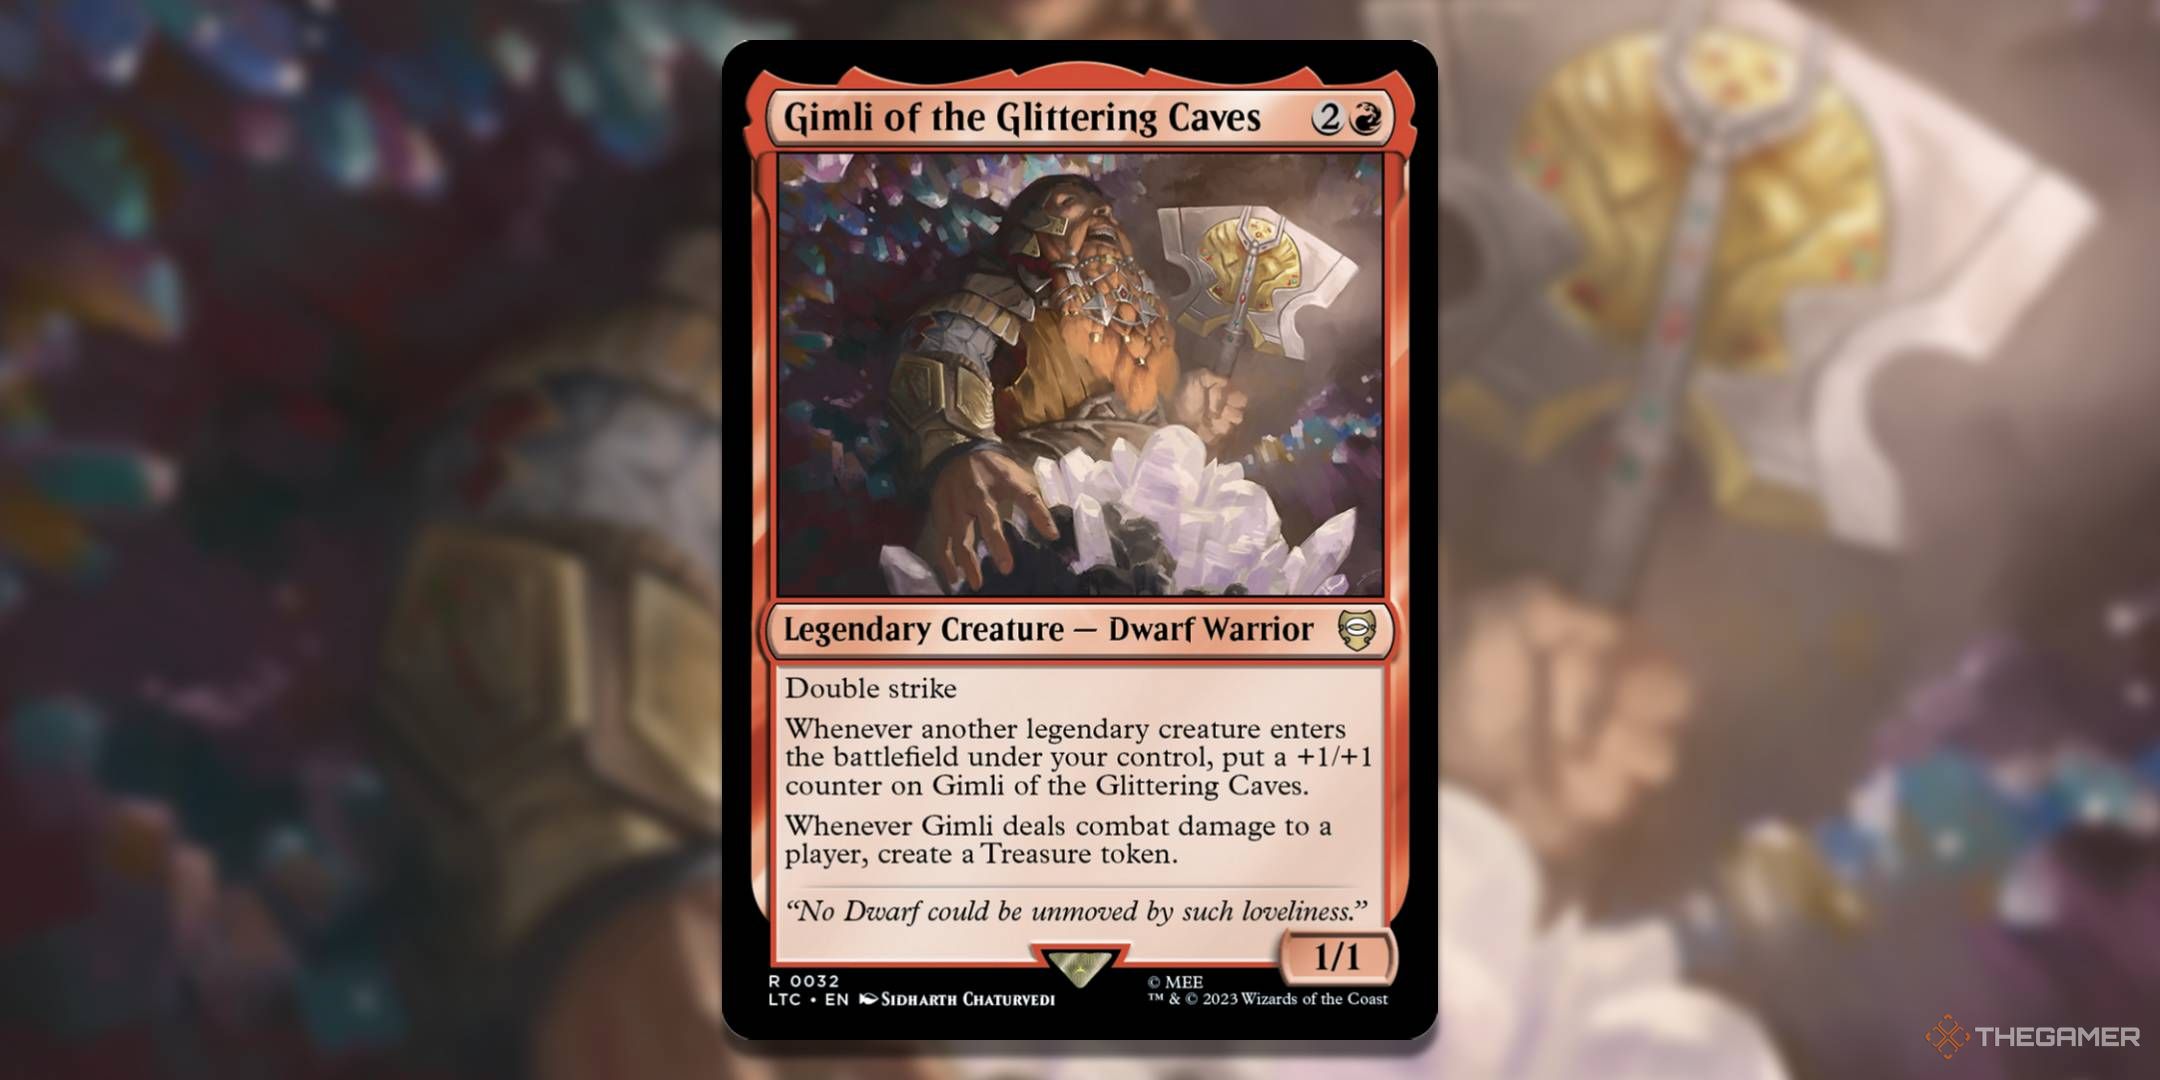
With Norin the Wary consistently entering and exiting the battlefield, you’ll be able to trigger Gimli of the Glittering Caves’ ability multiple times. In a single turn cycle, you could potentially accumulate three +1/+1 counters on Gimli, and even more if you cast other legendary creatures.
These counters are valuable due to Gimli’s double strike ability. If an opponent lacks blockers, they’ll face significant damage while you enjoy the bonus of Treasure tokens.
Gimli generates a Treasure token every time it deals combat damage to a player. Since it possesses double strike, both of its attacks will trigger this ability, creating two Treasure tokens in total.
Krenko, Mob Boss

Krenko, Mob Boss serves as your primary tool for generating an army of creatures. Although it may start off slow, just a few Goblin tokens can lead to the creation of countless Goblins for both offense and defense.
In addition to aiding in token generation, Krenko also provides extra triggers for your enter-the-battlefield burn effects. Given the sheer number of creatures Krenko can produce in a single turn, it can result in devastating burn damage, especially when paired with cards that amplify damage.
Grinning Ignus
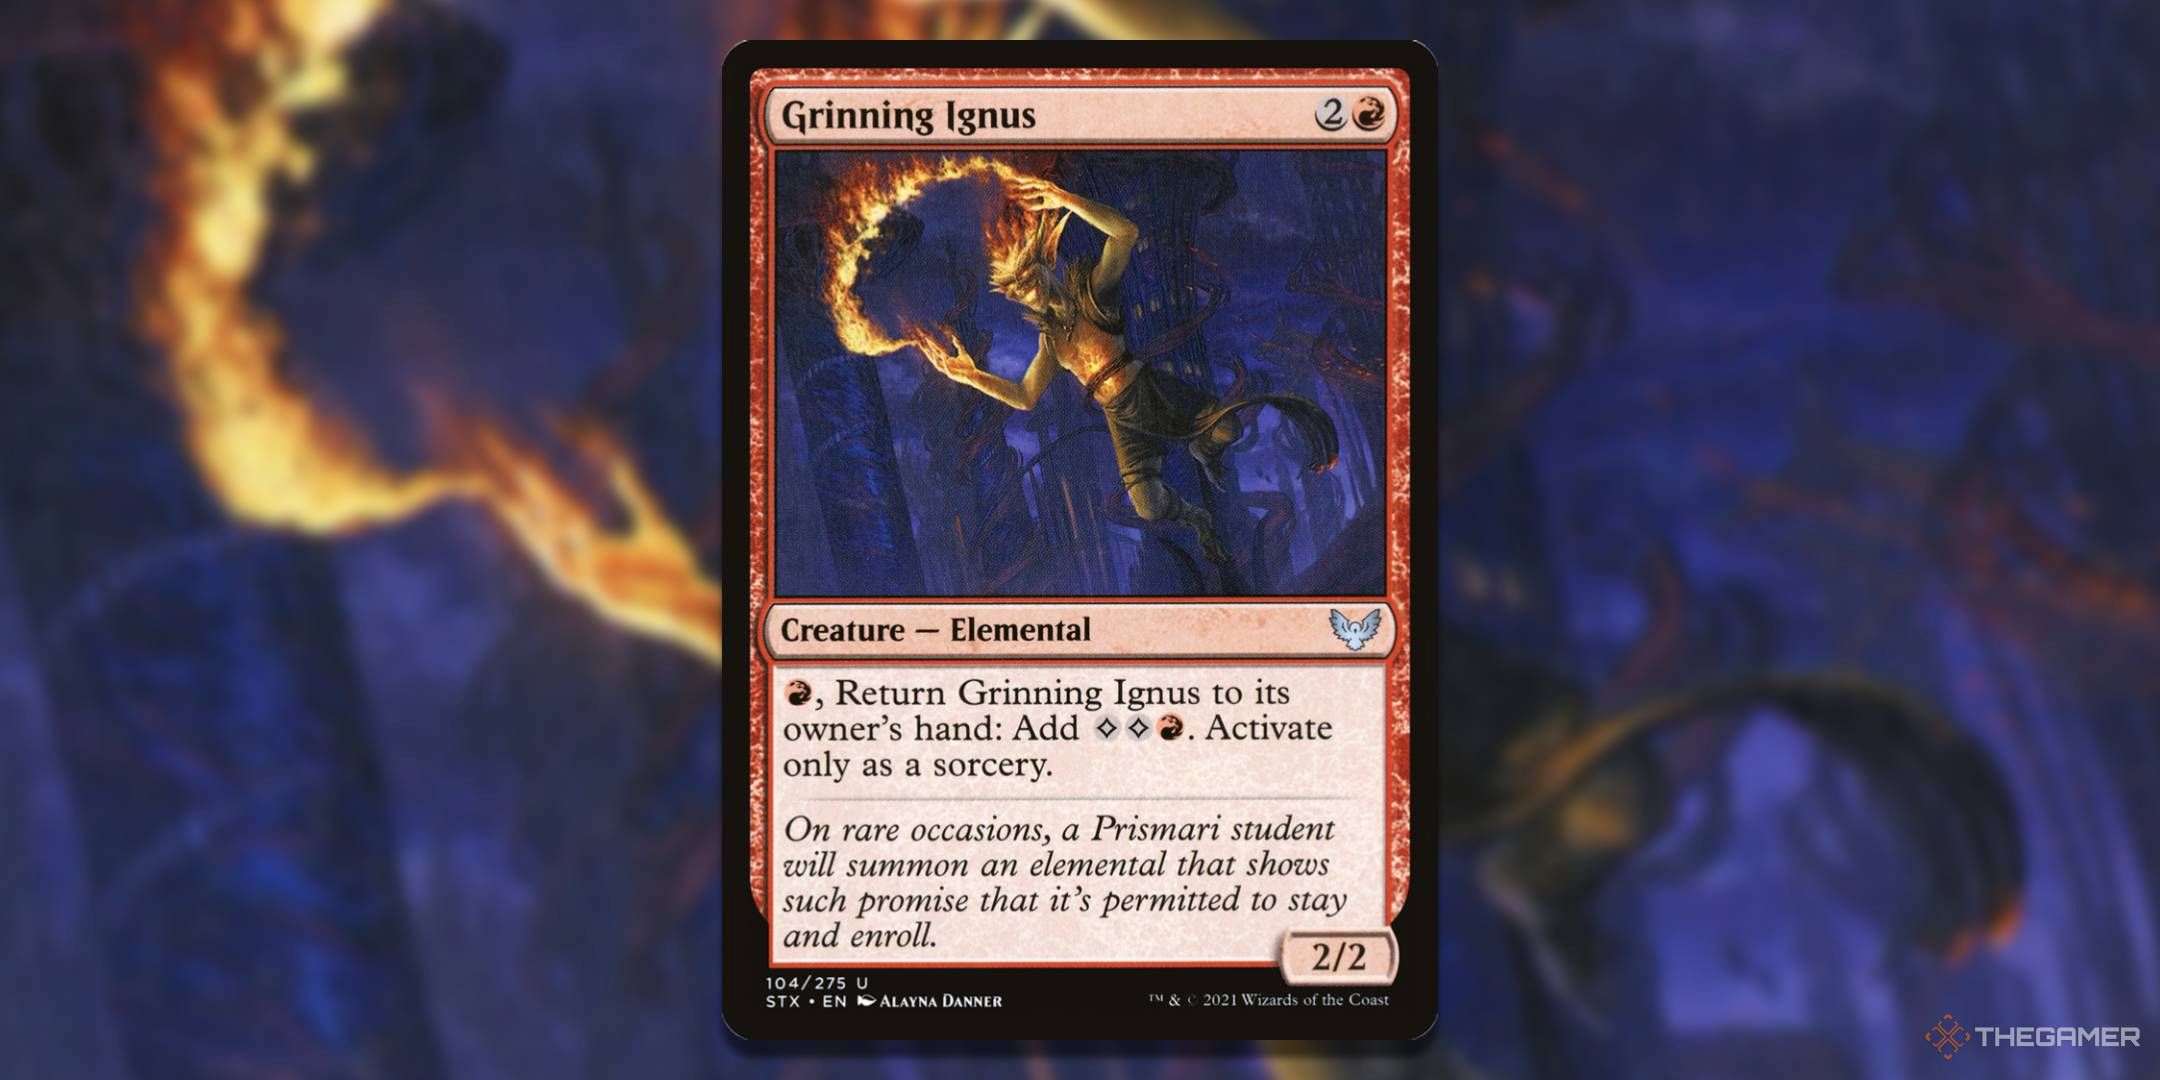
Grinning Ignus is easily recastable, allowing for consistent burning of opponents through its enter-the-battlefield triggers. Even in combat, it can effectively block large threats while allowing you to avoid damage by returning it to your hand.
The main allure of Grinning Ignus lies in its infinite combo potential with Birgi, God of Storytelling. This allows you to recast Grinning Ignus indefinitely, potentially generating infinite colorless mana and enabling you to draw your entire deck. Below is how the combo works:
|
Prerequisites: Birgi, God of Storytelling on the battlefield. Grinning Ignus either in hand (with enough mana to cast) or on the battlefield (with one red mana available). |
|
Step 1 (only needed if Grinning Ignus isn’t on the battlefield): Cast Grinning Ignus, triggering Birgi and adding a red mana. |
|
Step 2: Activate Grinning Ignus, returning it to your hand, and add two colorless and one red mana to your mana pool. |
|
Step 3: Repeat steps 1 and 2. |
|
Results: Infinite enter-the-battlefield triggers, infinite colorless mana (if Hazoret’s Monument or Ruby Medallion is on the battlefield), infinite draw and discard (if Hazoret’s Monument is on the battlefield). |
How To Play The Deck
A Norin the Wary Commander deck is built to hinder opponents with stax elements while inflicting damage through permanents that trigger when creatures enter the battlefield. Once Norin the Wary is on the field, it becomes difficult to remove due to its exile ability whenever a spell is cast, allowing for ongoing burn triggers.
The main source of damage comes from cards that deal damage when creatures enter, like Agate Instigator, Terror of the Peaks, and Impact Tremors. It’s crucial to deploy these permanents quickly.
Most of the damage output is fairly minor, accumulating slowly and potentially giving opponents time to counter your stax pieces. To increase this damage, consider including cards like Fiery Emancipation or City on Fire, which can significantly boost your burn potential.
This deck can take some time to secure a win since it is generally not aggressive. It operates passively, employing stax elements like Smoke, Blood Moon, and Ruination to delay opponents. As they focus on dealing with these pieces, you can gradually build up your battlefield while applying burn damage.
The primary victory condition is through dealing burn damage. The deck lacks many heavy-hitting creatures, so relying on combat for victory is less likely (though still possible). Combat becomes more viable over time if Urabrask’s Forge gains many counters, or if Krenko, Mob Boss generates numerous tokens.
A significant downside to this strategy is the tendency to become a target. The moment you play your first stax piece, your opponents may prioritize you to prevent further disruption. Given the deck’s nature and lack of defenses outside of stax elements, there’s little to be done about this. Hence, it’s advisable to hold off on casting stax cards until you are better prepared against your opponents’ counterattacks.