Select Language:
The Reckoning is the concluding chapter of Doom: The Dark Ages. True to its name, this chapter is packed with some of the most challenging encounters in the game. It can be especially frustrating to get through, as you’ll frequently find locked gates, and you’ll need to collect keys that won’t be available until later in the level.
This guide will assist you in overcoming tough battles, solving platforming challenges, and discovering treasures throughout the chapter. With our support, you can gather every collectible and, if you follow our directions, you should complete this stage with all chapters at 100%. Let’s get started!
|
Secrets |
11 ADVERTISEMENT |
|---|---|
|
Gold |
335 |
|
Rubies |
3 |
|
Wraithstone |
1 ADVERTISEMENT |
|
Demonic Essence – Ammo |
1 |
|
Codex |
1 |
|
Toys |
2 |
The Codex at the Start of the Level
When you start this chapter, head straight down a narrow corridor, drop into the area below, turn right, and pick up the Codex. This collectible is one of the few you can grab without needing the Secret Key, which won’t be available until you complete the chapter.
The First Major Battle and the Life Sigil
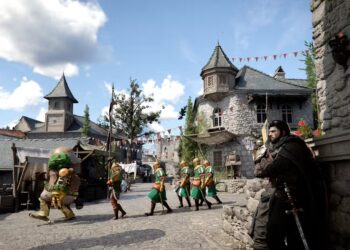
This stage is heavily gated—most areas are locked. Besides the Codex, you’ll need to push through some tough fights before getting your rewards. After reaching the Codex, you’ll be thrust into a huge melee. Expect to face many foes, including Nightmare Imp Stalkers, a Mancubus, a Cyberdemon, Hell Knights, a Revenant, Arachnotrons, a Whiplash demon, a Komodo demon, and a Cacodemon Hybrid. Focus on eliminating the Mancubus and Hell Knights first.
Once empowered demons appear, head to the northeast corner of the map to confront a Cyberdemon leader. Take them out quickly to avoid being overwhelmed. Move around the arena, isolate foes, and eliminate them one by one. The last phase includes battling a Komodo demon and a Cacodemon Hybrid.
After you’ve defeated the demons, collect the Life Sigil in the southern area that has now opened.
How to Find the Great Old One Toy
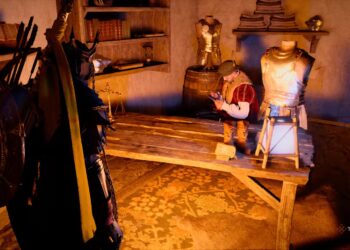
Make your way to the eastern side of the map, where a demonic tree awaits. Smash through it and prepare for an intense battle. Initially, you’ll face a Pinky Rider, two Acolytes, and an Agaddon Hunter alongside an Arachnotron. Given the ample space and the large tree for cover, this fight shouldn’t be too difficult.
Then comes a Battle Knight and a Revenant, along with several Nightmare Imp Stalkers and Stone Imps. This is quite hectic, as the Imp Stalkers can ambush you. Using grenades can help clear them out. Finally, you’ll contend with two Cosmic Barons simultaneously. This fight isn’t too challenging, as long as you time your parries correctly. However, mistiming even one parry can break your shield, making you vulnerable. Once all demons are defeated, you’ll find the Old One Toy tucked away in the southeastern corner of this area.
If you’re concerned about tackling the Cosmic Barons, consider using your B.F.C. Bolt to take them out quickly. This will also count towards completing one of your challenges.
Obtaining the Blue Skull

Ascend to the second floor in the northern section where you had that major fight. Follow the quest marker until you reach a large block. Look for a breakable wall nearby. After breaking it down, toss your shield into the glowing gears and then climb the wall that lowers on your right.
Jump down the hole above, then shield charge the big block. Move to the other side of the area, climb the block you just destroyed, and drop down into the area below. Take out the Whiplash demon, Shield Soldiers, and the Mancubus. After that, grab the Blue Skull, but don’t leave this area just yet.
The Treasure Chest and Ruby in the Blue Skull Area
In the same room as the Blue Skull, there’s a hole in the floor. Jump down into it, and you’ll land on a launch pad that sends you to the floor above. You should see a wall with a breakable symbol. Destroy it to access the first Treasure Chest.
The Gold Cache
Go to the western side of the arena and unlock the door using the Blue Skull. Afterward, drop down and sprint past the Agaddon Hunter. Be sure to eliminate the Shield Soldier demon leader first, as this will prevent a stronger hunter from coming after you. Continue down the hall and pull the lever to lift a gate, but be prepared for a wave of enemies, including a Hell Knight, multiple fodder demons, a Whiplash demon, and several Shield Soldiers. Just run through them, as they are empowered.
Use grenades to thin the crowd as you push through. Reach the end where you’ll encounter an Arachnotron Demon Leader. Blast it with your Super Shotgun and finish it off with your mace. Once the area is cleared, continue down the hallway to collect piles of gold.
In the open area, look up to spot a chain above. Cut the chain, then shield charge the block that drops. This will open a gate; shield charge it from the other side to push it across the arena. Climb up the block, navigate around the path, and collect more gold. At the end, go for those gold piles at the end of the hallway. Just be cautious of the Revenant demon hiding there.
The Second Treasure Chest

Next, stand on the large button and throw your shield through the hole in the wall at the distant gears. Proceed through the newly opened gate while your shield is still turning those gears. Once inside, you can recall the shield and continue onward. In the next area, you’ll face an Arachnotron. To your right, you’ll find another breakable wall. Shield Charge through it to discover the second Treasure Chest.
In the same area, you’ll confront a Mancubus, Acolyte, Cosmic Baron, Pinky Demon, and then another Cosmic Baron, culminating in an encounter with a Cyberdemon.
The Third Treasure Chest, Second Life Sigil, and Second Ruby
In the following area, a Mancubus will burst through the wall. Once you take him down, enter the room he was hiding in to gather the gold. Now, find another breakable wall in the main chamber. Once you spot it, break it with a Shield Charge and place your shield in the newly exposed gears. A climbable wall will appear. Ascend it, and you’ll uncover the third Treasure Chest.
Continue along this path, jump across a gap, throw your shield into some gears, climb up the scalable wall, and grab a Life Sigil. Now, recall your shield, which will open the gates ahead. Jump over to that area, climb up, and find another Ruby.
The Final Section of The Reckoning

To finish up the stage, you’ll face one last epic battle against a variety of demons. However, you will enter this fight with berserk status, making it feel more empowering than difficult. You’ll be able to tear through enemies until you reach the end. And speaking of the end, you’ll come face to face with Ahzrak once more. For more tips on this challenging final boss fight, check our detailed guide below.