Select Language:
Welcome to Dracula’s Castle, a detailed escape room series in Escape Simulator 2! This challenge is full of Gothic mystery, where you’ll need to solve a series of connected puzzles with cryptic clues, hidden objects, and ancient stories. Your main goal here is to find four Moon Keys, which are required to open the large gates leading into the castle.
This guide provides step-by-step solutions for all the main puzzles—from the Gargoyle’s Gambit and Infernal Alignment to the tricky Guiding Reflection—so you can gather all the Moon Keys and escape (or enter, depending on your goal!). Prepare to delve into darkness and uncover the secrets of the Courtyard.
—
### All Puzzle Solutions in Dracula’s Castle Courtyard
The aim of this room is to find four Moon Keys to unlock the massive doors at the back of the area.
#### How to Solve Gargoyle’s Gambit
Start by locating the recess to the left where three statements are posted on the wall near a lock on the statues’ left side. The lock features a row of symbols matching the statements on the wall. Your task is to determine whether each statement is “False” or “True” (or “Mendacium” or “Veritas” in Latin). Use the translation paper on the noticeboard across the room for help.
The answers are:
– Mendacium, Mendacium, Veritas, Mendacium, Mendacium, Veritas
This will unlock a smaller compartment revealing the first Moon Key.
#### How to Solve Infernal Alignment and Key Beneath
First, pick up the Shovel leaning against the right wall near the noticeboard. Follow the clues on the paper in the middle of the noticeboard—specifically, to dig in spots where you see three blue flames through hanging glasses. The locations are:
– Just right of the noticeboard, one step from the corner pillar (to find a Mechanical Key)
– Central at the back of the fountain near the castle doors (to find a chest)
Use the Mechanical Key to open the chest by twisting it after inserting. Inside, you’ll find the second Moon Key.
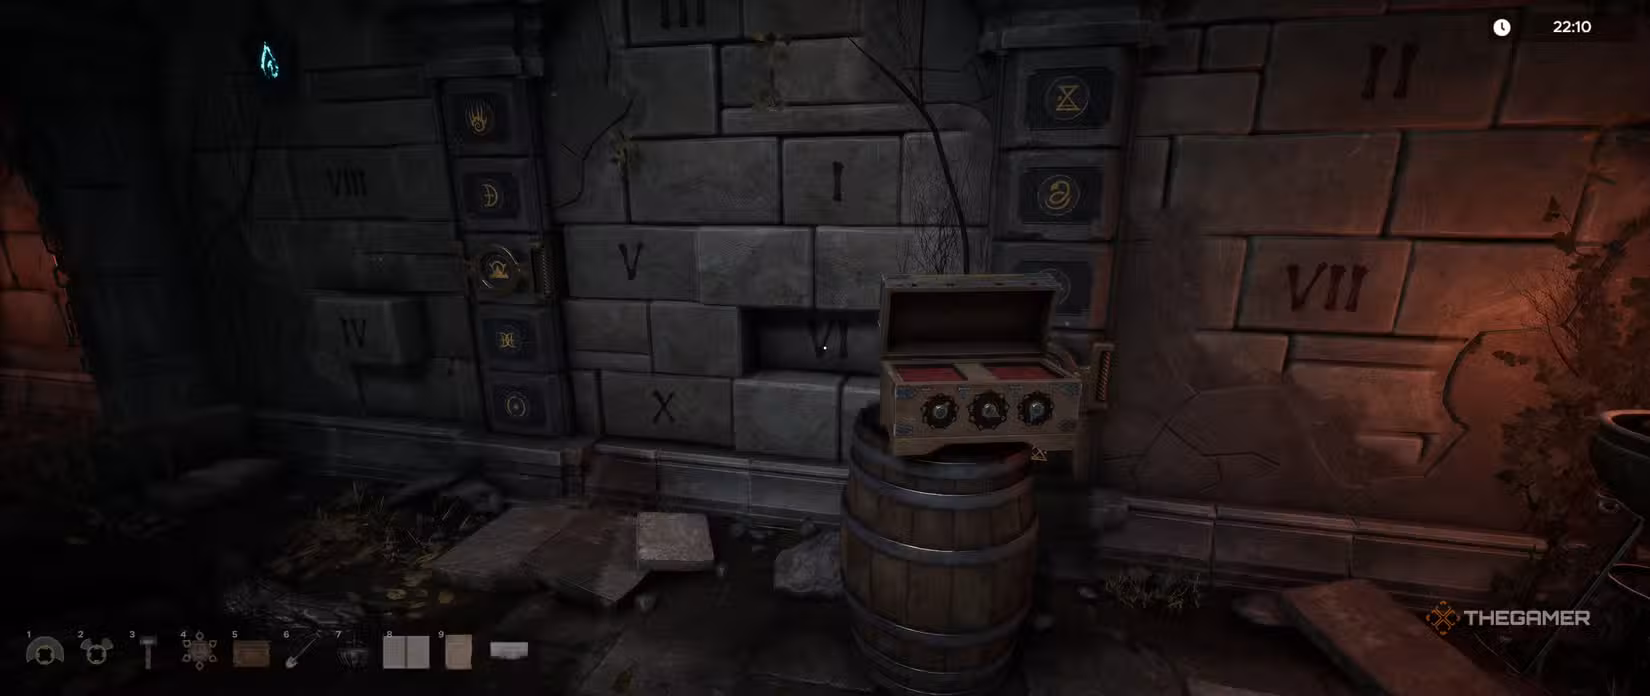
#### How to Solve Turning Vault, Runes of Rotation, and Sin & Salvation
On the right wall, interact with two devices that will influence how the numbered bricks protrude or sink—linking symbols on the devices with certain numbers.
Check the chest on the floor to the right, which has three dials with symbols. Use the devices to find which numbers relate to these symbols, then set the chest dials accordingly:
– II, IV, VI
This opens the chest, giving you two Mechanical Keys for the next step.
Use these keys on the pedestals beneath the statues of a demon and angel near the gate. Twist the keys so their tops face outward (not visible from the side), creating unbroken circles around the spokes. Assign:
– The large semi-circle key to the demon statue
– The two-spokes key to the angel statue
This will give you a key and two statuettes. Use the key on the locked door to the left to access the last puzzle.
#### Decoding the Statuette Riddle
Inside, decode the riddle by placing the angel statuette third from the left at the top row and the demon statuette directly beneath it. Solving this yields the third Moon Key.
#### How to Solve Wagon Escape, Burning Message, and Workman’s Secret
Clean the window of the carriage opposite the locked door to reveal icon arrangements for unlocking it. Consistent with the guide:
– Top row empty
– Lions facing outward, heads facing each other
– Goats facing outward, heads facing each other
– The lion facing forward
Inside the carriage, pick up the key and the flask.
Next, on the chest opposite the statuette puzzle, retrieve the paper with a code. Use it to open the lock (answer: HELP), and take the Stake.
Use the Stake, flask, and hammer (found beneath the noticeboard) to unlock the carriage’s back. Inside, you’ll find a mirror.
#### How to Solve Guiding Reflection and Echoes of Truth
Using the mirror, activate bird’s-eye view mode to locate four glowing symbols around the fountain, matching the symbol arrangement on the panels. Adjust the panels’ portholes to match these symbols, summoning a spirit who will quiz you.
Answer these questions correctly:
– Quis est maximum? → Sol
– Quid est inimicus ignis? → Aqua
– Ubi sunt falco? → Caelum
– Quid est post vitam? → Mors
Getting all correct grants you the final Moon Key.
—
### How to Escape the Courtyard with the Moon Keys
Insert the four Moon Keys into their slots in the castle door. When inserting each key, rotate it until the top faces outward and is hidden from view. Adjust until all keys are correctly aligned to escape the courtyard.
—
### All Token Locations
– Beneath loose slabs on the left
– Under the noticeboard on the right bench
– In the hand of the angel statue near the gate
– Inside the small locked room’s window on the back wall
– Under the top hat in the carriage
– At the base of the tree near the numbered brick puzzle
– Within the fire near the carriage
– Hidden inside the wall on the right rear side
—
### How to Solve the Darkest Puzzle
This advanced version of the truth and lies puzzle features six statements:
– The top row statements are all lies.
– On the bottom row, the first statement is a lie, while the other two are truthful.
Solve this to reveal the ultimate puzzle and complete your escape.