Select Language:
Certainly! Here’s a rewritten version in American English:
—
Getting through the Gauntlet of Shar in Act 2 of Baldur’s Gate 3 can be a nightmare. It’s filled with challenging enemies, difficult choices, and frustrating puzzles. However, this section is crucial to the overall storyline of the game, particularly with Shadowheart’s journey.
To assist you in navigating this tough area, we’ve compiled a comprehensive guide on the Gauntlet and where to find the umbral gems. Whether you’re having trouble locating the gems, getting stuck on the Soft Step, Self Same, or Faith Step trials, or dealing with the Silent Library, we’ve got everything you need to know about the Gauntlet of Shar in Baldur’s Gate 3.
Baldur’s Gate 3 Gauntlet of Shar: Trials and Goals
The Gauntlet of Shar can be divided into several key sections after you get through the Thorm Mausoleum:
- Locate Thorm’s Relic
- Soft Step Trial (Umbral Gem)
- Self Same Trial (Umbral Gem)
- Faith Step Trial (Umbral Gem)
- Yurgir Boss Fight (Umbral Gem)
- Silent Library (Spear of Night) and Shadowfell
Locate Thorm’s Relic
First, you need to find Balthazar in the southwest corner of the Gauntlet of Shar map, where he’s protected by undead warriors. Balthazar, a cultist allied with Disciple Z’rell, will direct you to hunt for Thorm’s relic hidden somewhere in the Gauntlet. The great thing is, this quest overlaps with Shadowheart’s ambition to become a Dark Justiciar, so you’ll be taking on each of the three trials along the way.
Each trial rewards you with one Umbral Gem, glowing orbs that can be placed on specific pedestals throughout the Gauntlet. You need to collect a total of four gems, with the last one found in Yurgir’s lair—but more on him later. Let’s dive into these three trials first.
Soft Step Trial
The easiest way to conquer the Soft Step Trial is to navigate the maze before you initiate the blood sacrifice, disarming traps and unlocking doors in advance. When you reach the umbral gem at the end of the locked doors, have Shadowheart activate the trial by using the blood dish. Switch back to the party member who has already “completed” the trial to grab the gem and return to the start.
For the Soft Step Trial, you only need one party member, ideally someone skilled in stealth and lockpicking. To find the trial, leave Balthazar’s quarters the same way you entered until you reach the Gauntlet of Shar’s fast-travel point. Descend the stairs to your left from that point and go through the first door.
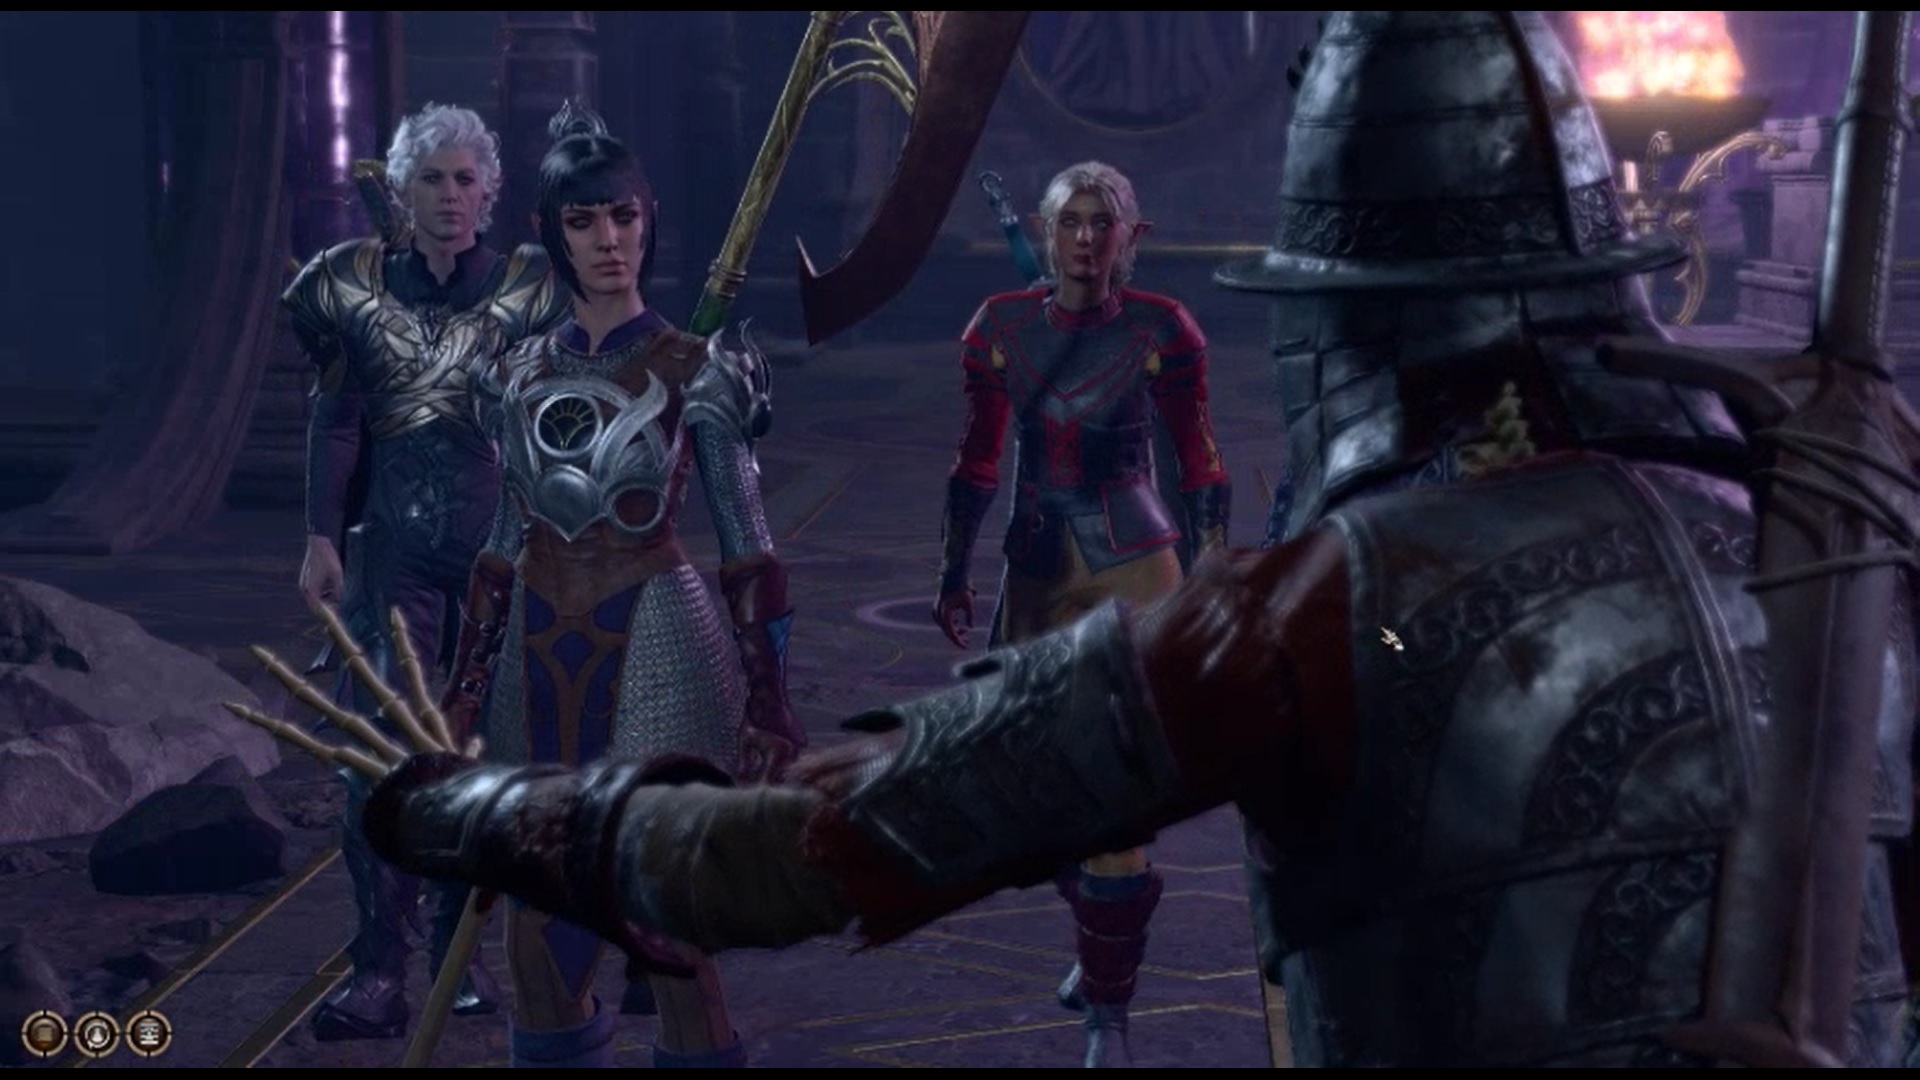
Self Same Trial
The next trial, Self Same, is trickier. In this trial, you’ll battle a shadow version of yourself. The key is to avoid attacking the shadow selves of any of your companions, as this will inflict a curse called Cheater’s Folly, which will reduce all abilities by one point and can stack up to four times. One easy way around this is to send all your companions back to camp, so you’re just facing yourself.
After winning the fight, you can collect the Umbral Gem from the back of the arena.
Faith Step Trial
The final trial is the Faith Step Trial. Located at the end of the same hallway, this trial requires you to navigate through a dark room along a specific path, avoiding deadly chasms on either side. If you fall into a chasm, you’ll return to the trial’s start, or if you’re playing in Honor Mode, you may die. Make note that some previous helpful techniques, like using Daylight, no longer work here, so you’ll need to follow an outlined path for clarity. Remember, don’t equip any illuminated weapons, or it will hinder your ability to see the path.
Yurgir’s Umbral Gem
Yurgir, a foe of the devil Raphael, guards the last Umbral Gem necessary for reaching the Shadowfell within the Gauntlet of Shar. You can find him in the eastern wing of the Gauntlet; turn right and descend the broken stairway upon entering the main hall instead of going left toward Balthazar.
While Yurgir looks formidable, his henchmen may prove to be more troublesome if a fight breaks out. To make defeating Yurgir easier, ask him about his contract, and point out the loopholes. Persuade him to command his henchmen to self-destruct, then have him eliminate his pet, and finally, convince him to end his own life.
If you’re successful initially but struggle with the next two attempts, eliminating his henchmen will allow you to focus solely on Yurgir. Be cautious when he’s low on health, as he will activate timed mines that pop upon contact or after a delay, so keep your distance during those final few rounds! After his defeat, you can pick up the Umbral Gem from the rubble near the entrance of the chamber.
If you’d prefer not to fight Yurgir, it’s possible to break his contract with Raphael by getting him to surrender and reveal the terms. A Dark Justiciar remains in the Gauntlet, and you’ll need to locate the book titled One Becomes Many at the base of the Statue of Shar and then light the candles in the circle. A rat will appear and offer treasures if you agree to leave it alone. However, if you refuse, engage the rats, and Lyrthindor, the Justiciar, will appear. Defeat him, and return to Yurgir for a chance to obtain the Umbral Gem.
Besides the gems, you also need the Spear of Night, which is part of Shadowheart’s quest, to kill a Selunite in the inner sanctum—let’s see how to find it.
Silent Library and Nightsong Puzzle
The Spear of Night is located in a locked room at the back of the Silent Library. First, you must defeat a few more undead justiciars, after which you face a riddle about what can silence the Nightsong in Baldur’s Gate 3. This guide will provide detailed steps, but here’s a hint: you’ll need a particular book.
Once you obtain the Spear of Night, head back to the pedestal and insert one of the Umbral Gems to power a lift. Ride the platform down, press the button on the right, and you’ll arrive at another pedestal that requires three gems to activate. Place all remaining Umbral Gems onto the pedestal to unveil a hidden entrance to the Inner Sanctum, leading to the Shadowfell. This is a point of no return; save your game before proceeding to ensure you don’t miss anything from Act 1!