Select Language:
The Prime Asus A320M-K motherboard is a reliable option for many PC builders. However, like any hardware, it can encounter issues over time. Detecting errors promptly can save you time and prevent further damage to your system. This guide outlines several effective methods for identifying errors on your Asus A320M-K motherboard.
Understanding Common Symptoms of Errors
Before diving into specific diagnostic techniques, it’s vital to recognize signs that your motherboard may have issues. Common symptoms include:
- Boot Failures: The computer fails to start or gets stuck at the BIOS/UEFI screen.
- Random Crashes: Unexpected reboots or blue screens of death.
- Hardware Malfunctions: Peripherals not functioning correctly or devices failing to be recognized.
- Performance Issues: Sluggishness or unresponsive applications.
Initial Checks
Start with these basic checks to rule out common problems before proceeding to deeper diagnostics.
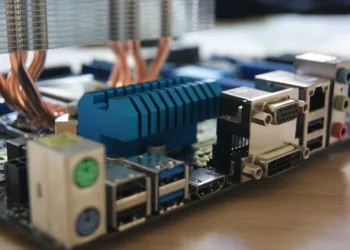
1. Visual Inspection
- Check Connections: Ensure all power cables and data cables are securely connected.
- Inspect Components: Look for damaged components, such as burned chips, bulging capacitors, or any signs of physical damage.
- Clean the Motherboard: Use compressed air to remove dust and debris that might obstruct proper connections.
2. Reset BIOS/UEFI Settings
Sometimes, incorrect BIOS settings can lead to performance issues. Resetting the BIOS can resolve conflicts.
- Power off the computer.
- Locate the CMOS battery on the motherboard.
- Remove the battery for about five minutes.
- Replace the battery and boot the system.
Advanced Diagnostic Methods
If the initial checks do not resolve the problem, consider these advanced diagnostic techniques.
1. Run Hardware Diagnostics
Most motherboards come with built-in diagnostics.
- MemTest86: This tool tests your RAM for errors.
- CPU Stress Test: Use software like Prime95 to ensure the CPU operates without issues.
- GPU Diagnostics: Tools like FurMark can help evaluate the graphics card’s functionality.
2. Monitor Temperatures and Voltages
Overheating or unstable voltages can lead to errors. Use software like HWMonitor or MSI Afterburner to check:
- CPU Temperature
- Motherboard Temperature
- Voltage Levels (Vcore, +12V, +5V, etc.)
3. Check Logs and Error Codes
Accessing system logs can provide insights into potential issues.
-
For Windows users, use Event Viewer:
- Navigate to Control Panel > Administrative Tools > Event Viewer.
- Look for the Windows Logs section and check both the Application and System logs for errors or warnings.
ADVERTISEMENT - BIOS Post Codes: If your motherboard has an LED display or speaker, pay attention to the beep codes or post codes that may indicate specific errors.
Additional Troubleshooting Steps
If issues persist after the above checks, consider these steps.
1. Reseat Components
- RAM Modules: Remove and reinsert the RAM. Ensure they click securely into place.
- Graphics Card: If applicable, reseat the graphics card.
- Cables: Disconnect and reconnect all power and SATA cables.
2. Test with Minimal Configuration
To rule out faulty components, boot the system with a minimal configuration. Disconnect all non-essential hardware:
- Use only one stick of RAM.
- Remove additional drives or peripherals.
- Boot with the integrated graphics, if available, instead of a dedicated graphics card.
3. Update BIOS/UEFI Firmware
An outdated BIOS can lead to compatibility issues:
- Visit the Asus support website for the latest firmware version.
- Follow the manufacturer’s instructions for updating.
Seek Professional Assistance
If you’ve followed the above steps and still experience issues, it may be time to consult a professional technician. They can conduct in-depth diagnostics and repairs that a standard user may not be equipped to handle.
By systematically checking these elements, you can effectively diagnose errors on your Prime Asus A320M-K motherboard. Regular maintenance and careful observation can keep your system running smoothly for years to come.