Select Language:
If you’re dealing with a laptop that displays a virtual keyboard on boot and runs significantly slower than usual, you’re not alone. This issue can arise after a problematic Windows update or installation. Fortunately, there are steps you can take to resolve the situation. Here’s a straightforward guide to help you eliminate that annoying virtual keyboard and restore your laptop’s performance.
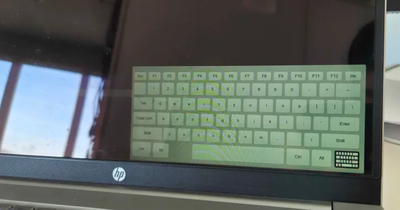
First, let’s understand the situation. When booting up, the on-screen keyboard appears, impacting your system’s speed and increasing boot times. In some cases, this keyboard can be closed by clicking an icon, but this workaround doesn’t address the root of the problem.
Here’s how you can tackle this issue:
-
Check Ease of Access Settings:
ADVERTISEMENT- Go to the Start Menu and open Settings (you can use the gear icon).
- Navigate to Ease of Access and select the Keyboard section on the left.
- Make sure that the On-Screen Keyboard option is turned off. If it’s on, toggle it to off.
-
Disable Tablet Mode:
- Swipe from the right edge of the screen or right-click the taskbar and select Tablet Mode.
- If your system is in tablet mode, turn it off. This can sometimes trigger the on-screen keyboard by default.
-
Modify the Touch Keyboard Settings:
- Still in the Settings, go to Devices and then to Typing.
- Scroll to the Touch keyboard section and ensure that the options related to showing the keyboard when no physical keyboard is attached are disabled.
-
Check for Windows Updates:
- Sometimes, glitches from previous updates can cause various issues. Make sure your Windows is up to date.
- Go to Settings, then Update & Security, and select Windows Update. Click Check for updates and install any available updates.
-
Explore BIOS Settings:
- Restart your computer and enter the BIOS (usually by pressing F2, F10, DEL, or ESC right after you power on).
- Look for any settings that might pertain to input devices or keyboards and make sure that all options are correctly set or disabled as necessary.
-
Use Device Manager:
- Right-click on the Start Menu and select Device Manager.
- Expand the Keyboards section. Right-click on your keyboard device and select Disable device if an on-screen keyboard is triggered by this driver. Be cautious with this step, as it can hide your physical keyboard.
- System Restore:
- If all else fails, consider running a system restore to revert your computer to a point before the issues began.
- Type “System Restore” in the Windows search bar, select Create a restore point, and then use the System Restore option.
Remember, each step may vary slightly depending on your specific version of Windows, so adjust as necessary.
By following these steps, you should be able to get rid of that virtual keyboard and enhance your laptop’s speed once again. Give it a try, and enjoy smoother performance on your device!
