
Select Language:
Exciting update: The treasured recordings of my bar mitzvah from the mid-90s are now digitized and ready for the digital age.
Although I have no desire to relive the cringeworthy moments captured on those tapes — oy vey, the awkwardness! — I received the original VHS tapes from my parents and realized they deserved a more permanent home than just gathering dust in a closet. Thanks to my USB capture card, a gadget I initially purchased to grab screenshots from various streaming services for my TechHive column on cord-cutting, I was able to convert them easily and affordably.
In this guide, I’ll provide a detailed walkthrough on how you can also digitize your VHS tapes or camcorder footage using similar techniques, along with some additional tips that might make you consider getting a USB capture card.
This article first appeared in Advisorator, Jared’s weekly tech advice newsletter. Sign up for free tech insights every Tuesday.
Essential Hardware
A USB capture card is a compact device that features an HDMI input on one end and a USB plug on the other. To use it, connect the capture card to your computer’s USB port, then link it to any device that outputs HDMI. You can record video from that device using a free software named OBS (we’ll discuss that in detail shortly).
Jared Newman / Foundry
There are numerous capture cards available on Amazon, often from lesser-known brands, priced under $20. While the specific model I used is no longer available, this similar one can capture video at 1080p at 30 frames per second or 720p at 60 frames per second. It includes a USB-C port but also comes with a USB-A adapter. (Alternatively, you might find one that operates the opposite way.)
In addition to the capture card, you will require a VHS player, or VCR. If you do not have an old one sitting unused, consider checking thrift stores like Goodwill, browsing Facebook Marketplace, or searching eBay.
Since most VCRs lack HDMI output — including the one I borrowed from my father-in-law — you will also need a composite-to-HDMI adapter, which I found on Amazon for about $10.
Your setup will look like this:
VHS Player → Composite video out → Composite adapter → HDMI out → USB Capture Card → PC.
I’m using a Windows desktop, but this method will work similarly on a Mac, Linux machine, or a Chromebook capable of running Linux applications.
Required Software

Jared Newman / Foundry
The other element of this setup is the free software Open Broadcaster Software Studio (OBS). While it’s popular among gamers for streaming their gameplay on platforms like Twitch and YouTube, OBS can also be used to record video from nearly any HDMI source.
After installing OBS and connecting your USB capture card, you can start recording your video with just a few simple steps:
- Under the “Sources” menu, click + and choose “Video Capture Device.”
- Assign the new source a name, such as “Capture Card,” and click “OK.”
- Select “USB 3.0 capture” (this represents your capture card) from the Device dropdown menu.
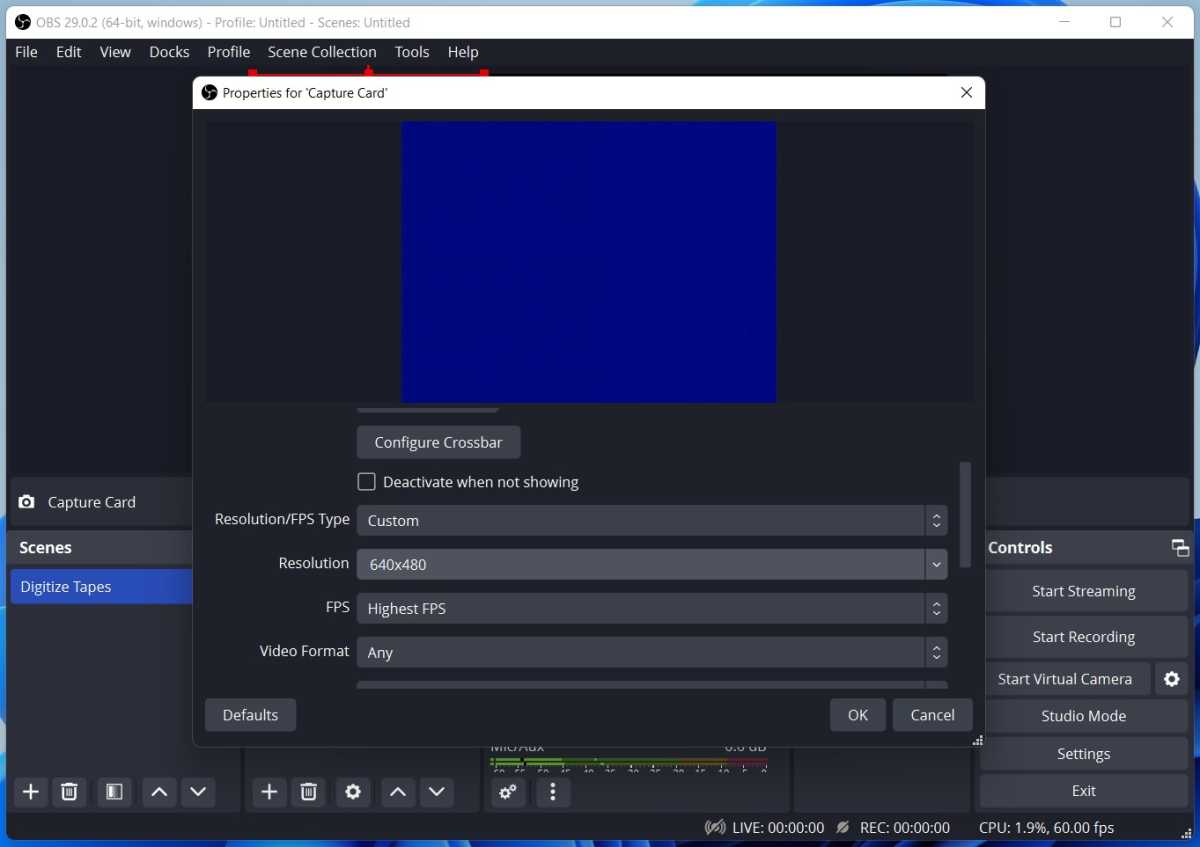
Jared Newman / Foundry
- To maintain the VHS format, adjust the “Resolution/FPS Type” to “Custom” and set the resolution to 640×480, then click “OK.”
- In the “Audio Mixer” settings, ensure that the “Desktop Audio” and “Mic/Aux” sliders are muted or set to zero.
- If you wish to listen to the tape player’s audio before recording, click ⋮ under “Capture Card” in the Audio Mixer section, navigate to “Advanced Audio Properties,” and set Audio Monitoring to “Monitoring and Output” for that Capture Card.
At this stage, if you play the tape in your VCR, OBS should display the video, albeit only in a small corner of the preview window. You can adjust it by dragging the video to fill the screen, then centering it in the preview window.
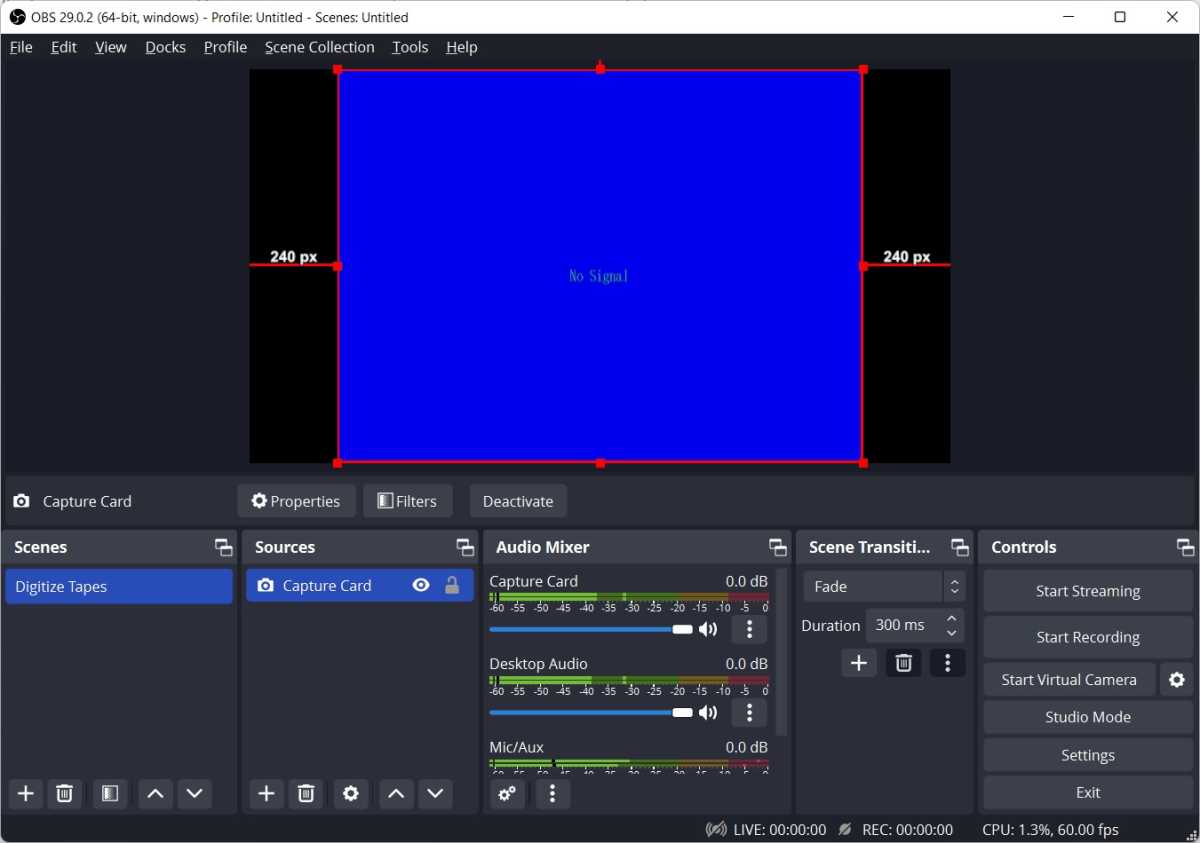
Jared Newman / Foundry
Now, with the VHS player running and “Start Recording” selected in OBS, just wait for the tape to finish. Once done, hit “Stop Recording,” and OBS will save your video as an MKV file, locating it in your computer’s video folder by default. If needed, you can edit it with any video editing software— I used the free Solveig AV1 Trimmer for Windows— or burn it to DVD using a program like DVD Styler.
Additional Tips for Using OBS and Capture Cards
While using a capture card and OBS are great methods for digitizing VHS tapes, there are other options available. You can invest in dedicated products like Vidbox or Roxio VHS to DVD for this purpose, or hire a professional service for bulk conversions.
However, if you own a VCR, getting the necessary adapters will only cost around $30, which is significantly less than alternative solutions. Moreover, this makeshift approach can yield dividends in the long run. Once you master OBS, it can be an effective tool for recording various types of content. Here are a few interesting uses:
- Recording from streaming devices: Connect a Roku or Fire TV Stick to your capture card and capture video from streaming platforms like Netflix and Disney+. You can also capture screenshots by right-clicking the preview window and selecting “Screenshot (Source).” This is useful for elaborating on my streaming device reviews at TechHive.
- Desktop recording: Click the + icon under “Sources” in OBS, and choose Display Capture to record your entire screen, or Window Capture for a single application. Do keep in mind that this won’t work with DRM-protected video services like Netflix.
- Recording yourself: You can add your webcam as a source from the Video Capture Device menu, allowing you to include video of yourself. This is perfect for overlaying commentary on other videos.
OBS’s “Scenes” feature allows you to flip between different layouts and capture setups. You can easily switch between a scene for digitizing VHS tapes, recording from streaming devices, and one featuring your webcam — no need to reconfigure everything each time.
Though OBS may have a learning curve — I’m still uncovering its features myself — it’s easy to see why many Twitch and YouTube streamers love it. With a little practice, the possibilities are nearly limitless.
This article first appeared in Advisorator, Jared’s weekly tech advice newsletter. Sign up for free tech insights every Tuesday.