Select Language:
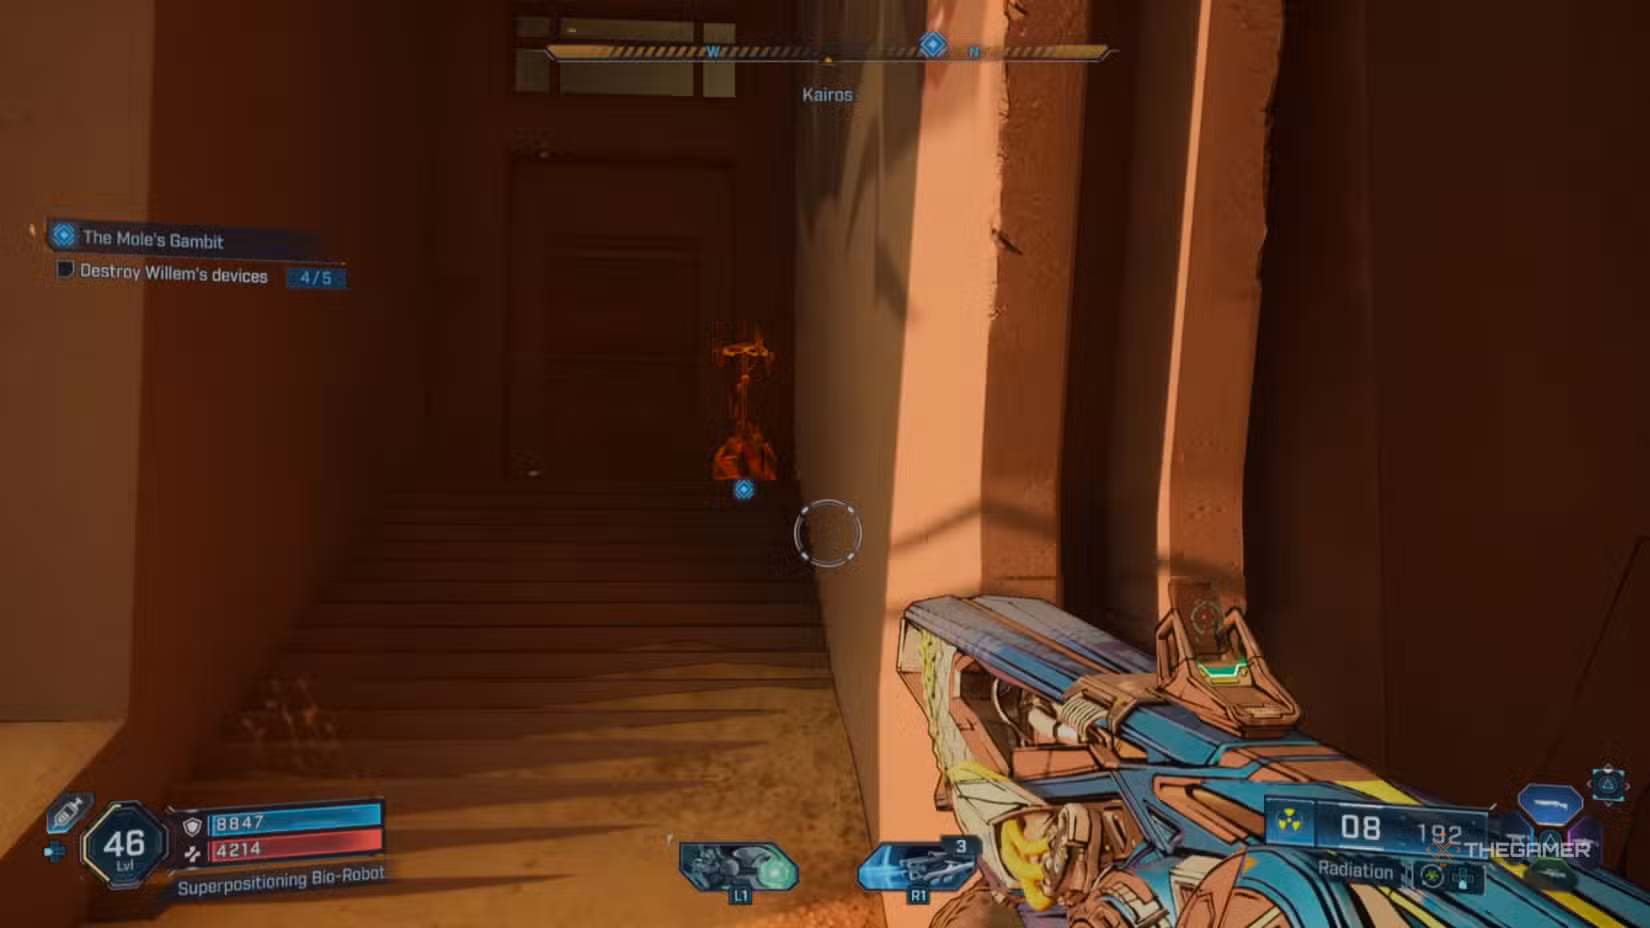
The Mole’s Gambit is the last mission in the Electi faction storyline in Borderlands 4. It’s pretty simple, but some parts might confuse you during your first playthrough. After traveling all across Carcadia Burn to find a traitor within Electi, it’s now your job to stop them before they return with reinforcements.
This guide will walk you through the entire mission. It starts in Carcadia Burn, and once finished, you’ll move on to a new area for more adventures.
How to Destroy the Relays
When you return to Carcadia City after your mission with Levaine, meet her in the Leaders Chamber to begin the last part of the story. She’ll send you to destroy the relays you set up earlier for Willem. Turns out, those relays are decoys designed to disable the city’s defenses.
Sometimes, Levaine may stand to the left of where she should be, making the objective marker disappear. If this happens and you can’t talk to her, just restart the game. She should be back in the right spot afterward.
You don’t need to remember exactly where all five relays are, because you can find them easily by sticking to the walls of the search zone. Exit the Leaders’ Chamber and stay along the right side when you reach the area. As you go along the walls, you’ll spot the first three relays. Then, cross the street and go back the way you came to find the other two. Each relay is marked with an objective indicator when you get within about 30 meters.
Relays Locations
- Up the stairs in the alley past the open plaza on the right from where you enter the search zone.
- On the second floor of the storage awning in the next section.
- At the end of the road, near a broken chain-link fence around the corner.
- Heading back toward the Leaders’ Chamber, near a burning barrel and some concrete bags, just before jumping to the area above.
- At the building with red triangles, past a barbed wire fence, and up the stairs.
Important: The relays can only be destroyed with melee attacks. They are immune to all other damage types.
Getting the EMP Parts
Your next stop is the Marrow Narrows Ripper Camp just north of Carcadia. Here, you’ll gather parts to build Yorick’s makeshift EMP device. Return to the Leaders’ Chamber and exit through the back door near the vending machines. Use the ramp in the corner to glide down to the coastal flats below. From there, drive west to the camp, but approach from the far side since that’s the entrance.
Clearing out the Rippers isn’t mandatory for collecting parts, but it makes things easier. Extra Rippers will spawn each time you grab a part, so dealing with them helps prevent getting overwhelmed.
EMP Parts Locations
The camp is roughly circular, with cranes and containers around the edges:
- The detonator is on a platform in the southwest corner. Beware, a Ripper will pop out next to it when you pick it up.
- The antenna is on a red crane in the northwest corner, accessible by jumping across hanging containers.
- The casing is on the ground in the northeast corner. It stands out because it glows green, not teal, which means you might mistake it for trash or environmental debris.
Finding Leader Willem
Once you have the parts, your next move is to find where Willem is assembling his synthetic army. To do this, intercept an Order convoy heading southeast. The easiest way is to fast travel to the Rustical Hurl silo (if you’ve claimed it), then use the zipline or drive up the hill and follow the road northeast. The convoy will appear shortly.
Eliminate all enemy waves and hack the console on the trailer bed to discover Willem’s location. Then, head east and south to The Excrucible, a heavily guarded area with Order troops, including Bulkheads and a Menacer hover-tank. Make sure your fire answers both shields and armor.
Note: The Menacer usually has an Invulnerability Orb that must be destroyed first before it can be damaged.
Grapple up to the upper level through the broken platform on the east side. Fight your way to the main entrance and follow the path to the synth storage unit. Assemble the EMP device inside by placing the three parts in order; this will start charging it.
Using the EMP Device
Once assembled, you need to survive for 90 seconds against an endless wave of synths. They keep spawning as you defeat them, so you can fight aggressively for extra XP and loot or play it safe to ensure success. When the timer finishes, all remaining synths are destroyed automatically, and your path to Willem is clear. Head into the next room to stock up at the vending machines, then drop into the boss room to face Willem.
How to Defeat Leader Willem
Willem alternates between jumping onto the deck above to snipe and returning to the ground to attack with mid-range elemental weapons. He isn’t particularly dangerous unless swarmed by his synth minions. Stay near the room’s entrance side and keep firing at him. Kill synths when they get too close or if you need to fight for survival. Using Shock damage quickly disables his Shield, while Corrosion or Cryo weapons break through his Armor.
Pro Tips: Torgue Sticky Rounds are effective—load him up and detonate them all at once for significant damage.
After defeating Willem, collect his loot. The door behind him leads back to the facility entrance. From there, you can choose to restart the fight with Moxxi’s Big Encore or return to Carcadia City to finish the mission. You won’t need to go back immediately; just talk to Levaine in the Leaders’ Chamber to hand in your mission and claim your rewards. You can either take the longer route, doing other missions and collecting items along the way, or fast travel straight back for your XP and gear haul.