Select Language:
In Vampire: The Masquerade – Bloodlines 2, you can boost your relationships with different vampire clans by completing special tasks unique to each one. Doing so unlocks new abilities that aren’t usually part of your character’s original skills, helping you develop a more varied and well-rounded character over time.
If you’re interested in the artistic Toreador clan and its contact, Patience, your goal is to gather nine Crosses of Saint James that are hidden around Seattle. While some of these crosses might come easy to find, you’ll need to seek them out intentionally if you want to complete the quest.
How to Start the Toreador Affinity Quest
To begin working on the Toreador clan relationship and start collecting crosses for Patience, you’ll need to finish the main story of VTM – Bloodlines 2. This is done through the quest called “A Star of Cold Aspect,” which ends with a boss fight against Benny and a significant story decision.
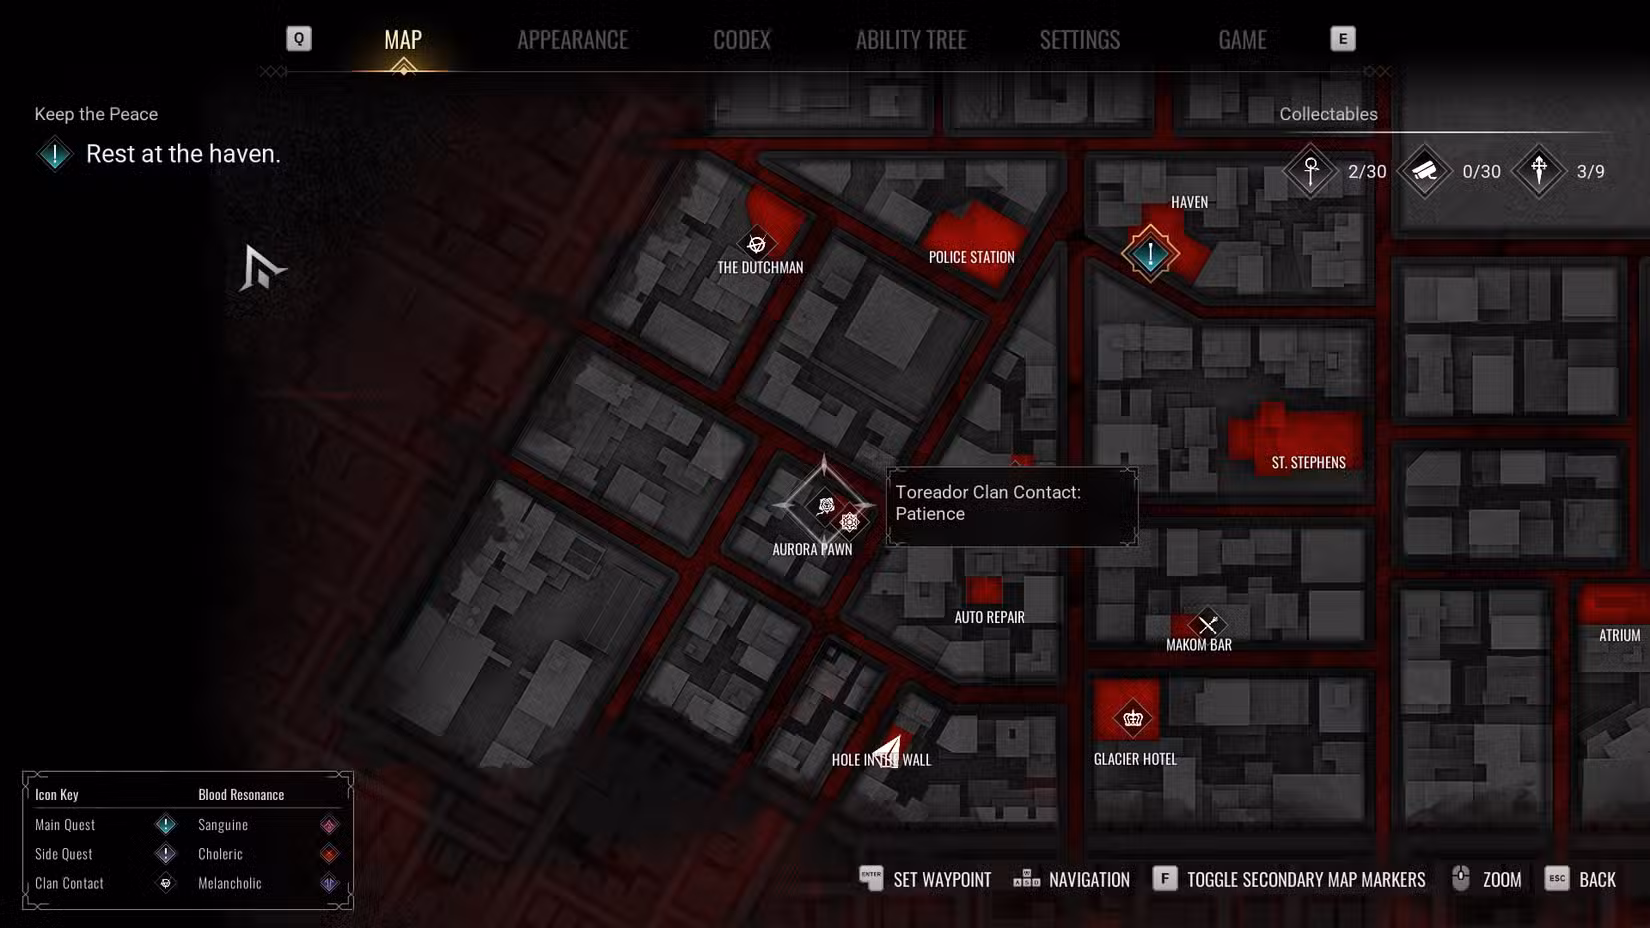
Once you’ve completed that, you’ll return to the game world with the option to pick your next task. Head over to Aurora Pawn (shown on the map above) and go into the back room to talk with Aurora. They’ll tell you that the more crosses you bring, the happier they’ll be.
While you earn relationship points for each cross you find, you’ll need to collect all nine to fully complete the quest. Luckily, most crosses are easy to reach and are located near important story landmarks that you’ll visit multiple times.
All Cross of Saint James Locations
Below are the spots where you can find each cross:
Cross #1: Aurora Pawn
- Inside Aurora Pawn, at the back closet near Patience’s office, to the right, stuck to a pin-up poster on the wall. You can grab it immediately after starting this quest.
Cross #2: Wake The Dead
- Head east from Aurora Pawn, on the left side of the street, you’ll find the bar called Wake the Dead. On the larger shelf inside, on the second row from the top, is the cross on a display stand.
Cross #3: Haven
- This is one of the easiest crosses to find. Return to your safe house (your Haven). Use the stairs up two floors, find the Christmas tree in the corner, and take the cross from atop the pile of presents near the tree.
Cross #4: The Dutchman
- Enter The Dutchman nightclub, walk across the dance floor, go under the balcony, and through the doorway in the corner. The cross is stuck on a cracked mirror above the rightmost sink.
Cross #5: Muldoon Auto Repair
- Visit Muldoon Auto Repair, where you met Benny’s sire, Max. Inside, go to the back room through the doorway and find the cross hanging on a tool rack on the left wall.
Cross #6: Makom Bar
- Go to Makom Bar, where Fletcher, your Ventrue contact, works. Inside the back office, pass the first row of shelves, turn left, and find the cross sitting on top of a barrel in the far corner.
Cross #7: Hole In The Wall
- Head to the anarch hideout, Hole in the Wall. Inside, on the right side near the neon flamingo sign, turn right and check the dartboards in a small alcove to find the cross.
Cross #8: Glacier Hotel
- Enter the Glacier Hotel, take the elevator up to the penthouse where you met Lou. Walk to Lou’s office, go upstairs to the balcony, and look for a yellowed photo of a large building—this is where the cross is hidden.
Cross #9: Weaver Tower
- Travel to Weaver Tower, located on the far east side of the map. Take the elevator to the top floor, turn right, and check the right arm of the couch in the small waiting area for the cross.
With all nine crosses collected, you can return to Patience, deepen your bond with them, and even pursue romantic options if you’d like. As you gather crosses, you’ll also notice that your ability points for the Toreador skills start to decrease in cost, allowing you to upgrade your character further in Vampire: The Masquerade – Bloodlines 2.