Select Language:
The multiplayer experience in Sniper Elite: Resistance brings to mind a time when games were packed with various multiplayer options, even if the main focus was single-player play. This game introduces some distinctive elements that set its multiplayer mode apart from others.
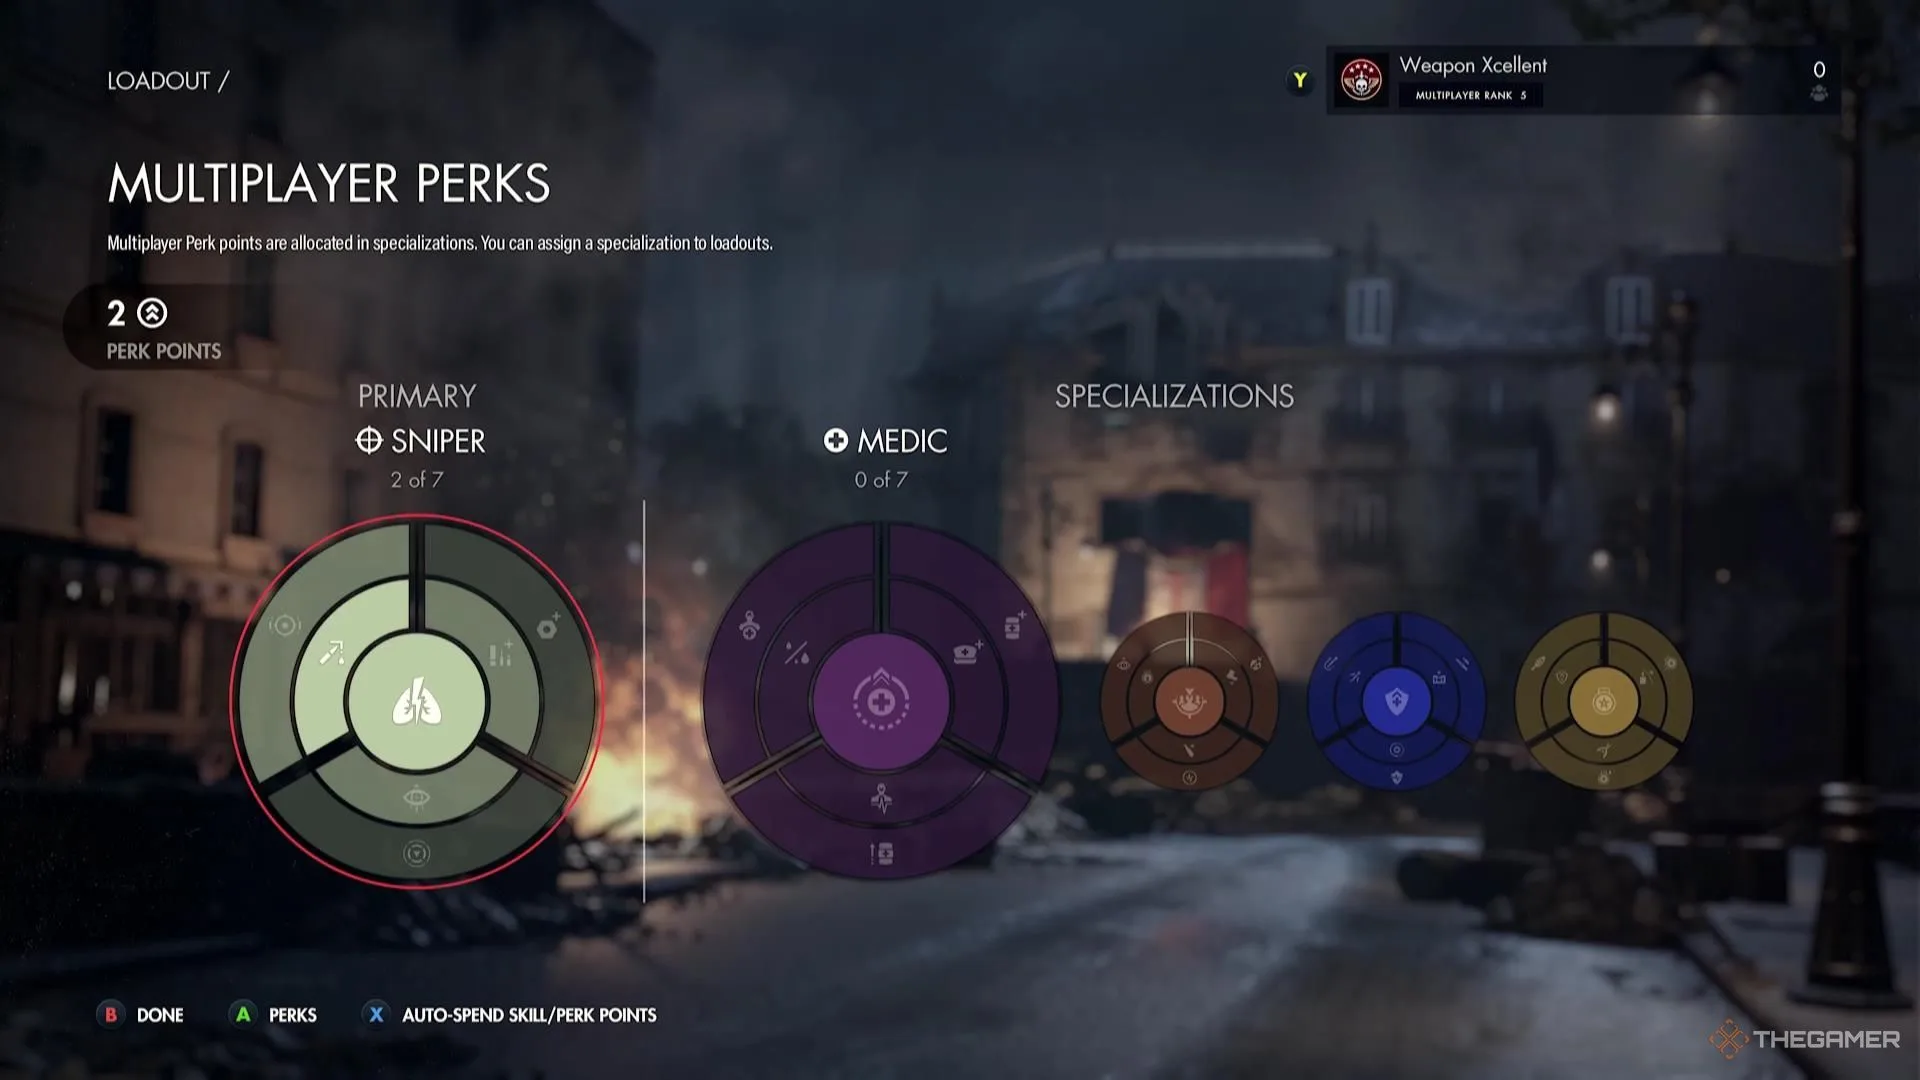
Once you hit level five in the multiplayer segment of Resistance, you’ll have the chance to explore different specializations beyond the default Sniper specialization. These unique specializations can significantly alter how your character plays, and while it may take a while to unlock them, it’s worth understanding how it all functions.
How to Unlock Multiplayer Specializations
To unlock multiplayer specializations, you must reach level five; keep in mind that this level is separate and doesn’t correlate with your campaign progress. Essentially, everything you do in multiplayer is distinct, including weapons and attachments.
Achieving level five in multiplayer generally takes just a few hours.
Your starting specialization is the Sniper specialization, which you can use right away. Any Perk Points you earn on your journey to level five can be applied to that specialization or saved for another one you might prefer.
You earn one Perk Point for every level you gain.
Each Specialization and Its Perks
There are five specializations in Resistance, each featuring seven perks that you can unlock over time.
Your starting Sniper specialization remains equipped, and you can also select one of the other two specializations to complement it.
Sniper Specialization
Here’s a rundown of the perks available in the Sniper specialization:
|
Perk |
Cost |
Description |
|---|---|---|
|
Breath Training |
1 |
This reduces the stamina cost of entering Empty Lung by 20%. It greatly enhances your ability to maintain Empty Lung, which can be game-changing in certain modes like No Cross. |
|
Ammunition Stripper |
1 |
This enables you to extract ammo from weapons you find. While it’s not extremely vital, it can be lifesaving in protracted battles. |
|
Open Senses |
1 |
This boosts your movement speed in Focus Mode and extends the range of Focus Mode to 16 meters. It’s particularly useful for players who frequently use Focus, although it’s less impactful in modes like No Cross. |
|
Crippling Shots |
1 |
This gives your rifle bullets a 5% chance to cause bleeding, inflicting a damage-over-time effect that the enemy must stop with a Bandage or Med Kit. It’s a small chance, but when it triggers, it significantly impacts your adversaries. |
|
Extra Item Slot |
2 |
This provides an additional item slot in your loadout, enhancing your versatility or letting you focus on specific aspects of your kit. |
|
Audio Location |
2 |
This helps determine player locations based on sound. It grants you valuable intelligence, but reacting to that intel is key to making it worthwhile. |
|
Nerves of Steel |
2 |
This decreases scope sway when you take damage. This is especially beneficial in close-quarters combat where every shot counts. |
Medic Specialization
Here’s a look at the perks within the Medic specialization:
|
Perk |
Cost |
Description |
|---|---|---|
|
Medical Training |
1 |
This increases the speed of your healing and reviving allies by 25%. It’s particularly beneficial when playing in a team. |
|
Deep Pockets |
1 |
This increases your carry limit for Bandages and Med Kits by one each, significantly affecting longer engagements. |
|
Calming Nature |
1 |
This provides allies within an eight-meter radius with a 20% speed boost in heart rate recovery, making it especially useful in tight squeezes. |
|
Haemostasis |
1 |
This makes you immune to bleeding caused by other perks and halts any damage-over-time when your health is below 15%. |
|
Efficient Healer |
2 |
This returns a Bandage when you use a Med Kit on someone at 50% health, extending your healing supplies. |
|
Medical Expert |
2 |
This doubles the healing effect of bandages, helping your healing supplies stretch further. |
|
Rejuvenator |
2 |
This allows you to revive allies at 50% health, enabling them to get back into action faster. |
Scout Specialization
Below are the perks that the Scout specialization offers:
|
Perk |
Cost |
Description |
|---|---|---|
|
Spotter |
1 |
This increases tagging speed with binoculars by 25%, allowing you to quickly mark enemies and dive for cover. |
|
Light Footed |
1 |
This cuts your visibility on radar while moving by 50%, a major advantage in close-quarters situations. |
|
Deep Pockets |
1 |
This boosts your carry limit for Decoys and Bottles by one, aiding in tactical plays. |
|
Keen Eye |
1 |
This highlights enemy traps within eight meters unless you’re aiming down sights. |
|
Acrobat |
2 |
This enables takedowns from above and reduces fall damage by 10%, making this a satisfying and strategic option. |
|
Athlete |
2 |
This minimizes heart rate increase while sprinting by 25%, which is useful for quick tactical movements. |
|
Concentration |
2 |
This keeps Focus effects from diminishing quickly when exiting Focus Mode, enhancing overall effectiveness in crucial moments. |
Assault Specialization
Check out the perks available in the Assault specialization:
|
Perk |
Cost |
Description |
|---|---|---|
|
Toughened |
1 |
This grants an additional 25 health that does not regenerate once lost. |
|
Deep Pockets |
1 |
This raises your grenade and TNT carry limit by one, which can greatly enhance explosive tactics. |
|
Irrepressible |
1 |
This decreases the delay in health regeneration by 33%, allowing you to regain health a bit quicker during skirmishes. |
|
Good Arm |
1 |
This extends grenade throw distance by 15%, giving you more explosive options even from a distance. |
|
Opportunist |
2 |
This grants one box of ammo for a weapon upon melee killing an enemy, giving you occasional unexpected resupplies. |
|
Juggernaut |
2 |
This lessens negative effects from taking damage, including a 50% reduction in heart rate increase and lessened movement penalties. |
|
Grenade Throwback |
2 |
This allows you to throw grenades back at enemies, potentially catching them off guard. |
Engineer Specialization
Here are the perks offered by the Engineer specialization:
|
Perk |
Cost |
Description |
|---|---|---|
|
Anti-Handling Device |
1 |
This prolongs the time it takes to disarm your mines and ensures they detonate if someone attempts to disarm them, making it a cunning weapon choice. |
|
Deep Pockets |
1 |
This increases your mine carrying capacity by one, enabling better coverage of areas to thwart enemies. |
|
Bomb Defuser |
1 |
This neutralizes enemy Anti-Handling devices and slows down the mine defusal process. |
|
Extra Padding |
1 |
This diminishes incoming explosive damage by 10%, enhancing your survival rate in explosive scenarios. |
|
Explosives Expert |
2 |
This allows quick deployment of landmines, though it bypasses the benefit of your Anti-Handling Device perk. |
|
Enhanced Shrapnel |
2 |
This adds a 15% chance for your mines to cause bleeding, creating critical situations for enemies who survive the initial blast. |
|
Master of Destruction |
2 |
This extends the range of your Panzerfaust by 20%, facilitating long-range assaults on stationary targets. |