Select Language:
Just like its predecessor, Moonlighter 2: The Endless Vault revolves around exploring dungeons, completing runs, battling various monsters, and collecting relics. These relics are then sold to earn money, which you use to buy new weapons, upgrade Will’s abilities, and enhance his shop. The core gameplay loop keeps you going back out for more.
Multiple game systems and mechanics add depth, such as combat nuances and strategies like how to optimally store relics in your backpack for better effects. To help you get started, here are some useful tips for your first hours in Moonlighter 2.
Since Moonlighter 2 is currently in Early Access, some details might change as the game develops.
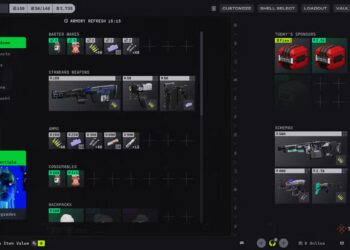
How To Price Your Relics Correctly
One of the most important skills to learn early on is setting the right price for your relics. This can be challenging because you don’t know what most customers are willing to pay initially. The good news is that overpricing doesn’t usually punish you; if a relic is too expensive, a customer might just leave angry, but another will come along shortly after. You can always adjust the prices, so it’s wise to aim high.
Each customer reaction to your pricing gets recorded in your Codex, so you can check it later. Unless you have special perks or encounter wealthy customers, aim for the “Perfect Price” (the smile with no golden eyes reaction). Customers will leave happy, and you’ll earn more money.
Pricing relics involves some trial and error. To help, here’s an estimate of typical relic prices:
| Relic Type | Price Range |
|---|---|
| Common | 20–80 gold |
| Uncommon | 200–400 gold |
| Rare | 500–900 gold |
| Epic | 1,000–1,500 gold |
| Legendary | 2,000–2,400 gold |
Note that some customers may pay more or less depending on active perks or their type, so these ranges are just a guide.
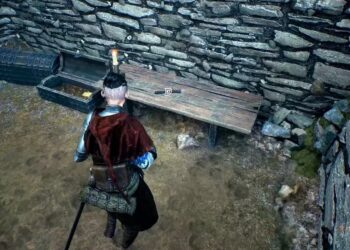
How To Throw Enemies Out Of The Scenario
During the tutorial, you’ll learn that some enemies have a health bar mark signaling they’re about to enter a Rupture state. When they do, attacking with your backpack can send them flying in a straight line. Use this to knock enemies into other enemies, traps, or out of the arena.
Generally, it’s best to send ruptured enemies out of the level, as this automatically kills them. Traps or other enemies might only do minor damage if you choose to trap or distract enemies instead. To aim for knocking enemies away, look for a circle instead of a cross when using your backpack attack.
How To Arrange Your Backpack
Organizing relics in your backpack is a common, ongoing task. Many relics have curses that activate when placed in specific slots or near certain other relics. Planning your layout can maximize earnings when you return.
A good tip is to keep basic relics that modify others—like Shock, Burn, or Petrify—in locations where their curses aren’t triggered. Save their effects for when you find rarer relics that can benefit from them. This way, you enhance the value of high-quality relics instead of normal ones.
Remember, curses are canceled when you return to the hub, so don’t carry relics back to town simply to preserve curses for your next run.
Expand Your Shop As Soon As Possible
You’ll spend many hours unlocking upgrades, but focusing on the shop expansion early on is highly recommended. At some point, Ms. Scratch will offer to enlarge your shop for about 25,000 gold. While this is a large expense early in the game, it’s worth saving toward. Expanding your shop will give you more display cases for relics and a larger storage chest for your robot helper—both invaluable for progress.
There’s also a second upgrade available for 50,000 gold if you keep saving.
Never Forget Your Current Challenge
Suppose you need 5,000 gold to meet a Vault challenge. You might think to sell everything you find to reach that goal quickly. However, once the Vault reaches the goal, it stops counting your gold, and the challenge advances. Instead, aim to sell just enough relics to reach the target—then leave the rest for your next run. This approach helps you make steady progress without overshooting the goal.
Keep in mind, you can still earn gold for personal use during the run; this tip only applies to Vault challenges.
You Can Escape At Any Time
If your health is low during a fight, watch for the pendant icon in the bottom right. This indicates you should consider retreating. Exiting the dungeon early isn’t a penalty—when you return to the hub, you keep all relics and materials you gathered, unaltered.
This option works even during boss fights. If you’re about to die and run out of potions, hold the pendant button for a few seconds to safely retreat. It’s better to leave and preserve what you’ve earned than to risk losing everything.
Always Pick A Combat Perk That Changes Your Attack
There are over 30 combat perks, each modifying aspects like attack strength, special moves, or gun damage. For boss fights and tougher enemies, prioritize perks that increase your damage output—such as those that boost Attack, Special, or Gun damage. For example, perks like Bubble Special enhance both damage and apply effects like Foam.
While other perks are useful depending on the situation, focusing on damage increases ensures you’re prepared for the biggest threats. Critical hit chances or damage boosters, like Thunder stacks from bombing breakable objects, are also highly valuable.
How To Choose A Weapon
There are four main weapon types:
- Short Sword: The most balanced and straightforward choice, reliable with perks providing specific benefits.
- Large Sword: Slow but deals massive damage and has good reach—best for players who prefer patience.
- Spear: The most defensive weapon, with the longest range, though it’s generally slow and its special attack isn’t very strong until later upgrades.
- Gauntlets: Fastest weapon, great for quick damage, but leaves you vulnerable since you need to be close to enemies.
You can unlock all 20 weapons in the game. Success is possible with any weapon, so choose based on your preferred playstyle and what kind of fighter you want to be.
Blo-Beam Is The Best Gun
Moonlighter 2 offers three guns, and the Blo-Beam stands out by a wide margin. It has extensive range, high damage, and hits every enemy in its path. Although the Blo-Blaster is good for close quarters, the Blo-Beam offers the best overall performance.
Plus, it can be upgraded to give you an extra shot, making it even more effective.
Selecting Recipes Is Key
Every run contains exactly one “recipe stage,” which rewards you with a special recipe—often for furniture or unique items that cannot be found elsewhere. Choosing this stage should be a priority, as it provides access to valuable recipes.
When you spot a recipe stage, plan your route to reach it, and make it the central aim of that run. The recipe offers long-term benefits and can boost your crafting options.
Remember, Mind Your Route Choices
Deciding which paths to take during your runs involves balancing multiple factors: relics you hold, attack upgrades, health needs, and potential encounters with strong enemies. Planning your route carefully helps maximize efficiency.
When you find a recipe stage, focus on paths that lead directly to it. These stages are rare but rewarding, offering unique items you can’t obtain elsewhere. Prioritize reaching them to make the most of each run.