Select Language:
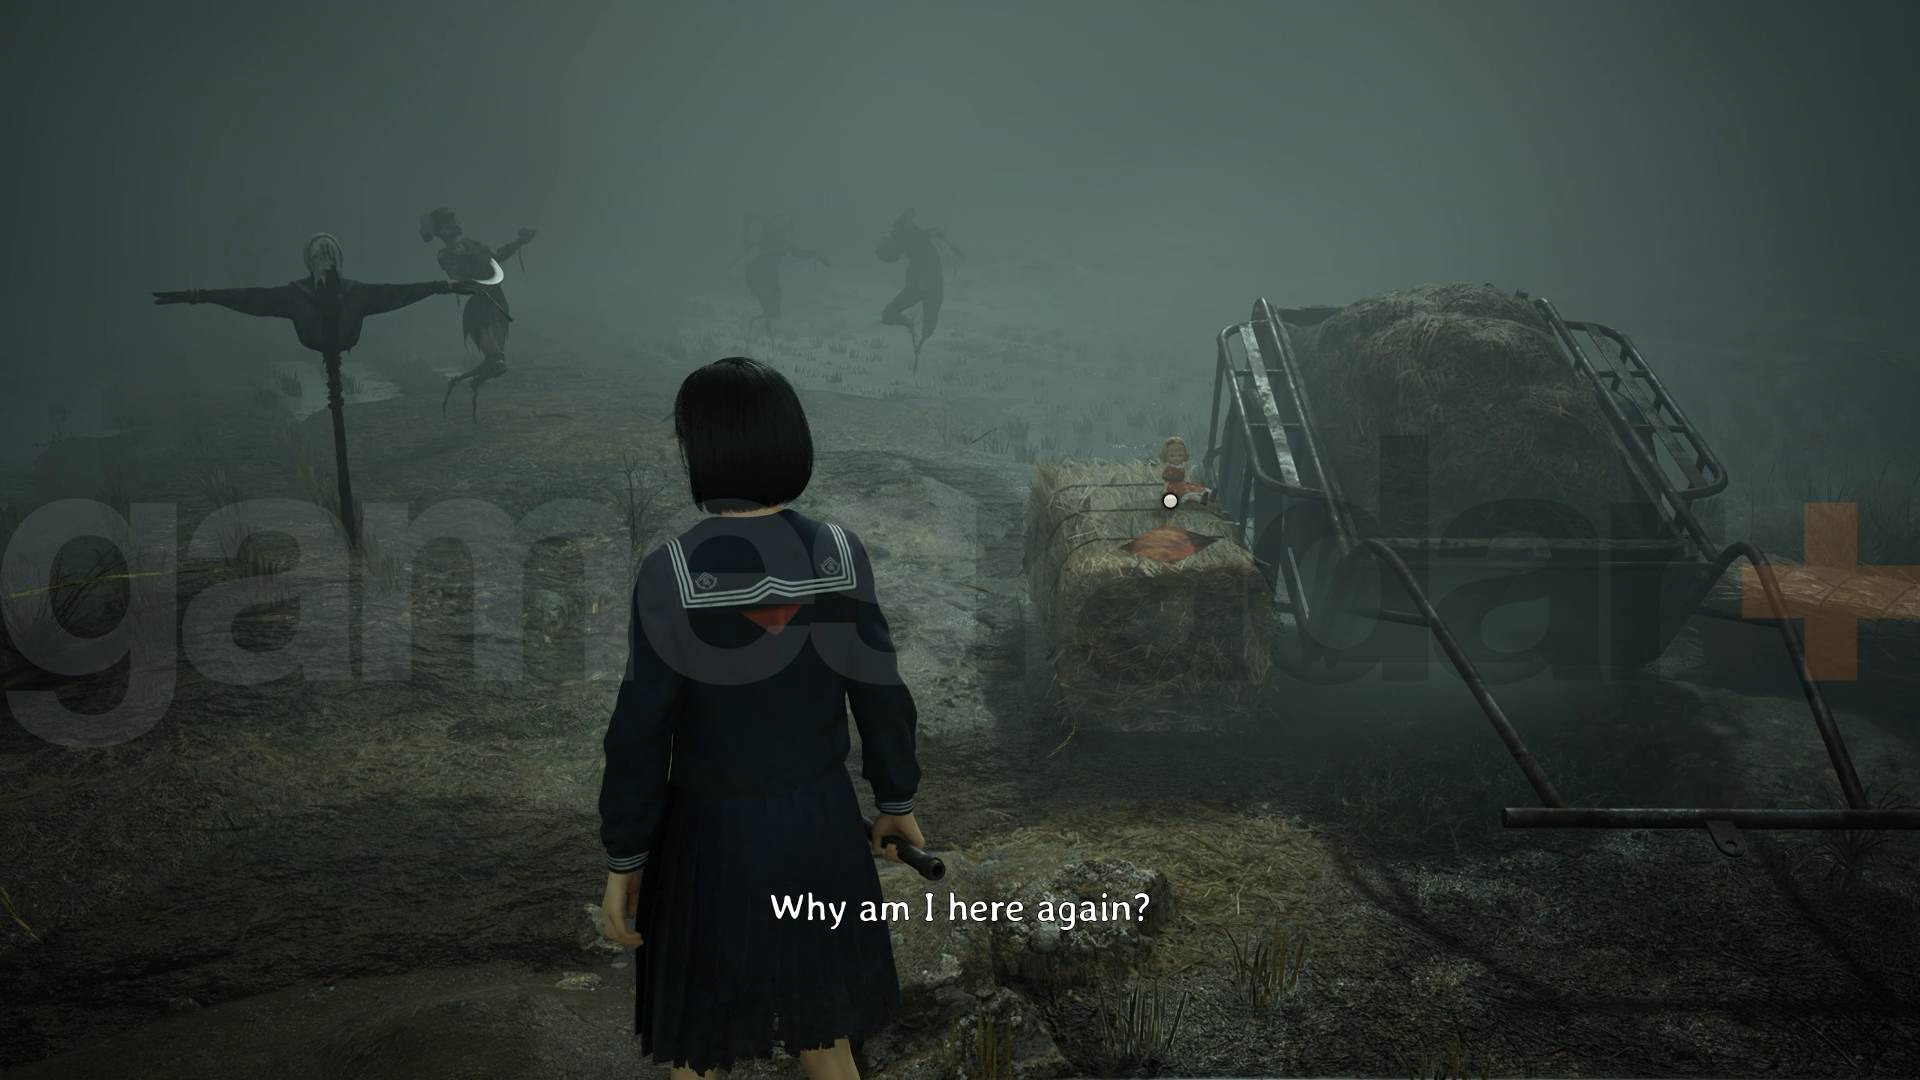
The scarecrow puzzle in Silent Hill f has you escape from a field by pulling on thorns. All the clues start with “Can you imagine how I feel?” and help you identify the correct scarecrow to interact with. Pull the right thorn, and you can move forward. If you choose wrong, you’ll be attacked by a monster, and you’ll need to fight it before trying again.
Most likely, you’ve been attacked quite a bit by now because the clues aren’t very clear, and it’s hard to translate messages about polite smiles or other hints into helpful actions. As you progress, the clues remain confusing, and there are five scarecrows to solve this way.
Once you’ve completed the Silent Hill f altar puzzle and opened the Shrine vault, this challenge is much longer and less obvious. If you’re having difficulty escaping the field and keep getting attacked by scarecrows, here’s what you need to do.
To escape the field, use a hint from a wooden scarecrow with a covered face. The goal is to figure out which scarecrow, resembling Hinako and her friends, will help you. Each scarecrow has a thorn stuck in it. Find and pull the correct thorn, and the scarecrow will point the way out, accompanied by a gust of wind to guide you. If you pick the wrong one, it will attack, and this will happen multiple times.
I’ll explain the solutions for each scarecrow shortly, but in the meantime, try to stay close to the main area. The main scarecrows won’t attack unless you pull the wrong thorn, but other wandering scarecrows will attack instantly if you get too close or stray too far. You can’t explore elsewhere because if you run away, you’ll end up back where the scarecrows are, risking attracting more monsters. Your best bet is to stay put until you get a clear direction.
Here are the specific scarecrows and what to do with each:
Scarecrow 1: “I’ll put on my polite smile for now”
Find this scarecrow just below its shoulder on the right side. Pull the thorn there to receive a card saying, “It’s okay. You don’t have to be afraid anymore.” It then points behind her, with a gust of wind indicating the way forward.
Scarecrow 2: “What it’s like to have been deceived by you for so long”
Near this scarecrow, look for a thorn under its left armpit. Pulling that thorn reveals the message, “That’s what I said to you, when I saw you so scared,” guiding you on the next step.
Scarecrow 3: “He never looked at me the way he looked at you”
This one’s belly is the target. Thorns there, when pulled, display the message, “I wonder why I called you over,” hinting at the direction to go next.
Scarecrow 4: “You’ve always been such an eyesore”
Find the thorn on the left side of this scarecrow, near its armpit. Pull it to see, “I could have just lied to you. Told you to go any which way,” which points to your next move.
Scarecrow 5: “You hurt me, and even hurt him, too”
This final scarecrow’s thorn is on its left shoulder. Pull it out to reveal the long message, “You hurt me, and even hurt him, too. Do you know how it feels to force a smile when I’m staring at that disgusting face of yours?” Once this is done, the challenge ends.
Afterward, you’ll find yourself back in the village with a new goal: follow Shu, who’s nearby. The next stage involves exploring and solving the missing object part, which is straightforward but involves some misdirection to find it.
That’s the basic process to escape the scarecrow field in Silent Hill f. Stay alert, pick carefully, and avoid wandering too far to prevent unnecessary monster attacks. Good luck!