Select Language:
PvP in Final Fantasy 14: Machinist Guide
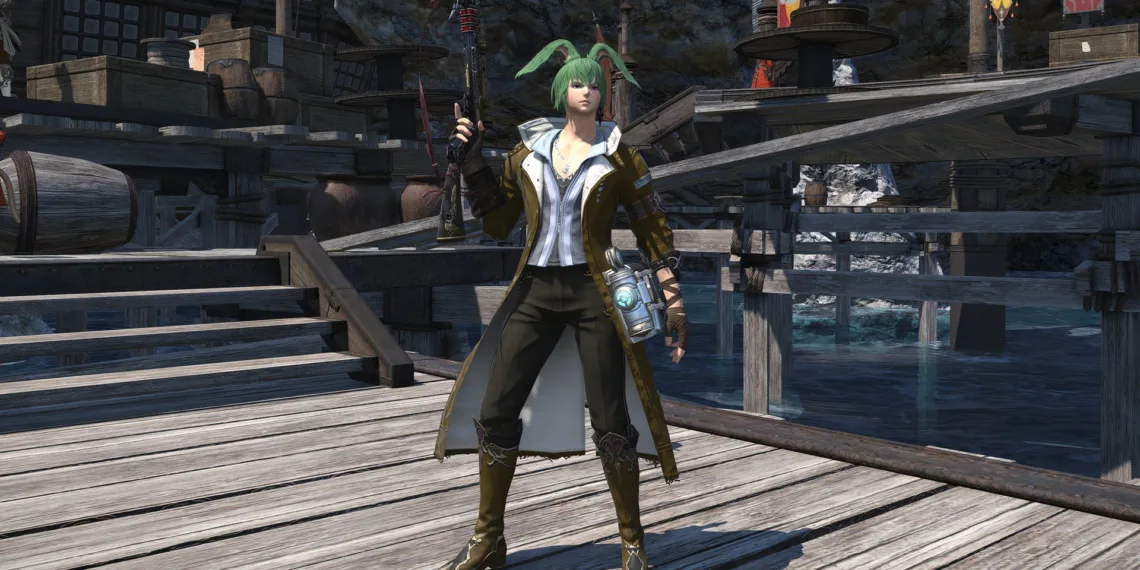
While Player vs. Player (PvP) content in Final Fantasy 14 might not have the same level of popularity as its Player vs. Environment (PvE) counterpart, it certainly presents some fascinating concepts. A notable aspect is how each Job is adapted to fit this different gameplay style, retaining its fundamental identity while also incorporating fresh features.
Overview
The Machinist serves as an excellent illustration of this adaptation. Though it isn’t always the top choice for high-end PvE, its PvP version stands out as a formidable damage dealer. It features impressive damage output, a wealth of utility, and among the most enjoyable — and at times, infuriating — Limit Breaks in PvP.
As a Physical Ranged Job, the Machinist excels in PvP as a fast-paced damage dealer, capable of dishing out significant damage from a safe distance. Its abilities can be accessed with just a click, adding interesting effects to each action.
Despite having a quick cast time for its basic attack (a rarity compared to PvE), this is the only downside to the Machinist’s kit. After landing enough normal shots, it switches into quick-fire mode for a few seconds, allowing players to unleash powerful attacks against targets with the classic Wildfire nuke.
Signature abilities like Drill and Chain Saw also make an appearance. The significant distinction is that you cannot directly select which tool you’ll use next, but you can utilize Analysis to apply unique effects, such as Stuns, Damage Increase debuffs, or even double damage outputs.
The Machinist has adequate defensive measures to compensate for its lack of mobility, meaning you won’t need to be overly concerned about those pesky melee players or tanks swooping in before you can regroup with your team in Crystalline Conflict. Overall, it’s a great choice for players eager to climb the ranks.
Job Action Breakdown
The Machinist focuses on using burst abilities in sequence while filling gaps with Blast Charge attacks. Once fully charged, you start firing off your Blazing Shots rapidly and gain a Movement Speed boost, which allows you to either chase down low-HP enemies or reposition yourself strategically.
Though it lacks massive AoE capabilities, its strength lies in eliminating a single target swiftly. Once you weaken your opponent’s defenses, that player typically stands little chance against your burst damage.
| Action | Cast Time | Recast Time | Attack Type | Information |
|---|---|---|---|---|
| Blast Charge | 1.44s | 2.4s | Weaponskill | Deals 6,000 potency to one target. Movable while casting. Grants a Heat stack that lasts 15s and leads to the Overheated state, which changes the action to Blazing Shot. Overheated lasts for 5s. |
| Blazing Shot | Instant | 1.5s | Weaponskill | Deals 8,000 potency to a single target. Usable only in Overheated state. |
| Full Metal Field | Instant | 30s | Weaponskill | Hits the target and nearby enemies with 10,000 potency, causing two hits but the second hit deals half damage. Triggers Overheated state. |
| Wildfire | Instant | 24s | Ability | Places a ticking bomb on the target that explodes later. Each hit with Weaponskills raises the bomb’s damage by 4,000 potency, up to a maximum of 16,000 potency. Lasts for 8 seconds. |
| Detonator | Instant | 1s | Ability | Immediately explodes the Wildfire bomb on the current target with current stacks. |
Unlike other physical ranged roles, casting times on basic attacks may feel unusual, but it’s essential for aiming accurately. Blast Charge will be your primary attack while you wait for other abilities to become available. It also activates Overheated, your strongest damage state.
Blazing Shot stands out as one of your most stylish abilities, unleashing a fast barrage in Overheated mode. While this phase lasts only a brief moment, it can create a significant impact. Wildfire is most effective when used during Overheated, making it easy to achieve its four-hit requirement.
General Strategy
Machinists thrive at dealing substantial damage to single targets. Their AoE options are effective but usually best applied for picking off isolated enemies. The key rule is to not cap on Drill and its follow-up actions as they regenerate every ten seconds, allowing for consistent damage output.
Analysis has a longer cooldown, making it a bit more situational. Prioritize Chain Saw = Air Anchor > Drill > Bioblaster, adjusting based on the match’s needs. Always use Analysis on your first Drill to maximize damage potential in your opening skirmish.
As you begin to engage, ensure you use all your cooldowns before unleashing Blast Charges. A well-timed first Wildfire could secure an early elimination. Typical combos would be:
Analysis + Drill > Wildfire + Full Metal Field > Blazing Shot (x3) > Bioblaster.
This combination allows Wildfire to explode with high intensity while setting up a potent follow-up tool after Bioblaster. Detonator shouldn’t be a frequent choice, unless you are confident it will secure a kill for you.
In PvP modes, focus on exposed targets. When the chance arises, don’t hold back from bursting them down. If your Limit Break is available or nearly charged, ensure your target has already used their defensive resources before landing the kill shot.
Deploying your turret should always be a priority. It can provide shields for allies or poke enemies from a distance, offering higher utility than it appears. Always aim to maximize its potential on the battlefield.
Crystalline Conflict Strategy
Crystalline Conflict is often the best setting for a Machinist. The 5v5 matchups allow for players to leverage their high damage output effectively. Stay back initially, letting tanks and melee classes charge in, and then follow up when it’s your time to push forward.
Using Scattergun can help push enemies away, clearing objectives more efficiently. Bioblaster paired with Analysis can provide valuable AoE damage during team skirmishes.
Manage your Blast Charges carefully. If you find yourself in the Overheated state, it typically signals that other abilities are ready for use. Avoid capping on your cooldowns, unless the area is clear of enemies.
When it comes to using your Limit Break, don’t save it for too long. Focus on taking out enemy backline players but ensure to weaken them first. The ultimate is particularly effective against players sneaking objectives during overtime or when they’re preoccupied with other engagements.
Frontline Strategy
In Frontline matches, the Machinist’s lack of AoE damage can be a significant disadvantage, although it functions similarly to other modes. Maintaining awareness of the backline is crucial, as your damage can go unnoticed amidst chaos.
When securing objectives, utilize major cooldowns on essential targets while saving some for potential fights to come. Scattergun remains beneficial for preventing enemies from reaching strategic points.
Stay close to your team, using ranged attacks to secure kills and assists, which can enhance your overall effectiveness in battle. Remember that increasing your Battle High boosts your Limit Break’s damage, making it even deadlier.
Always make calculated decisions on when to engage in fights. Focus on objectives while being ready to capitalize on enemies attempting to escape. The Overheated state allows for better movement, letting you reposition if necessary.
For optimal performance, focus your abilities on Bioblaster and Chain Saw, particularly prioritizing Chain Saw for its potential to hit multiple targets at once. Be cautious of divers in the game and use your skills strategically to aid your allies.
In summary, adeptly managing your abilities, positioning yourself wisely, and targeting enemies efficiently are key strategies to master the Machinist role in PvP.


