Select Language:
Quick Links
In Indiana Jones and the Great Circle, Indiana Jones finds himself pondering numerous questions after his experiences at the Vatican. Along with Gina, he secretly boards a Nazi airship, landing them in Gizeh. Here, they encounter a challenging environment packed with secrets and Nazi foes to overcome.
Among the secrets waiting to be uncovered are the Lost Artifacts. Just like in the Vatican, you’ll need to seek these out, as they’re cleverly concealed in hidden spots. Simply exploring may not lead you to them, so it could be wise to pause your adventure to hunt for these artifacts. This guide provides details on where to find all five Lost Artifacts.
Complete Locations of Lost Artifacts in Gizeh
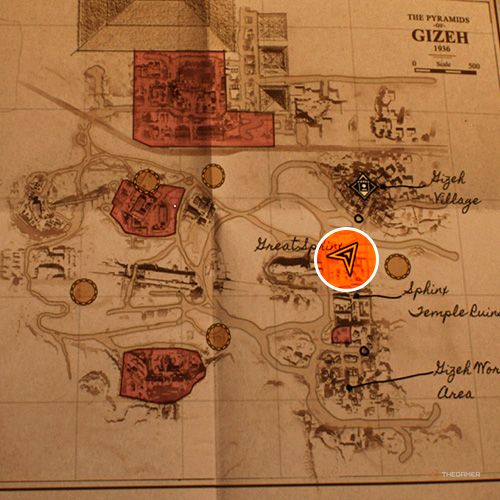
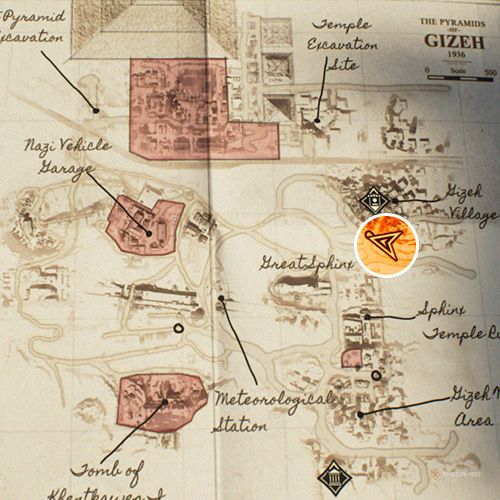
Later in your journey through Gizeh, you can buy the Gizeh Artifacts booklet from Asmaa, the NPC from whom you purchased the lighter in Gizeh Village. It costs 350 Egyptian Pounds, and once acquired, it will allow you to see all Lost Artifacts marked on your map.
Finding the Ivory Mask
|
Map Image |
Location |
|---|---|
|
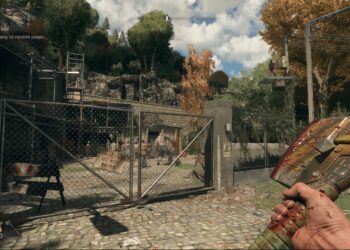
To find the Ivory Mask, start by positioning yourself in front of the grand Sphinx statue. Once you’re facing it, to your right, you’ll see a wooden bridge. Just past the bridge, look to the right into a pit where you’ll find a crashed vehicle. Jump down to explore. While you’re looking around, you’ll see a small hideaway nestled between the cube-shaped stones. Crouch down and crawl through to get to the Ivory Mask hidden inside. |
Finding the Jambiya Dagger
|
Map Image |
Location |
|---|---|

|
After you discover the large mural depicting the Idol of Ra with Nawal and watch the cutscene, don’t rush out of the temple. In the mural room’s corner, you’ll find two wooden platforms. First, climb up to the one near the spotlight, then leap to the other platform. This will lead you directly to the Lost Artifact. |
Finding the Aduno Koro
It’s recommended to seek out the Aduno Koro after you’ve acquired the Wehrmacht Uniform Disguise to simplify your search.
|
Map Image |
Location |
|---|---|
|
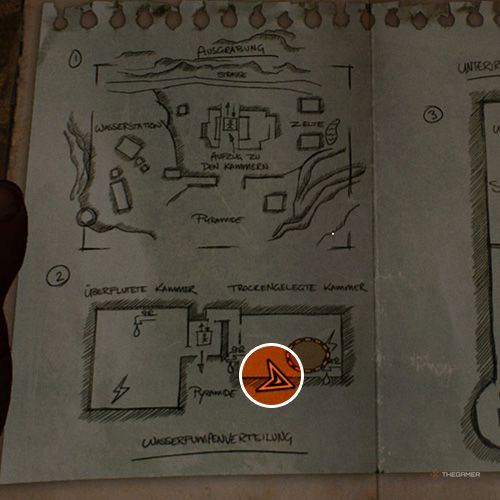
Start by accepting the ‘Secret of the Queen Mother’ side quest from Omar. While at his place, take the dig map from the table. Upon arriving at the dig site, you’ll find that the elevator switch is unresponsive on your first try. On your second attempt, you’ll need to power it, but it still won’t work. Afterwards, trace the red cable behind the elevator into the temple, which will lead you to a large room with a wooden platform encircling a central pillar. Climb up to the top of the wooden platform, then jump to the ledge on the wall nearby. Ahead, you’ll see a ledge protruding where you’ll spot a skeleton. If you sprint and jump towards the skeleton, you’ll uncover the lost artifact beside it. |
Finding the Ba’al Statuette
|
Map Image |
Location |
|---|---|
|
This lost artifact can be found south of Gizeh Village. Start at the direction signboard for fast travel. Look to the east, and you’ll see a white tent nestled between two electric poles. Head south from the tent and ascend the wall where you’ll find a truck. Jump down onto the truck from the wall, then carefully climb to the front of the vehicle. Proceed to the back of the truck where you’ll discover a banana crate. Lift the crate to uncover a suitcase hidden beneath it. Open the suitcase to reveal the lost artifact inside. |
Finding the Nok Sculpture
|
Map Image |
Location |
|---|---|

|
This lost artifact is located to the south of the road in the southeastern section of your map. It’s the same area where you first arrived in Gizeh and snapped a photo of the blue tent by scaling the hill with your camera. From the hill, head south, and you’ll find a small hole between the stones. Use your lighter to light the straw inside the hole. Once it’s ignited, crawl through the hole to access the artifact beside the skeleton. |