Select Language:
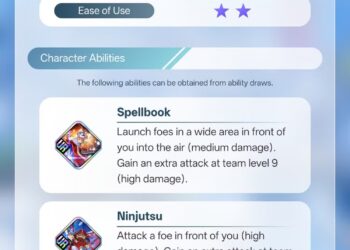
There are many interesting and unusual weapons and armor in Crimson Desert. From a sword that sends out tracking energy orbs to a fan that creates large tornadoes to attack enemies, there’s plenty to discover while exploring the expansive open world of the game.
One of the coolest armor pieces is the Marni Laser Helm, which does exactly what its name suggests. However, obtaining this helm isn’t as simple as grabbing some regular items. Here’s where to find the Marni Laser Helm and how to get it if you’re not yet strong enough for this part of the game.
Marni Laser Helm Location
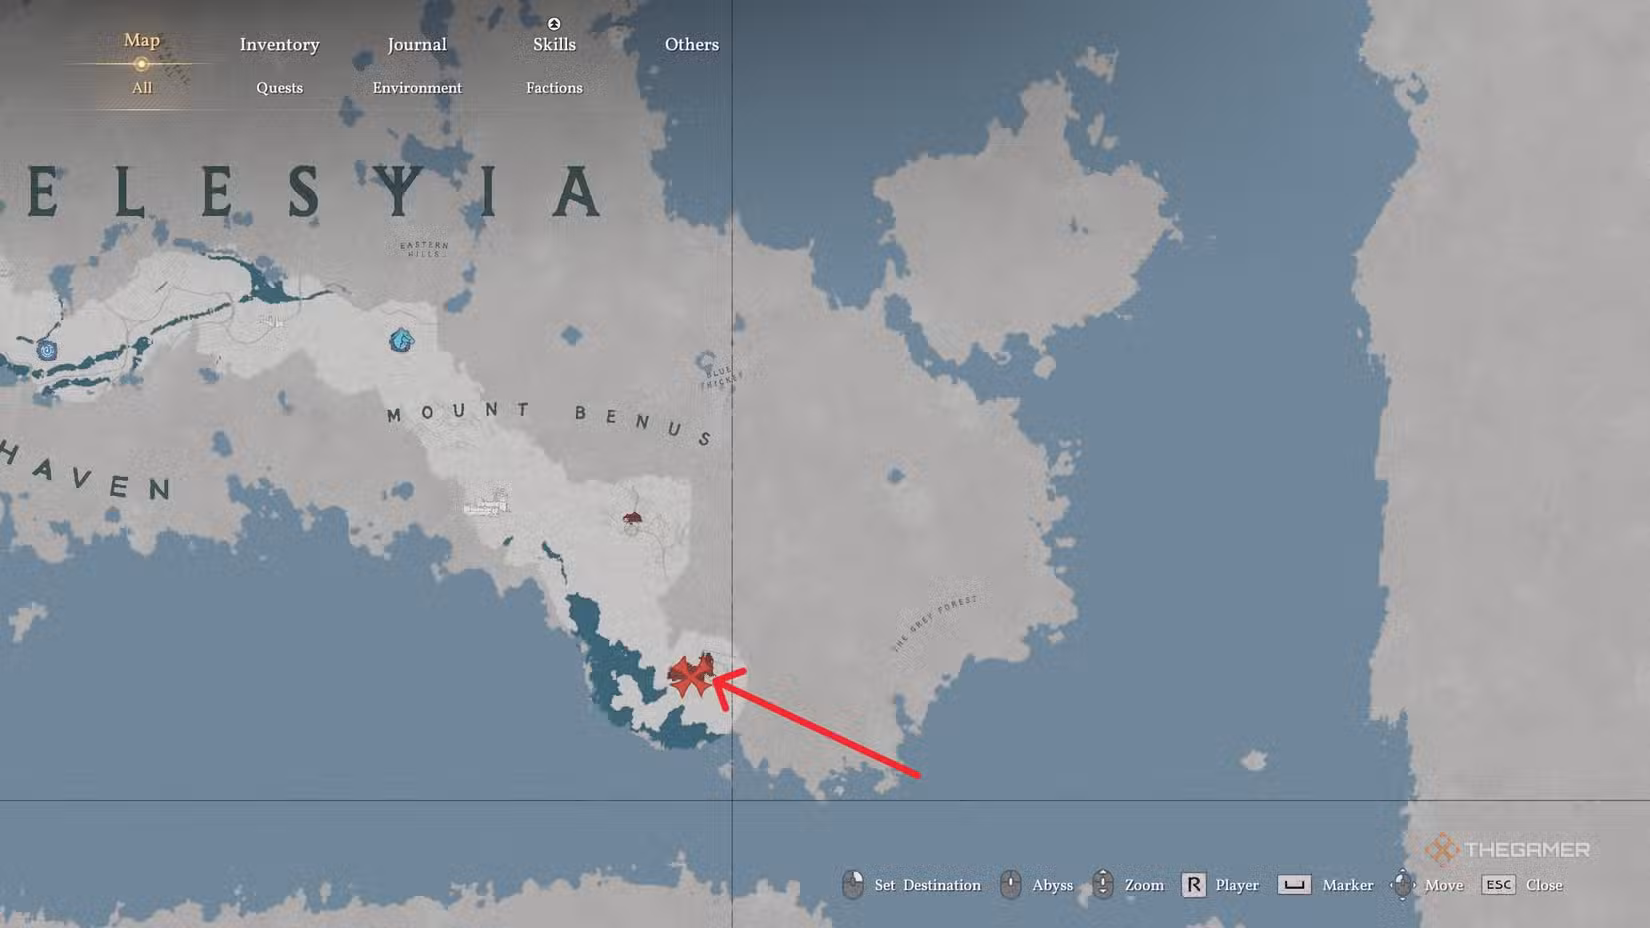
To find this piece of armor, head to the far eastern part of Delesyia and then move to the southeastern area. Specifically, look for Marni’s Masterium, a large fortress located on the coast on a cliff, completely surrounded by flying dragons.
Reaching this spot is challenging. You’ll need to travel across the map, starting from Hernand, making your way through Demeniss, and reaching Delesyia. It’s best to attempt this only after finishing Chapter 5 to ensure you have enough health, defense, and attack power to survive the dangers.
Demeniss isn’t too tough if you stay on the main roads, but Delesyia is much trickier. The island is full of mechanized dragonflies that shoot laser beams. These enemies can do a lot of damage if your defenses are low, and they will chase you relentlessly.
When you arrive at Marni’s Masterium, it’s wise to climb up the cliff along the coast to avoid detection by the golem enemies patrolling the area. The fortress is hostile at first, so you’ll want to sneak in quietly to avoid combat and grab the helm. The main threat here is the swarm of fast-moving, mechanized dragonflies, so fight only if necessary and try to stay out of sight of the rest of the base.
Getting the Helm
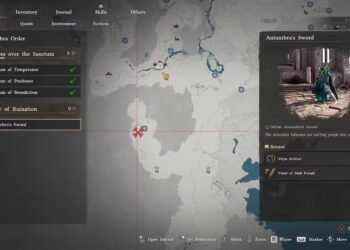
You will find the helm inside a small workshop room, shown in the image above. It’s on a table inside. If you arrive and can’t pick it up, that means enemies are still alert and looking for you. In that case, hide and wait or eliminate the enemies quietly.
There’s a large golem in the courtyard that can deal massive damage, so try to enter the workshop through the missing roof to avoid detection.
Once you successfully grab the helm, pick it up and either continue your mission or leave the base. To use the helm, equip it like any other helmet first. Then, press right on your D-Pad to select it in the radial menu. You can activate its powers by pressing both the Left and Right triggers. When activated, you’ll briefly lock onto multiple enemies, and boxes will appear around them. After targeting, fire a barrage of explosive lasers at all locked enemies to deal damage. Remember, the helm has a cooldown—you’re only able to use this laser attack once every minute.