Select Language:
The Recon Class in all Battlefield games has traditionally been difficult to use, and this is especially true in Battlefield 6. However, as you play with single-fire weapons, you will earn upgrades that make using the Recon Class much easier. One useful upgrade is the Rangefinder.
This attachment allows your shots to reach targets at very long distances and gives you the ability to fine-tune your aim as you fire. To become more accurate at longer ranges in Battlefield 6, it’s important to understand how the Rangefinder works.
How to Equip the Rangefinder
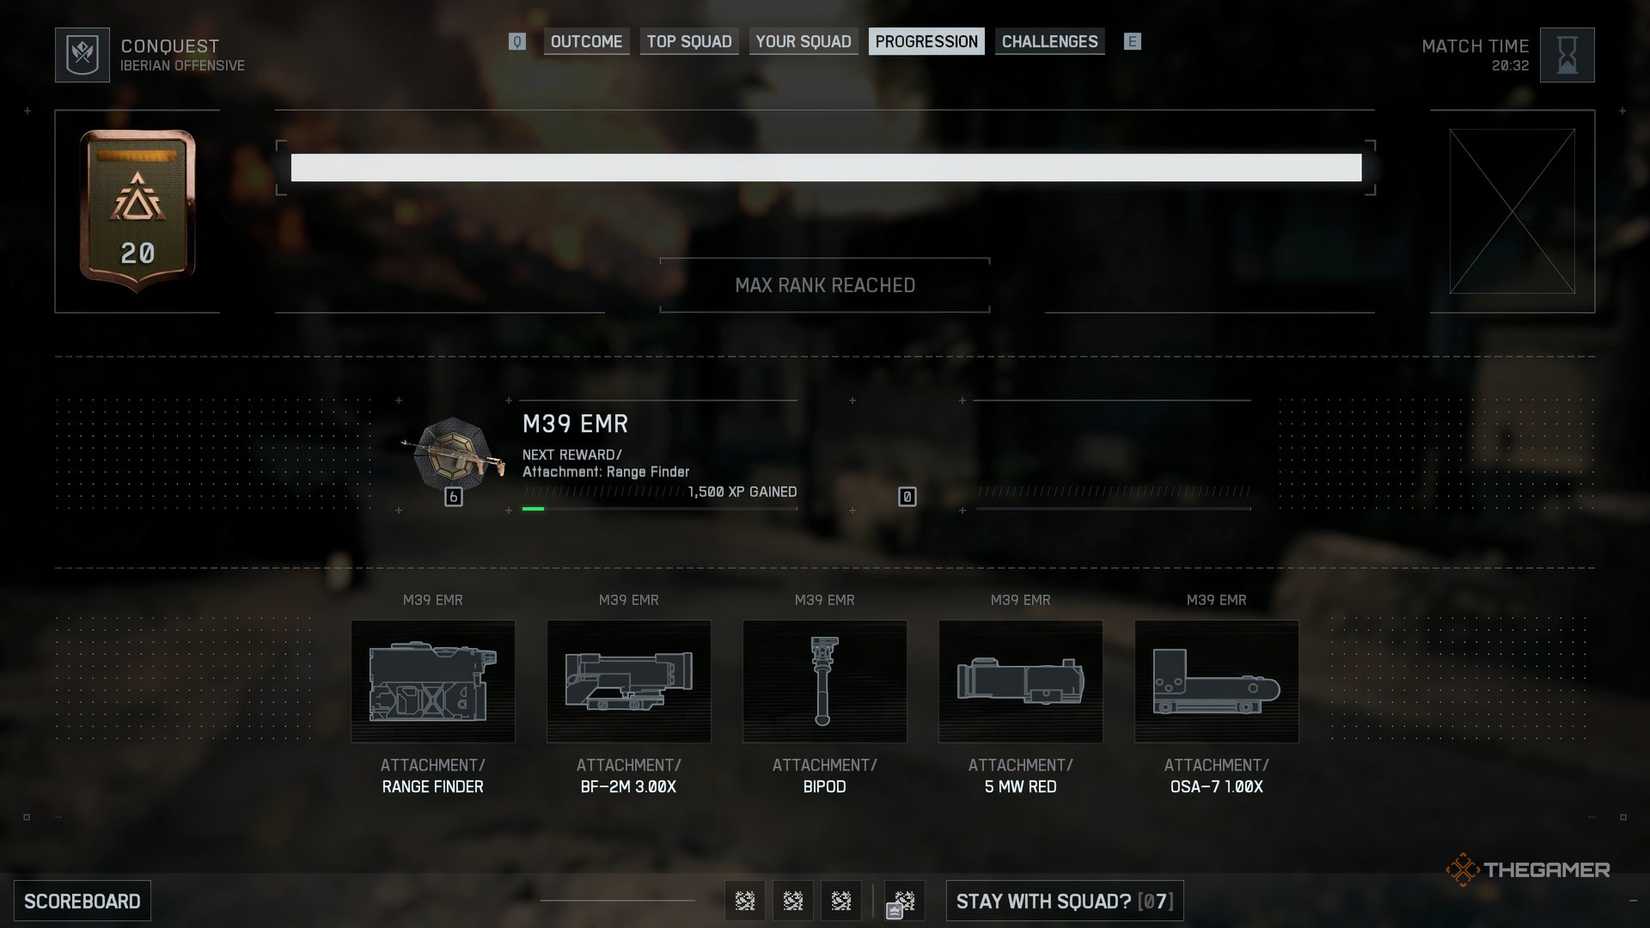
First, you need to unlock the Rangefinder attachment. This can be achieved by leveling up the mastery of any semi-automatic rifle—such as sniper rifles or DMRs—up to level four.
Improving the mastery level of a weapon in Battlefield 6 involves earning many kills with that weapon and completing in-game challenges during your matches.
Tip: If you’re not confident with sniper rifles, consider using a DMR. DMRs fire faster but do less damage, making them easier to handle than snipers.
Once you’ve leveled up a sniper or DMR to level 4, go to the weapon’s customization menu. From there, select the category that shows different attachments and look for the “Right Accessory” option, usually positioned on top of the gun. The Rangefinder can be equipped here, provided you’ve reached the required mastery level.
How to Use the Rangefinder
Unlocking and equipping the Rangefinder is straightforward, as the game gives hints about how to earn it. However, understanding how to operate the attachment can be confusing for many players.
Normally, when using a DMR or sniper rifle and shooting at long-range targets, you need to aim slightly above their heads to compensate for bullet drop caused by gravity. With the Rangefinder equipped, you can aim directly at enemies instead.
On the bottom right of your screen, just above the weapon icon, you’ll see a reticle with a number like “100m” next to it. This indicates the default range of your weapon.
Having a Rangefinder allows you to change this distance. To do so, press B on your keyboard or down on the D-Pad if you’re using a controller. The number beside the reticle will then change to reflect the new range, anywhere from 100 meters up to 500 meters.
You can also adjust the Rangefinder’s zero distance by changing it manually. To do this, aim down sights (ADS) and then press the designated button—to switch the range, press B or down on the D-Pad. When you do, the number next to the reticle will change, allowing you to target enemies at various distances easily.
Note: To make the Rangefinder work, you need to attach a magnified scope to your gun. Non-magnified scopes, like iron sights, won’t be compatible.
When you aim down sights, the scope’s reticle will stay steady on your target regardless of movement, making long-range shots more reliable. Remember to manually change the zero distance of your Rangefinder as you move across different map areas to maintain accuracy and target enemies at different ranges without worrying about bullet drop.