Select Language:
The Wolf Maiden is a challenging World Boss located in the Kiafeng region of Where Winds Meet. She’s known for her unpredictable attack style and high damage output, making her a tough opponent even for experienced players.
You can encounter the Wolf Maiden both in the open world and during the Feast Before the Beasts quest. Regardless of when you fight her, you’ll need to be well-prepared and skilled. Here’s an overview of her moves and how to defeat her.
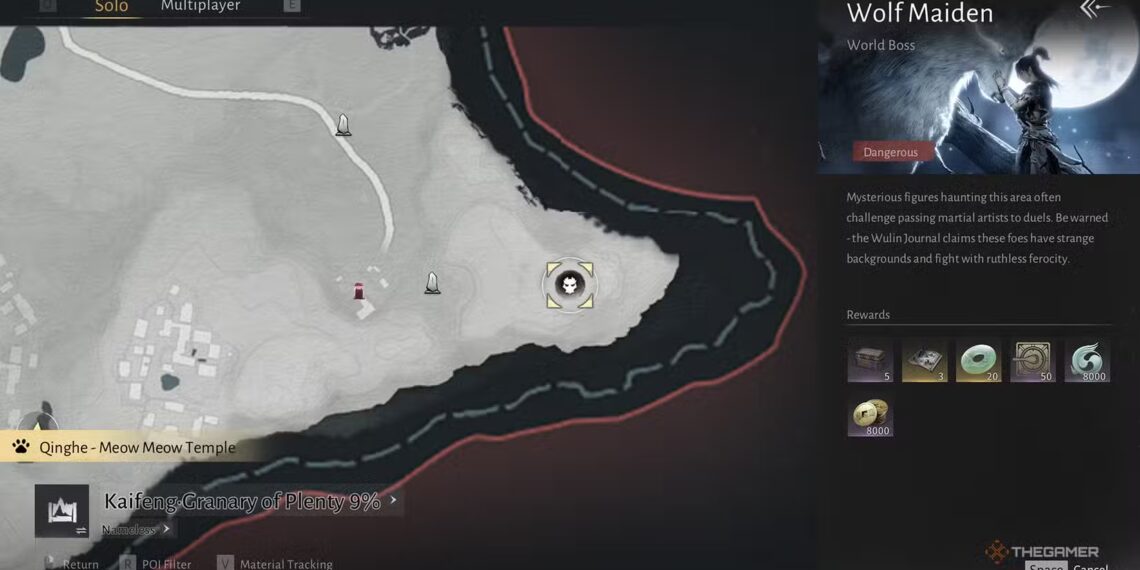
Wolf Maiden Boss Location
The Wolf Maiden is situated in Desperation Ridge, in the southeastern part of Kaifeng. To start the battle, turn the in-game clock to night and walk into the arena.
Wolf Maiden Boss Fight Walkthrough
Once the fight begins, the boss will jump onto a nearby tree, and a wolf will appear. The wolf howls and then charges at you. This sequence will happen twice before the Wolf Maiden jumps down. You can dodge or parry the wolves’ attacks, but parrying won’t drain her Qi gauge.
After dodging the wolves, the Wolf Maiden will leap down and perform a quick gold attack while falling. Dodge just before she hits the ground to avoid damage, and the fight officially starts.
Most of her attacks involve slashing with her claws and dagger, sweeping in an arc in front of her. The timing for parries varies with each strike, so it’s best to parry the first few and then dodge the rest. She also swipes her weapons to send out silver projectiles, which can be parried to deal extra Qi damage if you keep your distance.
She often performs dodging attacks where she side-steps and then charges at you, sometimes combined with projectile attacks. Pay close attention to her patterns so you can react accordingly by parrying or dodging.
Red Attack and Blood-Leech Moves
The Wolf Maiden’s red attack involves thrusting her dagger forward followed by a backflip kick. Though it looks aggressive, parrying both parts can be effective, but it won’t always trigger a counterattack.
She also has a dangerous move where she licks her dagger and then slashes in a spinning attack, hitting multiple times. If you’re close, time your parries to land right as she approaches, then quickly parry twice to avoid her energy burst at the end.
Phase 2
When her health drops to about 75%, she channels red energy and howls, damaging everything nearby, which signals the transition to the second phase.
During this phase, her Qi gauge slowly recovers, so stay aggressive to deplete it. She begins with a powerful leap attack while her gold attack is active, so dodge her dives as before.
All her attacks become more damaging and can inflict Bleed. She will also execute new or altered moves, increasing the fight’s unpredictability. Watch out for her combo, which includes dagger slashes ending with a red dagger thrust—parry this final strike for a counter.
A new gold attack involves her performing a cartwheel of slashes, then leaping into the air and dive-bombing you, unleashing a burst of energy. This attack is unblockable, so you’ll need to dodge to avoid it.
If you’re struggling, consider bringing NPC allies or other players into the fight. Even on easier difficulties with assist features, success isn’t guaranteed. On harder levels like Expert or Legend, expect to spend time practicing and strategizing.
Difficulties and Tips
One useful tip is to upgrade or repair the Bell of Demoncalm, which weakens bosses significantly. If you prefer not to do co-op or lower difficulty, grinding for the Bell can make future boss fights easier.


