Select Language:
With the release of Cult of the Lamb: Woolhaven, players are back in this charming yet brutally challenging world. This expansion has you helping a lost deity take down a crazy scientist trying to spread heresy across the land.
The main villain is Marchosias, a formidable boss who will test your skills more than any other in the game. Here’s what you need to know to beat her and what rewards to expect.
How to Defeat Marchosias
Similar to the boss fight with The Executioner, Marchosias is a three-stage battle that becomes harder as her health decreases. Unlike the original game, you start right outside the boss room, with options to choose weapons and curses before entering the fight.
During testing, I found that the best weapons against her are the Blunderbuss, Flail, and Sword. She spends a lot of time in lava, so using ranged weapons helps keep some distance and makes the fight easier.
For curses, I recommend grabbing the Divine Guardian if possible, since its two seconds of invincibility can be crucial during the chaotic last phase. The Touch of Ithaqua or Touch of Maelstrom are also good for clearing hazards and enemies she spawns.
Once you’re set, climb the stairs and face Marchosias.
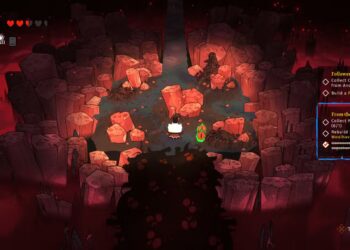
Phase One
At the start, rush toward Marchosias and attack her main body. Watch her arms closely—they’ll briefly lift a claw before swinging it. Dodging is simple; just roll backwards when she prepares to strike.
She’ll throw bombs into the arena that stick around before exploding. You can hit these bombs with your attack to launch them into her for extra damage. When you see a big red arrow on the ground ahead of her, roll out of the way, as she’ll launch a long tentacle attack in that direction, dealing heavy damage if hit.
When her health drops about a sixth, a cutscene will trigger, moving you to the next phase.
Phase Two
In this stage, her arms extend into horrifying tentacles. She gains new attacks, including a ground pound with her fists and swiping with spike-covered arms. She will also slam her hands down to create shockwaves you need to dodge by rolling through, and may summon additional enemies to fight alongside her.
Her attacks from the first phase reappear, and rot mounds spawn more frequently around the arena. Keep a close eye on her arms; her main attacks are triggered by their movements, so watching them will help you anticipate her next move.
Tip: Focus on damaging her main body rather than her arms, as hitting her arms does less damage.
Using an area-of-effect curse can help clear spreading rot and eliminate minions when they appear. Running to the lower part of the arena is a safe strategy since most attacks are less likely to reach there.
Keep hitting her while avoiding her arm strikes until her health falls to about one-third. When that happens, a final cutscene plays, leading into the last phase.
Phase Three
Get ready for chaos. Her body becomes electrified, and she gets access to new, intense moves. Her ranged attacks become more frequent, but her melee strikes are mostly gone.
She starts by unleashing a barrage of lasers sweeping around the arena, which you can dodge by moving close to her, since the beams mainly stay in the center and lower parts. She also fires targeted beams at your last position, so keep moving whenever a red circle with an X appears under you.
If you manage to sever her right and left arms, she will switch tactics, firing bombs that release fiery shockwaves constantly around the arena. These shockwaves are relentless but small enough to dodge with quick rolls.
She will also rain down rot—tiny circles appearing on the screen—and launch her tentacle more frequently than in earlier phases, especially if her health is low. Focus on staying alive rather than just dealing damage. Avoid getting greedy, as getting hit by multiple attacks in quick succession will make you lose.
Until she reaches about a third of her health, keep attacking while avoiding her attacks, then prepare for the final showdown.