Select Language:
One of our favorite battles in Hollow Knight: Silksong is the First Sinner, ranking right up there with Phantom. It’s a quick and fair fight that keeps you constantly alert. To succeed, you’ll need to carefully dodge her punches, carefully walking the thin line of silk exits during the fight.
It’s unfortunate that this boss is so easy to overlook. But exploring and satisfying curiosity will greatly reward you when you find her. Plus, defeating her adds another powerful Ancestral Art to your collection.
How to Find the Apostate Key and the First Sinner
The First Sinner is a secret boss in Act Two, and you probably won’t encounter her unless you explore Pharloom thoroughly. You may come across her map area, called the Slab, earlier in Act One, but you won’t be able to access her door until much later.
Near the bottom of the Slab, by the Bellway Station, you’ll see a large locked door heading east. To open this, you need the Apostate Key. However, this key isn’t available in the Slab itself.
Instead, you’ll need to visit the Putrified Ducts. To access this area, you first need the Faydown Cloak, which you get at the top of Mt. Faye. There are two ways into the Putrified Ducts:
- From Memorium above the Citadel’s Choral Chambers
- From the top of Bilewater after defeating Groal the Great
Once inside the Putrified Ducts, head toward the bottom where you will find the NPC Huntress. If you go to the top left corner of the bottom room, navigating past enemies, you can pick up the Apostate Key lying on the ground.
You can use the Apostate Key in two spots within the Slab: the bottom door east of Bellway, which leads you closer to her, and a second door at the Slab’s top, which contains a platforming segment. Using the key here can also give access to a second chamber with a Mask Shard, making your next fight easier.
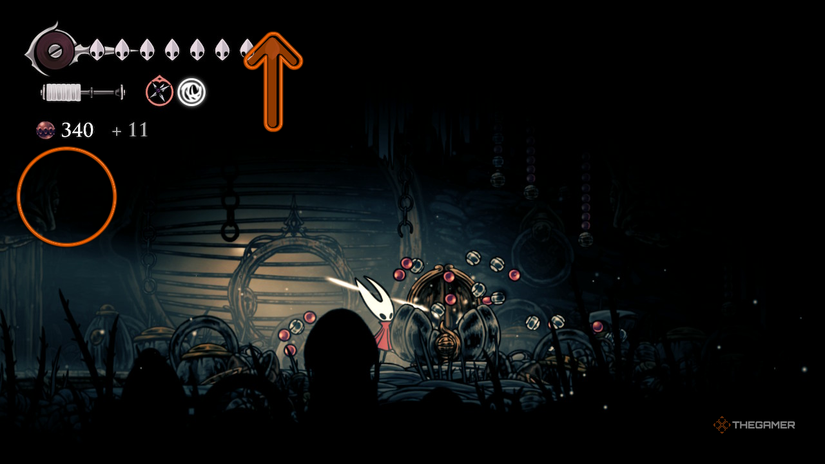
To reach the First Sinner’s prison, use the key on the bottom door, then drop down one ledge to the right. In a room with a Rosary chest and hanging Rosaries, jump onto the wall above the door and from there, double jump onto a barely visible path above the room. Follow this path — there’s some light platforming involved — until you reach a giant, silk-covered bell-shaped container. Strike the embedded pins pinning the chains to open the door.
Once open, interact with the weaver statue in the center and bind to it to start the fight.
How to Defeat the First Sinner
Preparation is key; don’t walk into her fight unready. It’s often necessary to return to the bench and adjust your build for better chances. At minimum, upgrade your Needle to at least +1, ideally to the Hivesteel Blade, which you unlock by completing Pinmaster’s Oil and the Great Taste of Pharloom.
Make sure your primary combat Crest has all tool slots unlocked with Memory Lockets. Anything less leaves you vulnerable.
The fight itself isn’t overly complex, but her quick attacks and overlapping move sets demand your focus. Keep centered in the arena and be mindful of dashing, as many of her Silkspears and teleportations are hard to predict. Staying near the middle reduces accidental hits from her ranged silks and teleport strikes.
Most damage is taken from her Frenzied Strikes and teleports during her Silkspear attack. To minimize harm:
- Dash toward her last known location rather than away.
- Jump quickly during Frenzied Strikes or try to parry if possible.
If you’re using the Beast or Witch Crest, they make healing much easier. They allow you to heal while countering her aggression, giving you extra chances to recover during the fight. For instance, the Witch Crest with the Injector Band speeds up healing animations, and combined with the Claw Mirror, allows for multiple quick heals, even during her aggressive phases.
There are few opportunities to heal, mostly during staggers or while mid-air during the Frenzied Slashes. Being efficient with healing tools is crucial.
Final Phase and Victory
Her second phase begins after a fake-out where she appears to be defeated. She then reemerges, moving faster and using Rune Rage, an even more aggressive attack pattern. Her most common damage sources in this phase are Frenzied Strikes and her teleportation attacks.
To avoid damage:
- Dash towards her last known position after she teleports.
- Jump over her Frenzied Strikes, or parry if you can.
Patiently observing her attack patterns and slow, deliberate responses work best. Remember, as Hornet, you’re swift and dangerous—sting like one.
After defeating her, you gain the right to accept the Weaver’s power. Inside her memories, a platforming section requires the Faydown Cloak to reach the end. When you succeed, you leave her prison and the Slab with a new power: Rune Rage. This ability, used by her during the fight, can now be turned against your enemies and those of the weavers.


