Select Language:
As the story of Silent Hill f unfolds, you sense Hinako’s grip on reality loosening, and the world around her begins to blur. The boundary between the Otherworld and real life feels so thin that the final sections in the Otherworld almost merge seamlessly into her hometown of Ebisugaoka. With her mental state breaking down, it’s only fitting that one of the toughest puzzles appears at this point.
In your last full journey through the Otherworld, you face a mural puzzle with no map and only a few hints. This challenge is both visual and logical, which makes it easy to overthink the solution. We’re here to help you finish it.
When Do You Encounter the Mural Puzzle?
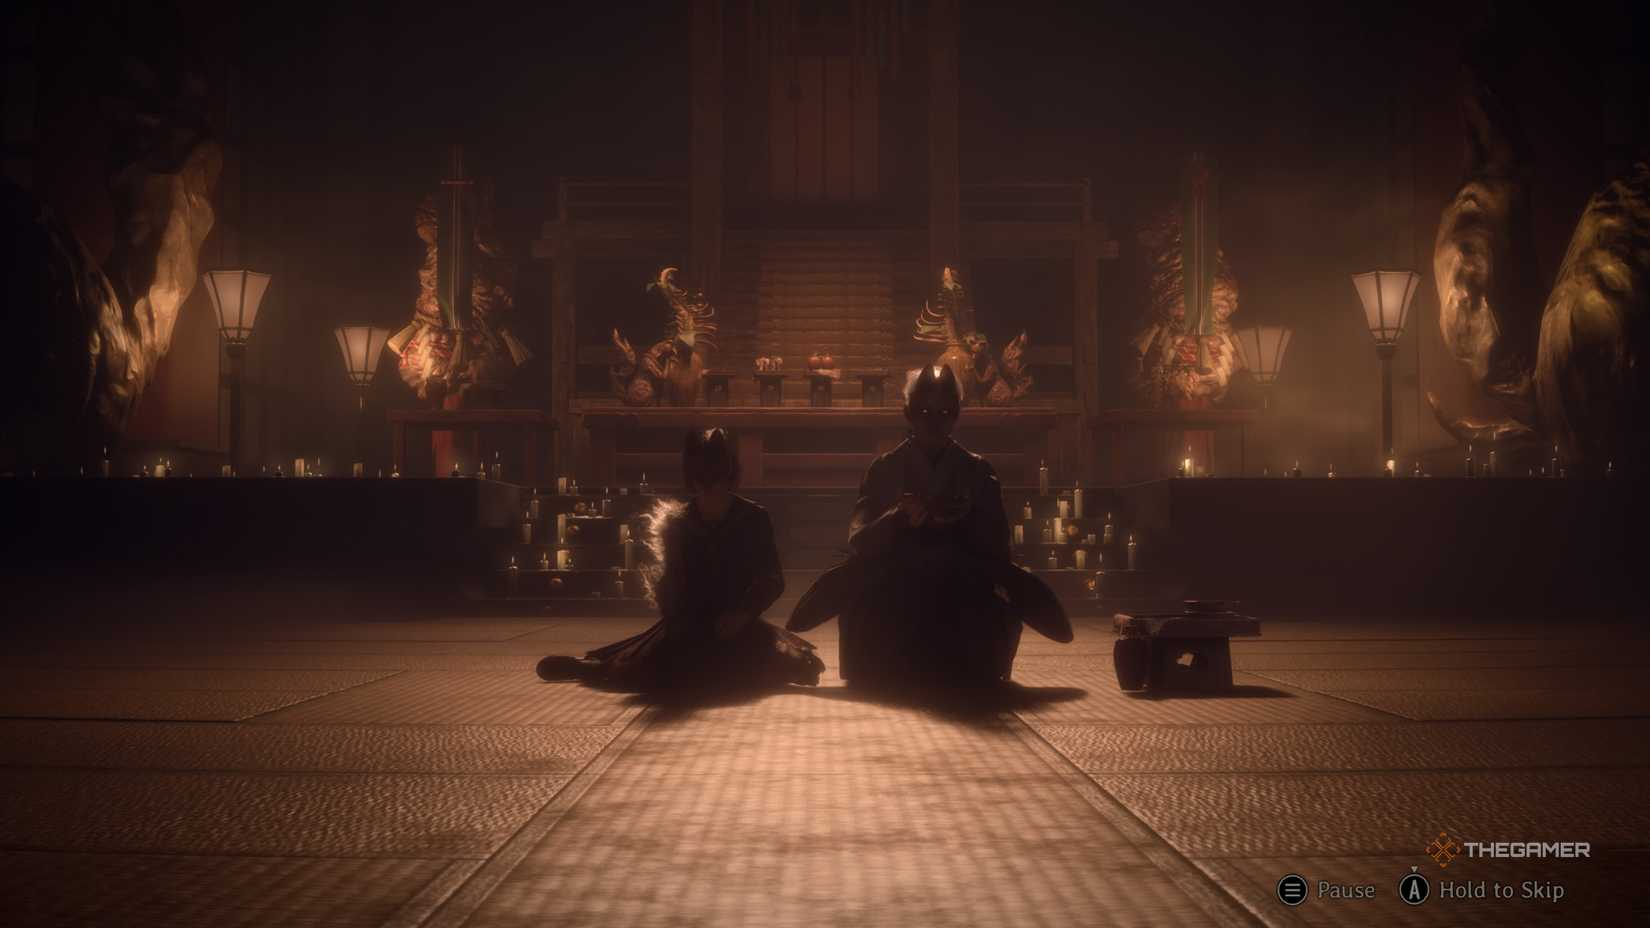
You will find yourself facing the mural during your final full visit to the Otherworld. This happens after the events at the Shimizu Residence, right after Hinako witnesses her parents’ fates. Here, she’s back with Fox Mas, who is disfigured, and she must solve one more puzzle to confront her own reality. When you first see the mural, there isn’t much you can do. It has nine holes scattered across it, but nothing can be manipulated at this stage. For now, examine the two scrolls on either side of the mural for clues on how to solve it.
The scroll on Story mode reads: “The Black Bird wishes to take the White Bird. The White Bird wishes to resist. The Fox brings along his followers in triumph. He notices not the two birds in conflict.”
On Hard mode, it says: “PUT THE WORDS HERE WHEN FOUND.”
You’ll need to find the Black Bird, White Bird, and Fox to complete the puzzle, which requires some searching. Let’s begin.
Gathering the Three Crests
This section of the Otherworld has no map, so navigation is part of the challenge. You must find the correct door to progress, and there’s a trick: every crest must be found in order, and once you go through the wrong door, you’ll face enemies and need to try again. All crests are essential, and missing one means restarting from the last door you entered.
Black Sparrow Crest
Start in the central room with multiple Inari statues. Many have small drawers that can be opened to find items, but one particular statue can be examined more closely. When inspected, it reveals a bloody pierced area. Remove this weapon, and its eyes glow blue, pointing you toward the correct door. Inside, you’ll find items like the Ornate Scroll, Family Physician’s Log, and Omamori – Hound. Make sure to check for hidden walls using Focus to uncover any missed items. After obtaining the Black Sparrow Crest, find the Housemaid’s Note before returning through the door to the mural hall.
White Sparrow Crest
Next, in the Inari hall, there are more statues. Follow the same process: open drawers, find the one that can be examined, and remove the piercing weapon to make its eyes glow blue. Before proceeding, pick up another Ornate Scroll and the Housemaid’s Note. After entering the next door, repeat the process—check for hidden walls, pick up items, and find the Strict Mother’s Letter. Continue until you obtain the White Sparrow Crest, then head back to the mural hall.
Fox Mask Crest
Return to the Inari statues once more. This time, there are more statues than before. As before, look for the injured Inari statue, remove the piercing weapon, and follow the glowing eyes to find the correct door. There is an optional door marked with the Inari symbol, which can be accessed with the Brooch earlier given to you. Entering this door reveals special items like the Mandate of the Clan, an Ema Plate, and the Letter With A Pressed Flower. Returning to the main hall, go through the correct, now red, door, defeat enemies along the way, and at the end, you’ll have a cutscene with Junko before finally earning the Fox Mask Crest.
Solving the Mural Puzzle
With all three crests collected, you can now solve the mural. The process involves placing each crest in its proper position. The key is understanding where each belongs based on the clues. The locations to place them differ with difficulty level, and each provides different hints, increasing the challenge.
On Story mode, three main facts help:
– The Fox leads his followers and doesn’t see the birds fighting.
– The White Bird wishes to resist.
– The Black Bird aims to take the White Bird.
Although the mural suggests nine holes, only one is part of the puzzle. The White and Black Birds are connected, but the Fox’s position narrows down options significantly. Observing the characters’ outfits and their roles helps. The fox at the front, wearing a hat and leading the procession, is identified as the Fox and is where the Fox Mask Crest belongs.
Next, consider the scene where two foxes are facing each other on the far right. One in red is holding a lamp, and the other is pulling its string away. The White Sparrow should be placed inside the lamp, symbolizing a desire to set free and fly away. The Black Sparrow fits on the back of the other fox, which is trying to steal the lamp.
After placing the crests correctly, the path forward opens, bringing you closer to the conclusion of Hinako’s story.