Select Language:
If you’ve played Hollow Knight: Silksong even briefly, you’ll notice that without a map, it gets pretty confusing—especially in the larger areas. While you can press a button to view the map in each zone, it won’t show anything until you’ve found that specific map.
Each biome has its own map, and there are mainly two ways to acquire them. In some regions, you’ll encounter an NPC called Shakra who will sell you the map. In other areas, particularly later in the game, you’ll need to discover a special mechanism to unlock the map.
This article will be updated as we locate more map spots in the game, so check back if you’re stuck somewhere else!
Bone Bottom and the Marrow Map Locations
Bone Bottom and The Marrow are the initial biomes you’ll explore. You start in Moss Grotto, which is part of the larger Bone Bottom biome. To get the map for Bone Bottom, you need to reach The Marrow, which comes right after meeting the first civilization after completing the moss area.
After entering The Marrow, look to your right for a path leading slightly upwards. Continue climbing until the background turns orange. From there, keep going up until no more upward pathways exist. Then, move to the left where you’ll hear someone humming. Approaching the sound will lead you to Shakra.
Note: Keep your Rosary beads safe for this NPC from the beginning of the game.
Besides selling maps, Shakra also offers items like the Quill, Compass, Bench Pins, and Shell Markers. The Quill is particularly important because it allows you to update your map, and the Compass helps you locate your current position. If Shakra disappears after your first visit, they can also be found further in the civilization area outside The Marrow, slightly higher and to the right of the original spot.
Map Prices:
- Bone Bottom map: 40 Rosary Beads
- The Marrow map: 50 Rosary Beads
Deep Docks Map Location
After defeating the Bell Beast and crossing the lava bridge in The Marrow, you enter Deep Docks. The map here is easy to find because Shakra often appears along the way. Once inside, head right until you spot a small sign indicating a bench upwards. Continuing right, you’ll hear Shakra’s hum. Drop down to find them, and aside from the deep docks map, you’ll also get the Bellway Pins, which mark fast travel points.
Map Cost: 50 Rosary Beads
Far Fields Map Location
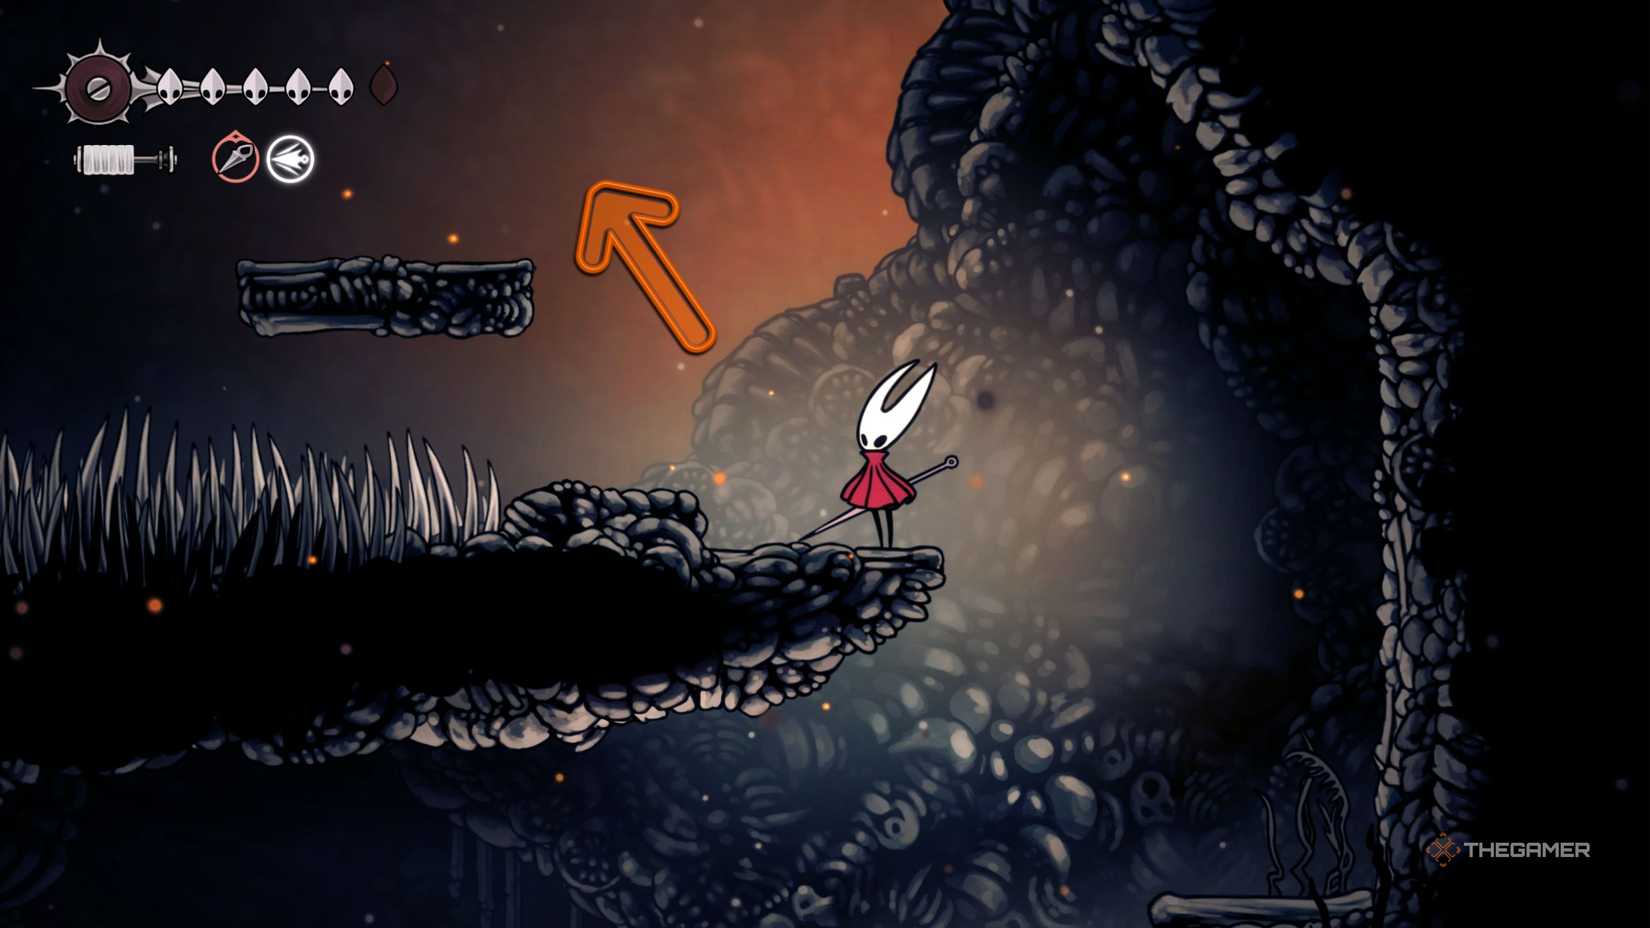
The Far Fields is the fourth biome after defeating Lace and crossing the lava bridge. Finding its map might be trickier since Shakra doesn’t hum here. The best approach is to go all the way right upon entering. Along your path, you’ll face three red-armored enemies. Defeat them and proceed right until you reach an open area with paths leading up, down, and right. Take the right path; within a small cave, you’ll hear Shakra.
You’ll recognize your route by familiar rings guiding you. The map can be bought for 50 Rosary Beads at this point.
Getting the Map:
From the entrance, go right after defeating the enemies, find the cave, and enter. The map is just inside, where you’ll see Shakra.
Greymoor Map Location
Once you complete the Far Fields and gain the glider, you’ll enter the Greymoor biome, split into two parts. After entry, you may explore left or right—going right leads you to a platform where Shakra is often found. Passing through the area, it’s best to head right again, where after one loading screen, you’ll find a drop. Using the local terrain, fall down, then continue right to spot Shakra, often near the owl enemies.
Map Cost: 70 Rosary Beads
Bellhart and Shellwood Map Locations
Past Greymoor, you’ll reach Haunted Bellhart briefly before moving into Shellwood. In Shellwood, keep heading left until you find a locked door. Climb upwards to bypass obstacles and reach a trap room filled with mobs. Moving further left to a door, you can take an elevator down; upon exiting, you’ll find Shakra waiting for you.
Map Prices:
- Bellhart map: 40 Rosary Beads
- Shellwood map: 70 Rosary Beads
Blasted Steps Map Location
After defeating the Widow and entering Blasted Steps via Shellwood, the difficulty increases sharply with tricky jumps and stormy winds. Progress through small tunnels, and after activating a platform-lowering lever at the top, move further up until the background darkens, indicating you’re close.
From that point, continue right, defeat the flying enemy with a red drill, and you’ll see Shakra’s ring nearby. Follow the path to find them with some additional jumps.
Underworks Map Location
Having overcome the Last Judge in Blasted Steps and entered the Citadel, you’ll be dropped into Underworks. Move right past a couple of enemies, and climb up the area. A sign outside indicates a path—follow it to find the free map, given by a mechanism after defeating a few enemies.
Coral Chambers Map Location
Getting the Coral Chambers map can be twofold. Early in Act Two, after defeating the Last Judge, you might see a model of the Citadel that sells this map for 40 Rosary Beads. Alternatively, after revisiting the area post-Underworld, you can unlock the map by going through dark tunnels, finding the Citadel model again, and purchasing it for 70 beads.
Cogwork Core Map Location
After defeating the Cogwork Dancers, you reach Cogwork Core. The map is simple to find: enter the area and go left, where a shining doorway with a nearby bench marks the spot. Climb the wall to find an inactive warrior. To the right, step on a pressure plate to acquire the map, and activate the nearby wheel to place a bench.
Whispering Vaults Map Location
Accessed from Cogwork Core, Whispering Vaults is stealthily hidden. Proceed right until the path opens downward, then jump across to continue right. You’ll face a large guard—defeat it, then hit a small dangling object above its position. This causes a ladder to appear; use wall-clinging to ascend. Move all the way left to find the concealed map for this area.
These maps are vital for progressing smoothly through the game’s extensive worlds, and locating Shakra and mechanisms is often the key to unlocking them. Some maps, especially the Coral Chambers, can be obtained for fewer Rosary Beads if purchased early or found through specific interactions. Keep exploring and gathering Rosary Beads to buy the necessary maps to make your journey through Hollow Knight: Silksong much easier.