Select Language:
When you unlock a civilization in Hollow Knight: Silksong, you’ll find a wish board that offers various quests. Completing these quests can earn you great rewards. Some quests require defeating certain enemies, while others involve hunting down a specific item or NPC.
One such request is to find and eliminate the Broodmother in The Slab. She is a tough boss, and preparation is essential before you challenge her.
How to Find Broodmother
Broodmother doesn’t spawn on the map initially. To make her appear, follow these steps:
- Activate the Songclave area by freeing the bell in the First Shrine at the top right of Choral Chambers.
- Explore The Slab, accessible from the bottom left of Choral Chambers. To fully explore this biome, find the key of Apostate above Bilewater.
- After obtaining The Slab’s map and exploring it, go back to the Songclave to see The Wailing Mother quest on the wishboard.
Tip: It’s best to explore The Slab thoroughly and secure all three keys there before attempting the quest.
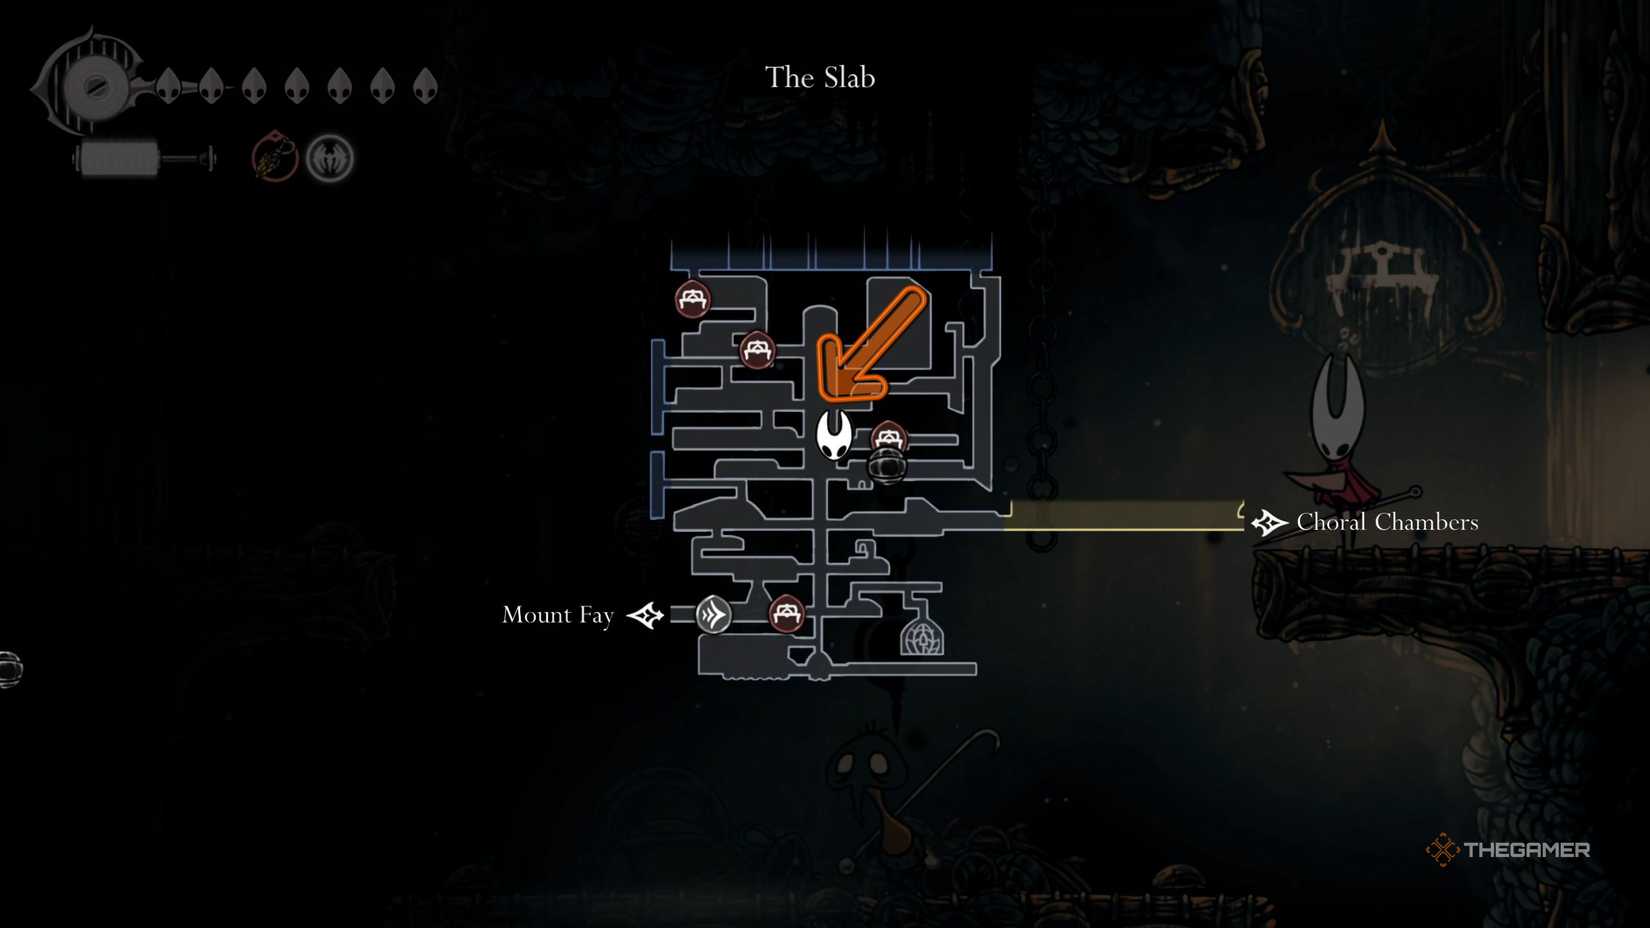
Once you accept the wish, head to the bench in the middle of The Slab, which is slightly to the right. You can reach it via the Bellway and climb up, or enter from Choral Chambers. Exit the room with the bench on the left and climb a bit to find clues pointing toward Broodmother’s location.
Follow the aura to the top left of The Slab, where you’ll find another bench. Sit there to save your progress, then proceed left into a cave entrance. Going through this cave will lead you to a final battle with Broodmother.
How to Beat Broodmother
Broodmother’s fight is unique because she has an attack that can immobilize Hornet temporarily. You’ll need to take on three waves of enemies first:
- The first wave involves four enemies that explode after defeat, which is straightforward.
- The second and third waves spawn mobs from The Slab along with the exploding enemies.
- To succeed, avoid taking damage more than once during these initial waves.
Tip: Focus on destroying the exploding enemies first to make the wave easier.
After surviving the waves, Broodmother appears and begins launching attacks immediately. Her attack set includes:
| Attack | Wind-Up & Description | Recommended Counters |
|---|---|---|
| Dash Attack | She waves her arms to warn you, then dashes across the area, often multiple times. | Dodge to the wall on the opposite side and stay high. Jump on her as she dashes by, then strike downward. Repeat by moving to the other side. |
| Mob Spawn | She pulls in her stomach to charge up, then spawns a single-hit exploding mob. | Focus on defeating the mob quickly before it moves away. |
| Immobilize | She pulls back, exposing her stomach, and throws goop on the ground, immobilizing Hornet if hit. | Climb the opposite wall to avoid the attack, which also helps dodge her dash attack afterward. |
| Slam Attack | She pulls herself to the ceiling and then slams the ground and ceiling alternately while moving across the battlefield. | Dodge by moving near her slam site just before the attack and dash through as she slams down. |
Tip: Upgrading your needle three times before the fight will help make the battle easier.
The boss arena is small, limiting movement. The fight has two phases: the second begins after she loses 40% of her health and adds the Slam Attack to her arsenal.
The key to winning is to land hits during her dash attack, as she leaves little time between her dash and recovery. Tools like the Pollip Pouch and Cogfly are highly effective, as they continuously damage her during combat.
After defeating Broodmother, complete the quest by returning her eye to the Songclave. Doing so grants you a large number of Rosaries.