Select Language:
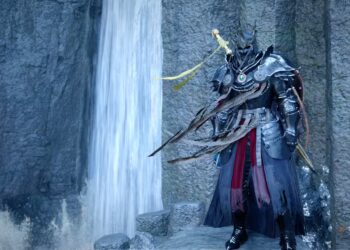
One of the first sidequests you can take on in Hollow Knight: Silksong is called “The Lost Fleas.” Your job is to find five lost pilgrims and safely bring them back to Fleamaster Mooshka’s traveling caravan. This quest is one of many scavenger hunts you’ll encounter early in the game. If you aren’t sure what to listen or look for, it can be a bit tricky.
Fleas are scattered across several early areas, including The Marrow, Deep Docks, and Far Fields. If you’re looking to finish “The Lost Fleas” quickly or just want to know what’s in it for you, here’s everything you need to know.
How to Start “The Lost Fleas”
There are two ways to start this quest. The first is to find the flea caravan and talk to Fleamaster Mooshka — his location is marked on the map above. Alternatively, you can begin the quest by checking the quest board in Bone Bottom after donating 200 Shell Shards to the repair effort. Once you’re at the caravan, go talk to Mooshka. You might need to speak with him twice to activate the quest.
Finding Every Lost Flea
Here’s where each flea is located:
Flea #1 — The Marrow
Start by heading northwest from the caravan on the map. Move west carefully over broken platforms. When you see a giant skull, turn around and go upward along the path to the northeastern part of the room. Look beneath you by pressing down on the thumbstick — you’ll see a platform to the southeast. Jump onto it to find the first flea caught in vines. Attack the vines to free it, then watch it fly away.
Tip: Listen for a faint yipping-like sound to help locate the fleas.
Flea #2 — Hunter’s March
This flea requires defeating a tough enemy and navigating part of Hunter’s March. You might want to come back after gaining the dash ability, which makes platforming easier.
Start from the indicated map point, go east into Hunter’s March, and perform a pogo jump across the first gap. Walk into the next area and either fight or pass the red ant. Use downward strikes to climb the fruits, then go left at the first ledge. Bouncing off fruits, find a cage where the flea is trapped — break it to free the pest.
Flea #3 — Deep Docks
Travel to Deep Docks via The Marrow or Hunter’s March. From the Bellway fast travel point, head west through an area with falling lava. Cross the lava stream carefully, then proceed up and right. The third flea is near the northeast corner of the room, past the lava, resting just beyond. You don’t have to fight it — just walk over, and it’ll head home.
Flea #4 — Deep Docks
From the previous location, go north in Deep Docks, east of the nearby bench. Jump or dash to a small platform in the northwest part of the area — you might need to use a lever to raise or lower a weight for better footing.
Flea #5 — Far Fields
The last flea is in Far Fields, east of Deep Docks. Start from the indicated map point, and go straight east until you see an illusion wall. Hit it several times with your weapon to reveal a hidden passage. Proceed through the narrow passage, which triggers a trap and a cage with a red ant. Destroy the cage and defeat the ant, then head further east to find the final flea in a similar cage.
Rewards for Finding All Five Fleas
After collecting all five fleas, return to Fleamaster Mooshka at the caravan. First, he’ll let you join the Flea Caravan and travel to Greymoor, unlocking that area for you. Mooshka also gives you Flea Brew — a temporary boost to your movement and attack speed. Use it at a bench by pressing Up + RB. If you run out, visit the caravan and speak with Grishkin for a refill.
Now that you’ve found all the fleas, enjoy your rewards and keep an eye out for more sidequests as you continue your adventure.