Select Language:
The Last Judge is the final challenge of the first act in Hollow Knight: Silksong. It’s likely to be the toughest boss you’ll face so far. The fight is long and aggressive, and each time you try to face it, you’ll need to do a tricky run back to get there.
Thankfully, with some practice and knowing what to do, you won’t get stuck. Understanding the runback route, choosing the right crest, and using a helpful tool can make a big difference. This can turn a daunting boss into a more manageable one.
How to Get Through the Last Judge Runback
Don’t Waste Time on Enemies
The runback to the Last Judge can seem intimidating because of the platforming involved. Watching a video of an optimized runback can help you avoid unnecessary jumps and enemy encounters.
Keep your speed up. Dashing allows you to skip fighting some enemies. Quickly dash and jump over the first few sandworm gaps, then start jumping vertically between platforms. Instead of moving straight to the right, jump to the left and wall jump up to avoid some difficult spots.
Next, you need to pogo off a bell. I used the Wanderer crest because it makes pogo jumps easier, but you can do this with other crests too. Run forward, then jump, dash, and float over the next gap to avoid an enemy and pogo off the bell. It’s better to pogo off a bell rather than hitting the wall for a quick wall jump — that’s more reliable.
Once you hit the far wall, wall jump up, then move back left for another pogo. Hit the left wall, wall jump again, then jump, float, and dash onto the last platform. Once you master these steps, you can do the entire runback in about 30 seconds without fighting enemies.
How to Beat the Last Judge
Playing Aggressively Can Help
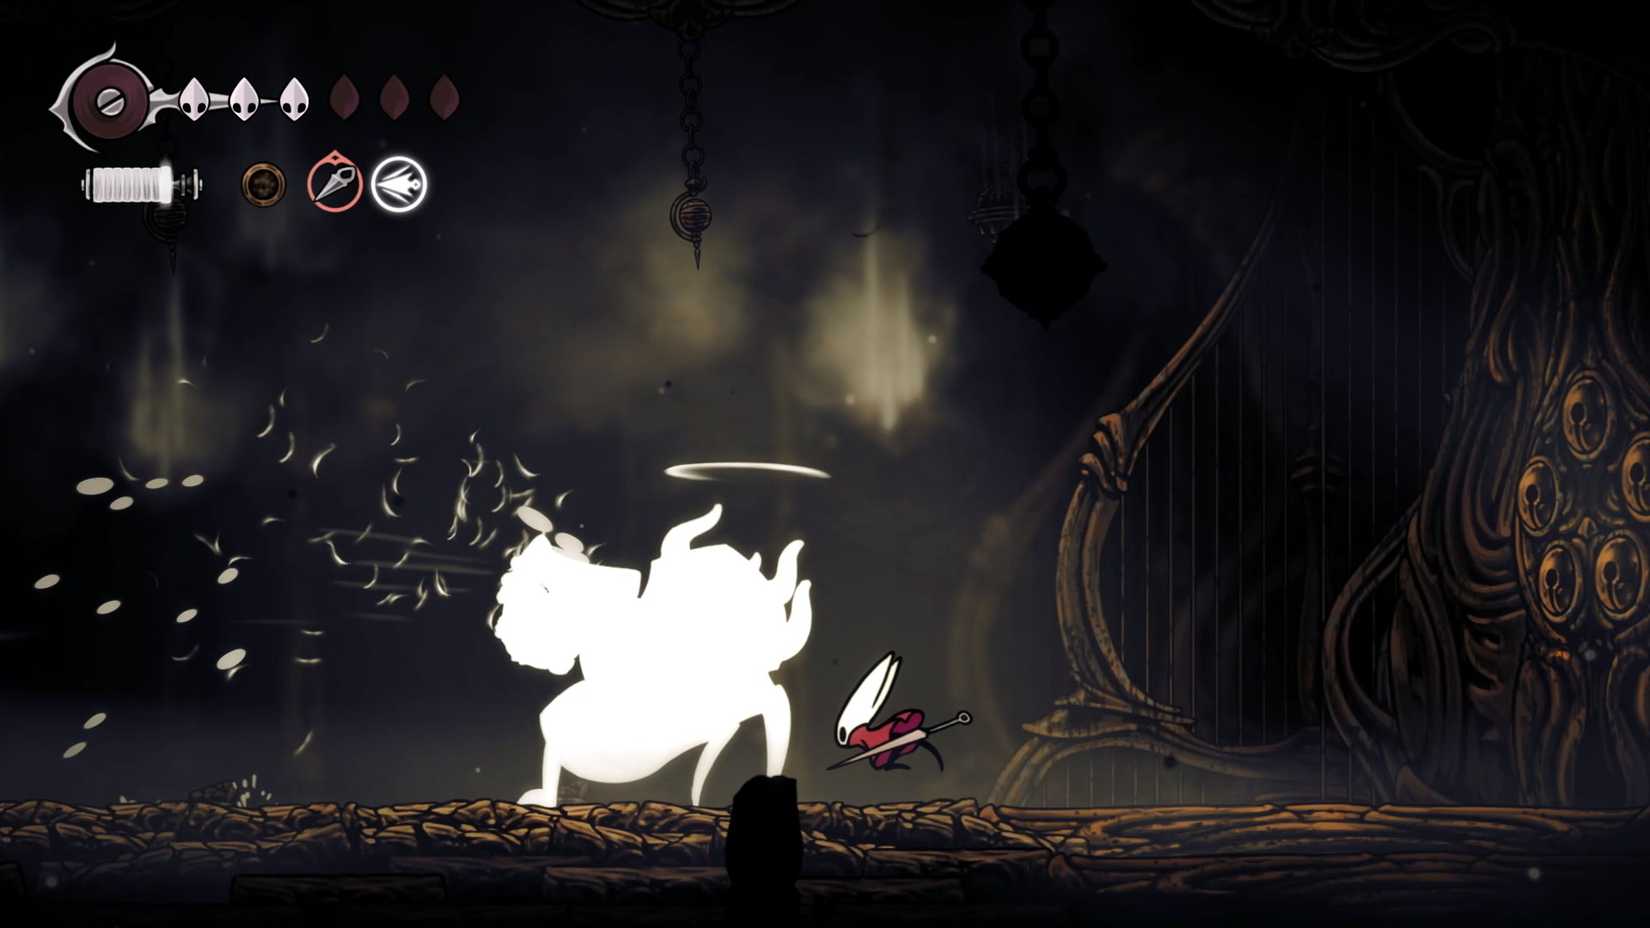
When fighting the Last Judge, having the Wanderer crest equipped is very useful. You can find it in the Bone Bottom area, after passing through the Wormways. With it, you can land quick attacks, but the boss can still be defeated with other crests if you prefer.
The Magma Bell, bought from the smith in Deep Docks, is also a good choice. It reduces fire damage, which is a major part of the boss’s attack pattern. You can pick other gear based on your playstyle. Since some of the boss’s attacks block tools, consider using flasks that boost speed or mask count.
You can play more aggressively against the Last Judge, especially if you have the Wanderer crest. Its first phase isn’t too dangerous — dash in for hits when it attacks. The easiest opening is when it leaps into the air and slams down, but you can also dodge toward it when it throws its flail, then leap over the flail when it pulls back. Its spin attack can often be parried with the crest, but it’s safer to back away.
The second phase introduces fire attacks. The spin attack sends out flames you can dodge by moving left or right. Pillars of flame also appear and can be avoided the same way. When it slams the ground, jump into the air to avoid the shockwave. The flail explosion releases fire too, so steer clear of the blast radius.
Pro Tip: When you need to heal, look for good openings and try to do it while airborne — fewer of the boss’s attacks will hit you then.
Mastering the timing of these attacks will give you chances to land hits. As the fight gets harder, you might want to play a bit safer, especially during the second phase. The transition between phases is a good moment to strike quickly.
After defeating the Last Judge, there’s a brief freeze before it falls. Move as far away as possible right afterward. Once it explodes, you can safely return to the area.
Getting good at the Last Judge fight takes time, but it’s doable once you know the openings. Remember: hit fast, dodge the flames, and get out of the way as soon as it’s over.