Select Language:
In Baldur’s Gate 3, the sidequest called “Rescue the Gnome” is a straightforward part of Act One that can have long-lasting effects on your game. You can start this quest soon after finishing the tutorial because it’s easy to access and is close to your starting area.
Like many side missions in Baldur’s Gate 3, this quest is connected to a bigger story that continues throughout the game. Here’s everything you need to know about how to begin, complete, and handle the consequences of this quest.
Where to Find the “Rescue the Gnome” Quest
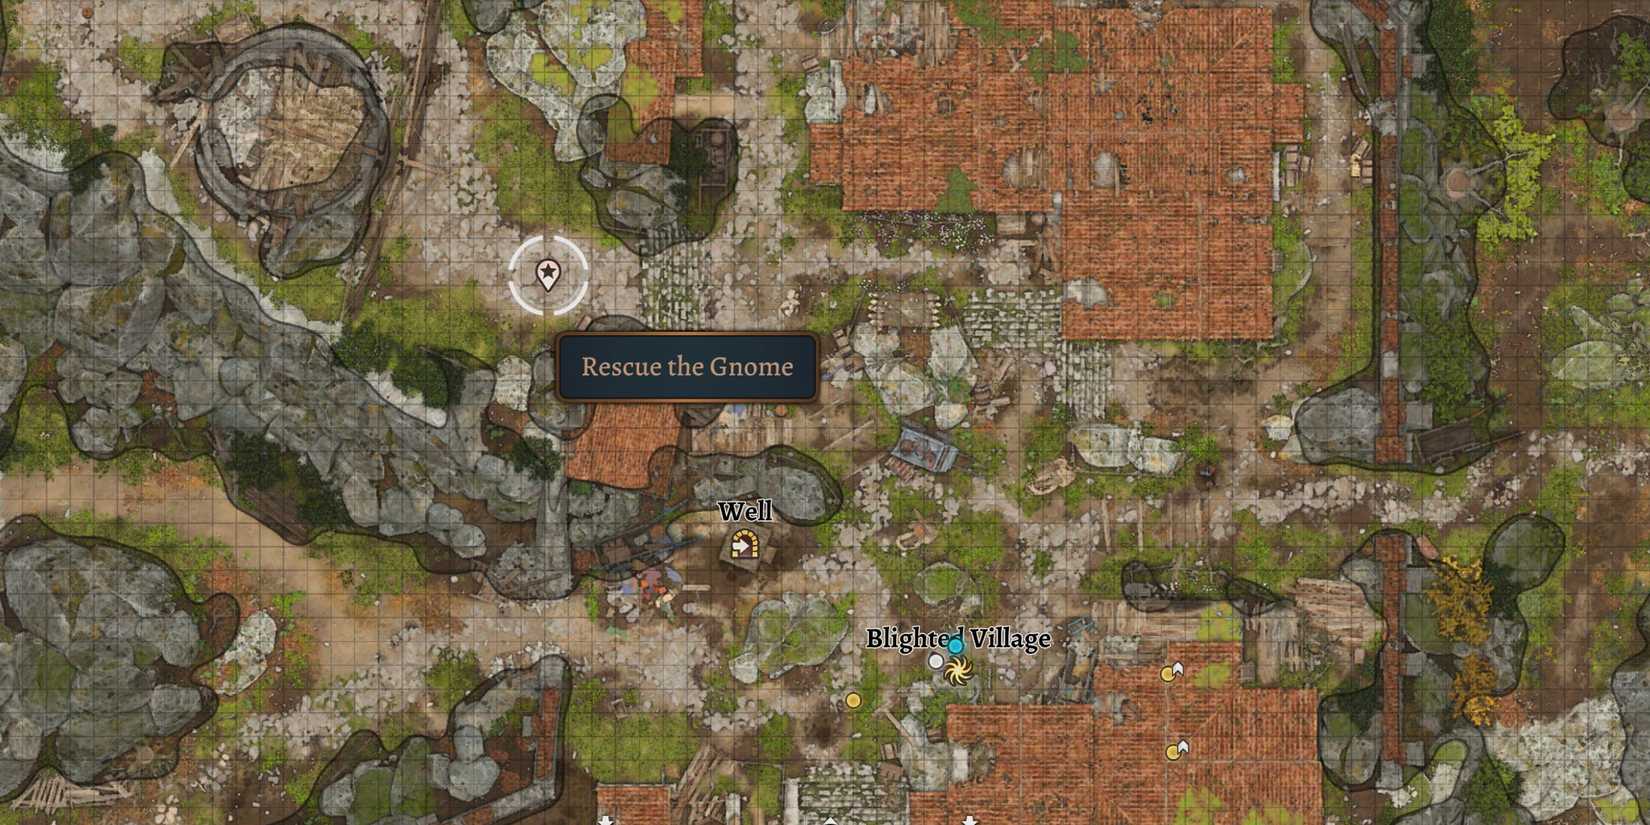
To start “Rescue the Gnome,” head to the location shown on the map above. The quest begins in the Blighted Village, which lies just east of the Goblin Camp, southwest of the Emerald Grove, and far northwest of the Nautiloid crash site.
Once you arrive at the Blighted Village, go to its northwest corner. You can either fast-travel to the nearby spot and walk west or follow the path around the area. If you see a windmill, you’re heading in the right direction.
How to Play Through the “Rescue the Gnome” Quest
To free Barcus from the windmill, enter the area and you’ll be confronted by the goblin Fezzerk and his gang. They’ve tied Barcus to one of the windmill blades as part of their mischief, and they’re not pleased about your interference.
During the encounter, you have four main options:
- Talk your way out: Use your speech skills to convince the goblins to leave peacefully. This is easier if you’ve already visited the Goblin Camp and accepted the Brand of the Absolute or if you’re playing as a drow.
- Bribe them: They will ask for 1,000 gold coins. You might try to haggle; however, Fezzerk isn’t good with math, and he might accept just 5 gold regardless of what you offer.
- Use your Mind Powers: If you have mind control abilities, this is the easiest way to convince Fezzerk to back off.
- Fight: Attack the goblins if you prefer combat. The fight isn’t too hard, and if Fezzerk’s health gets low, the rest of the gang usually runs away.
Using your mind control powers is highly recommended, as it’s the simplest way to persuade Fezzerk. Just be aware you can typically only use this option once per long rest.
After successfully dealing with the goblins, Fezzerk will leave, allowing you to talk to Barcus. He’ll tell you he’s desperate to get free. Explore behind the windmill to find an opening; inside, you will see two levers:
- “Release Brake” lever: Pulling this makes the windmill spin faster, freeing Barcus but also risking him being flung to his death.
- “Brake” lever: Pulling this will stop the windmill, and you can then untie and speak with Barcus again.
Either way, pulling one of these levers ends the quest. If you leave without acting, Barcus will die, and the quest will end soon after. Choosing to free him has its advantages and is the better overall decision.
Should You Free Barcus or Leave Him?
It’s best to rescue Barcus. Although it might seem funny to send him flying, freeing him is the moral and strategic choice. If you save him, he’ll reward you with items found in his bag and share that he is searching for a missing friend named Wulbren Bongle, which opens a new storyline involving saving other deep gnomes.
Later in the game, during Act Two, Barcus can become a merchant at the Last Light Inn, offering unique items like the Ring of Genuinity and the Acrobat Shoes. During this time, he’ll also give you a quest called “Rescue Wulbren,” which leads you to Moonrise Towers and rewards you with powerful gear.
In Act Three, you’ll find Barcus in Angleiron’s Cellar, an underground area, where he may assist you in the final fight if you’ve convinced him to lead the gnomes.
If you choose not to save Barcus, you’ll miss out on his shop and story contributions. The only reward lost is the loot found on his body.
Overall, freeing Barcus in the Blighted Village is the best choice for your playthrough, unlocking new storylines and rewards. Following the steps outlined above helps you efficiently complete the quest and enjoy the full experience of Baldur’s Gate 3.