Select Language:
The Golden Scarab talisman in *Elden Ring* can be found after defeating the Cleanrot Knights in the Abandoned Cave, located in Caelid. This dungeon is considered one of the trickiest in the game, filled with nasty, disease-infested poisons. However, securing the Golden Scarab is worth it because it significantly increases the number of Runes you earn, making it a valuable asset for farming.
To assist you in obtaining this coveted talisman, here’s a guide on how to reach its location, along with a detailed walkthrough for navigating the Abandoned Cave. Once you arrive in the hazardous lands of Caelid, head straight to the cave and be prepared to take on the Cleanrot Knights (if you’re up for the challenge).
How to Acquire the Golden Scarab Talisman in Elden Ring
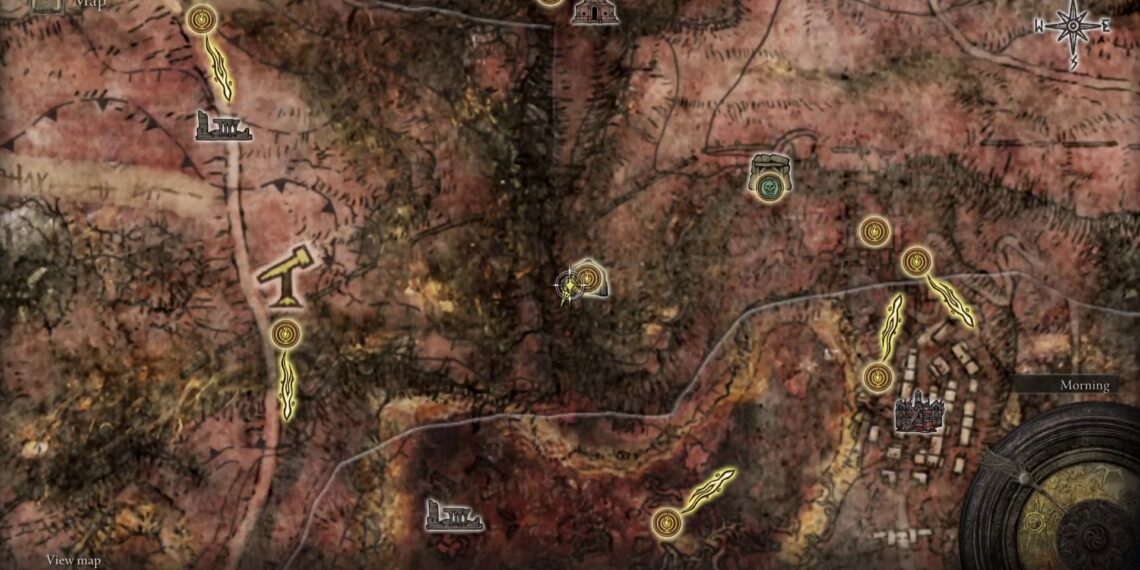
Start your journey in the Caelid region, situated east of the initial area, Limgrave. Look for the Abandoned Cave, which is located east of the Smoldering Wall Site of Grace, past some dead trees where you’ll encounter a couple of wild dogs. Below is a comprehensive guide to both the Abandoned Cave itself and how to defeat the Cleanrot Knights.
Courageously cross a branch that spans a ravine to access the cave, but watch your step—straying from the center can lead to a deadly fall.
Upon entering, take advantage of the Site of Grace and ensure you have plenty of Preserving Boluses or items to cure Scarlet Rot. While poison cures are helpful, they are not as critical if you proceed with caution.
Abandoned Cave Walkthrough
Your goal of obtaining the Golden Scarab awaits at the end of this challenging mini-dungeon, which includes battling a couple of bosses. Follow these steps to successfully navigate through it:
- From the Site of Grace, you’ll notice a river of Scarlet Rot ahead. Standing in it will increase your Rot meter, which, if it fills up, will inflict Scarlet Rot on you—a condition that damages your health until cured or worn off. It also slows you down.
- Beware of explosive geysers that pop up regularly. Standing near them can cause damage, especially if you’re caught in the explosion.
- Move to the left from the Site of Grace. Time your jump down into the river with the geyser’s eruption to minimize damage, then sprint through while hugging the wall towards the giant Iron Maiden across the water (don’t worry, it’s harmless).
- You have two path options now. The right leads to a dead end with Dragonwound Grease, while the left takes you deeper into the cave.
- Opt for the left path, where you’ll find a dry area with a Martyr Effigy halfway down. Now’s a good time to light a Lantern if you have one.
- Proceed into a larger cavern with another ledge and more geysers below. An item, the Serpent Bow, is situated in the center of the geysers, but you can skip it for safety.
- If you aim to survive, move to the far right side of the ledge before dropping down and eliminate the fungus mage who’s lurking below, as they can launch poison projectiles. Continue down the right tunnel to reach dry ground.
- As you enter the next area, expect rats and another fungus mage that will attack from afar. There’s a nook on the right side to take cover before you ambush the mage.
- After dispatching the mage, follow the tunnel down into a smaller room where you’ll find some rats and Fire Grease on a corpse. Take a moment before entering the next cavern.
- This cavern is full of dangers such as Scarlet Rot pools, fungus mages, and the large poison-spitting flowers you’ve encountered before. If you’re feeling underprepared, stick to the right wall and run up the slope to where two fungus mages are positioned. Take them out if you wish, then enter the northern tunnel behind them.
- If you’re feeling adventurous, there’s a chance to return to the big room to battle through and reach the west ledge for a unique weapon called the Venomous Fang, but to advance for the Golden Scarab, follow the northern tunnel.
At the tunnel’s end, you’ll encounter the golden fog marking the boss battle. Make sure you’re ready, equipped with your Rot cures and Flasks, and prepared for close-combat; this encounter is challenging for mages.
How to Defeat the Cleanrot Knights Boss Fight in Elden Ring
The Cleanrot Knights should be manageable if you’ve progressed past Godrick and are fairly simple for those who’ve reached Leyndell or beyond. However, earlier players might struggle, so proceed with caution as these knights can exploit player mistakes.
- Be mindful of the Scarlet Rot river in the boss arena. Avoid standing in it as it drains your health during the fight.
- Initially, only the Spear Knight will be present, rising from a kneeling position. If you’re quick, you can sneak behind for a backstab when the fight begins.
- Both knights can block attacks using their weapons, and they can then counter with a painful shove. Give them space until their guard is down.
- The Sickle Knight joins the fight only after the Spear Knight loses about half of their health. Each knight has unique strengths—the Spear Knight excels in close quarters while the Sickle Knight uses ranged attacks.
- Focus on eliminating the Spear Knight first. Since they start with lower health and are aggressive, neutralizing them quickly allows you to concentrate on the Sickle Knight without interruptions.
- Once the Spear Knight is defeated, the remaining Cleanrot Knight is much easier to handle. Pay attention to their attack patterns, as they have clear wind-ups, making it easier to dodge their strikes.
Upon defeating both Cleanrot Knights, you’ll receive 7,000 Runes, but more importantly, you’ll obtain the valuable Golden Scarab.
Golden Scarab Talisman Rune Boost Explained
The Golden Scarab is a Talisman that you can equip to enhance your Rune gains. While equipped, it boosts the Runes earned from defeating enemies by approximately 17% to 20% (however, it doesn’t affect Rune items or selling gear). You can stack this effect with the Gold-Pickled Fowl Foot for an even greater boost.
This is a significant advantage in *Elden Ring* because Runes are crucial for progressing through the game. The longer you wear the Golden Scarab, the faster you’ll advance. Once you obtain it, make it a permanent fixture in your gear; it will greatly assist you in farming Runes efficiently.


