Select Language:
The levels and sublayers in Donkey Kong Bananza offer an incredible variety, not just in theme but also in size. Some levels are quick trips to uncover deeper paths, while others are expansive with various objectives to tackle. You’ll explore delightful settings like the Resort Layer, hazardous Forest Layer, dusty Canyon Layer, and much more.
In total, there are 17 main layers to conquer, plus a few additional mini-levels. Since some layers require revisiting, Donkey Kong Bananza turns out to be quite a large game. If you’re curious about what’s coming up, I’ve organized all the sublayers by depth and also included a list of levels in the order they’ll appear in the main narrative, serving as a simple walkthrough.
All Donkey Kong Bananza Levels
Donkey Kong Bananza kicks off with a brief tutorial level, followed by 17 main layers and a final stage that wraps up DK and Pauline’s adventure. You can teleport between layers by accessing the map and selecting a fast travel point, and using Warp Gongs allows you to return to previously visited layers at any time.
Below is a list of all the sublayers arranged by depth, although you’ll actually experience them in a different order:
- Ingot Isle (tutorial)
- Ingot Isle Cave-In – SL 10
- Lagoon Layer – SL 100
- Hilltop Layer – SL 200
- Canyon Layer – SL 300
- The Divide – SL 400
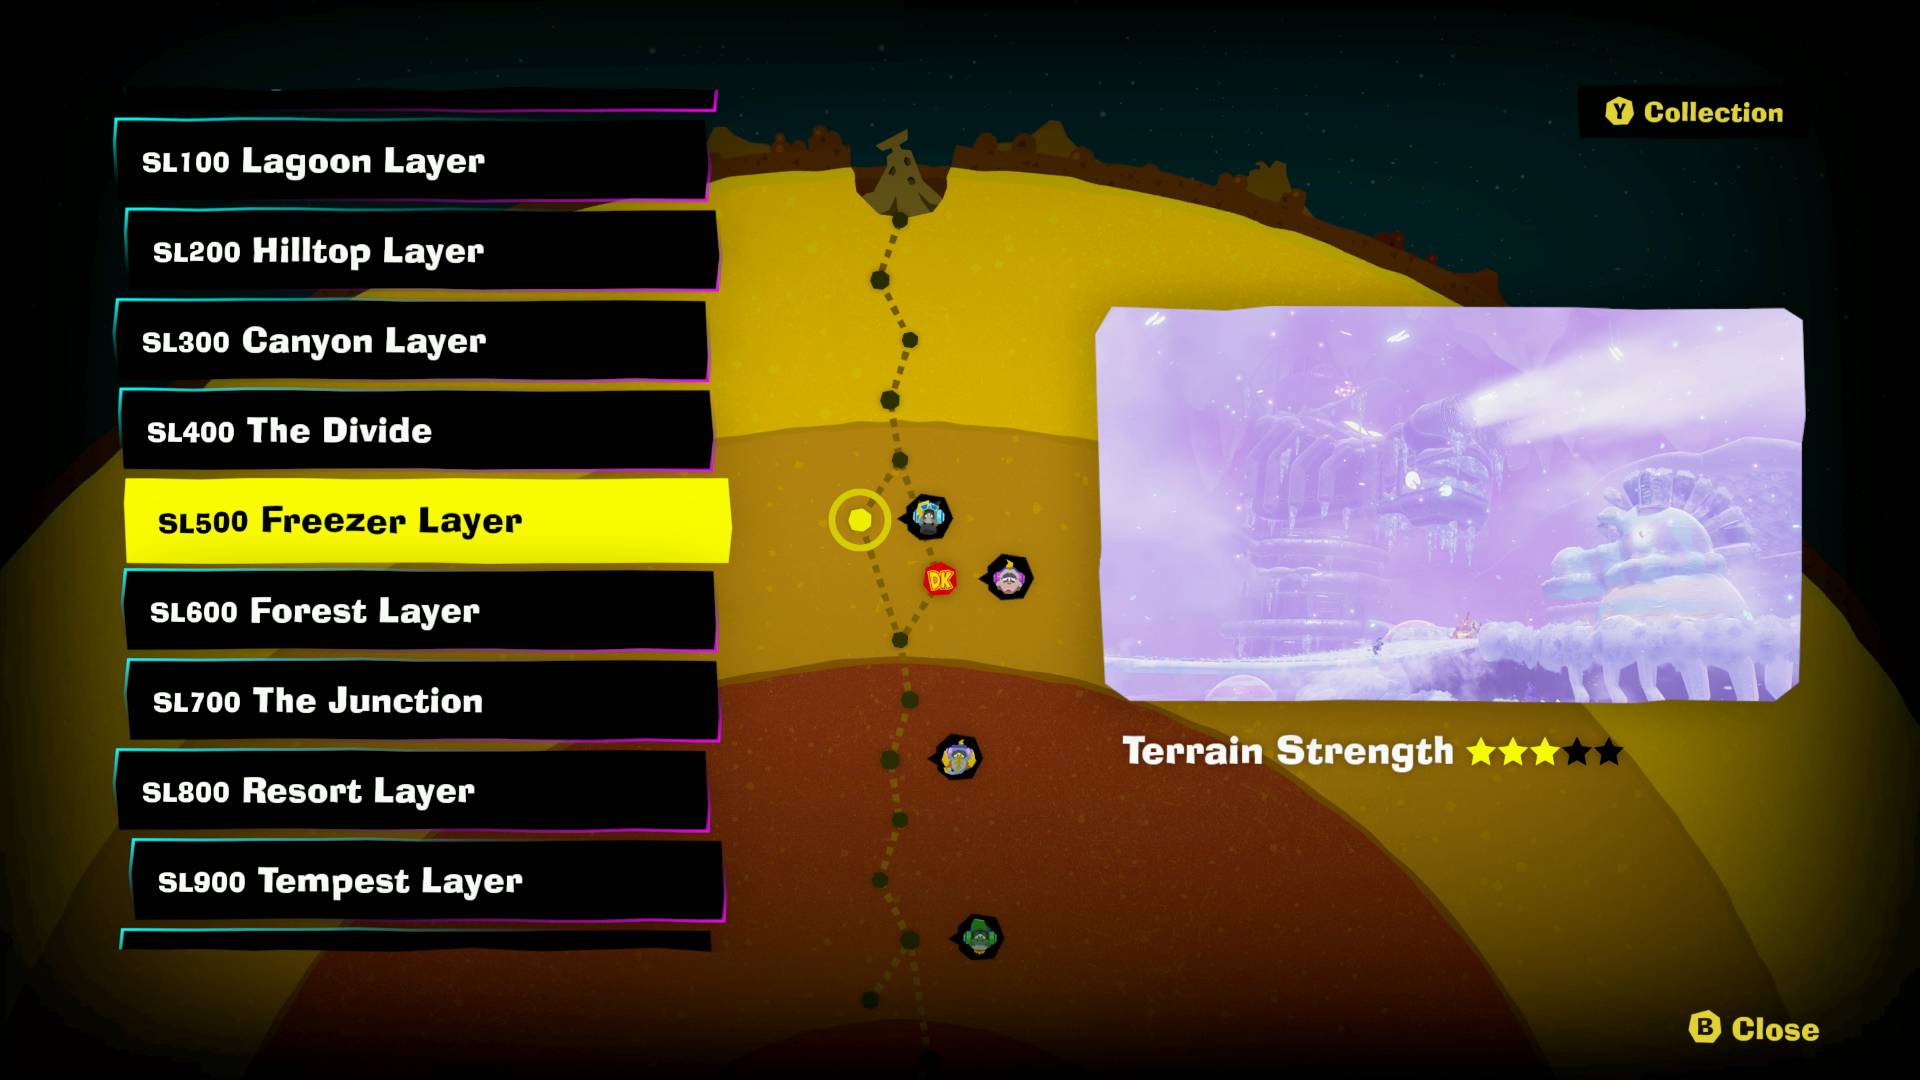
- Freezer Layer – SL 500
- Forest Layer – SL 600
- The Junction – SL 700
- Resort Layer – SL 800
- Tempest Layer – SL 900
- Landfill Layer – SL 1000
- Racing Layer – SL 1100
- Radiance Layer – SL 1200
- Groove Layer – SL 1300
- Feast Layer – SL 1400
- Forbidden Layer – SL 1500
- Planet Core – SL 1600
- Finale level
If you want to skip ahead, please note that spoilers follow! If you’re interested in a straightforward guide through the levels, I’ve also created a list of layers and their sublayers in sequence, including the average time to beat Donkey Kong Bananza.
All Donkey Kong Bananza Sublayers in Order

Here’s the complete list of levels in Donkey Kong Bananza, arranged in the order you’ll complete and revisit them in the main story, covering 21 levels in total. I’ve added notes for what players can expect to discover and accomplish in each sublayer:
- Ingot Isle: This is a brief tutorial stage that quickly leads to the next layer. Once you leave, you cannot return here.
- Ingot Isle Cave-In – SL 10: The remaining tutorial area where Void Co. causes the island to plunge underground. You’ll also pick up Pauline here in her gem form, but you can’t revisit until finishing the game.
- Lagoon Layer – SL 100, 101, and 102: A sunny, water-filled town where the first Donkey Kong Bananza Bananzas is unlocked, and you’ll encounter formidable foes like Void Kong, Poppy Kong, and Grumpy Kong!
- Hilltop Layer – SL 200: A brief stop where you assist the Fractones and reveal a pathway to the next layer.
- Canyon Layer – SL 300, 301, and 302: An arid area rich with small islands linked by minecarts, leading you deeper into a Banandium Refinery.
- The Divide – SL 400: A small level with a choice that determines which of the next two layers to explore first: the Freezer Layer or Forest Layer.
- Freezer Layer – SL 500, 501, 502, and 503: A chilly, sweet-themed area where you help locals repair their cooling system and discover the source of the unusual heat.
- The Junction – SL 700: Another decision point, this time needing to traverse both layers from The Divide before proceeding on the main path. Warp Gongs can be used to return.
- Forest Layer – SL 600, 601, 602: A swampy jungle with the famous Eggshell Hotel, where you assist residents in identifying the poison’s source.
- The Junction – SL 700: Return to the Junction. With both prior layers completed, you can face a boss, necessitating brief visits to Hilltop Layer and SL 101 of the Lagoon Layer using Warp Gongs before going back to the Junction.
- Resort Layer – SL 800: A serene beach paradise filled with oversized cube-shaped fruit. All you need to do here is reach the top of the giant watermelon in the center.
- Tempest Layer – SL 900, 901, and 902: A large area battling various adverse weather conditions, including whirlwinds and fire rain. You’ll need to defeat a boss multiple times to restore order.
- Landfill Layer – SL 1000: A compact trash heap where you clear out tunnels of debris.
- Racing Layer – SL 1100: A brief level featuring a 3D racing minigame. Win to advance to the subsequent layer.
- Radiance Layer – SL 1200, 1201, 1202, 1203, and 1204: A cavern overshadowed by its darkened Synthetic Sun. Reactivate it to aid the resident snake citizens.
- Groove Layer – SL 1300: A party-themed level filled with Fractones eager to dance. Help them revive the disco to proceed.
- Feast Layer – SL 1400 and 1401: A food-centric level where you explore and fix the Fried Pride Factory, which is overwhelmed by acidic muck.
- Forbidden Layer – SL 1500: An enigmatic layer close to the core, inhabited by irritable Fractones.
- Planet Core – SL 1600, 1601, 1602, 1603, 1604, 1605, 1606, 1607, 1608, and 1609: The final major level with numerous small islands leading up to the core and the final boss.
- Finale stage: I won’t reveal details here, but there’s an additional level following the final boss.
After you complete the last level and the credits roll, you’ll have the chance to freely explore SL 10 to 1609 to gather bananas and fossils, which can be spent on upgrading your skills and outfits. There’s also a post-game quest to further enhance your abilities!
If you want a smoother gaming experience, consider activating Donkey Kong Bananza Assist Mode. I’ve also put together some helpful tips and tricks for navigating Donkey Kong Bananza.