Select Language:
In the Cyberpunk 2077 mission titled "The Information," players work alongside Judy to navigate through a Braindance to locate the Relic. This task might feel overwhelming due to the vast amount of details to investigate, and the ever-present threat of Adam Smasher. You’ll have to locate security features and scan for thermal clues once you’re familiar with their significance.
Below, we’ll guide you on how to gather all the essential information from the Braindance, especially where to find the Relic during the "The Information" mission in Cyberpunk 2077.
Objectives for Cyberpunk 2077: The Information
- Review the Braindance in Analysis Mode to locate the Relic.
- Scan the apartment’s security systems (optional).
- Watch the entire recording from Evelyn’s perspective (optional).
- Look for thermal clues to find the Relic.
Exploring the Braindance in Analysis Mode to Locate the Relic
The first couple of objectives are central to your investigation. Before you can search for thermal clues, you need to complete prior tasks, which will eventually allow you to access the thermal layer.
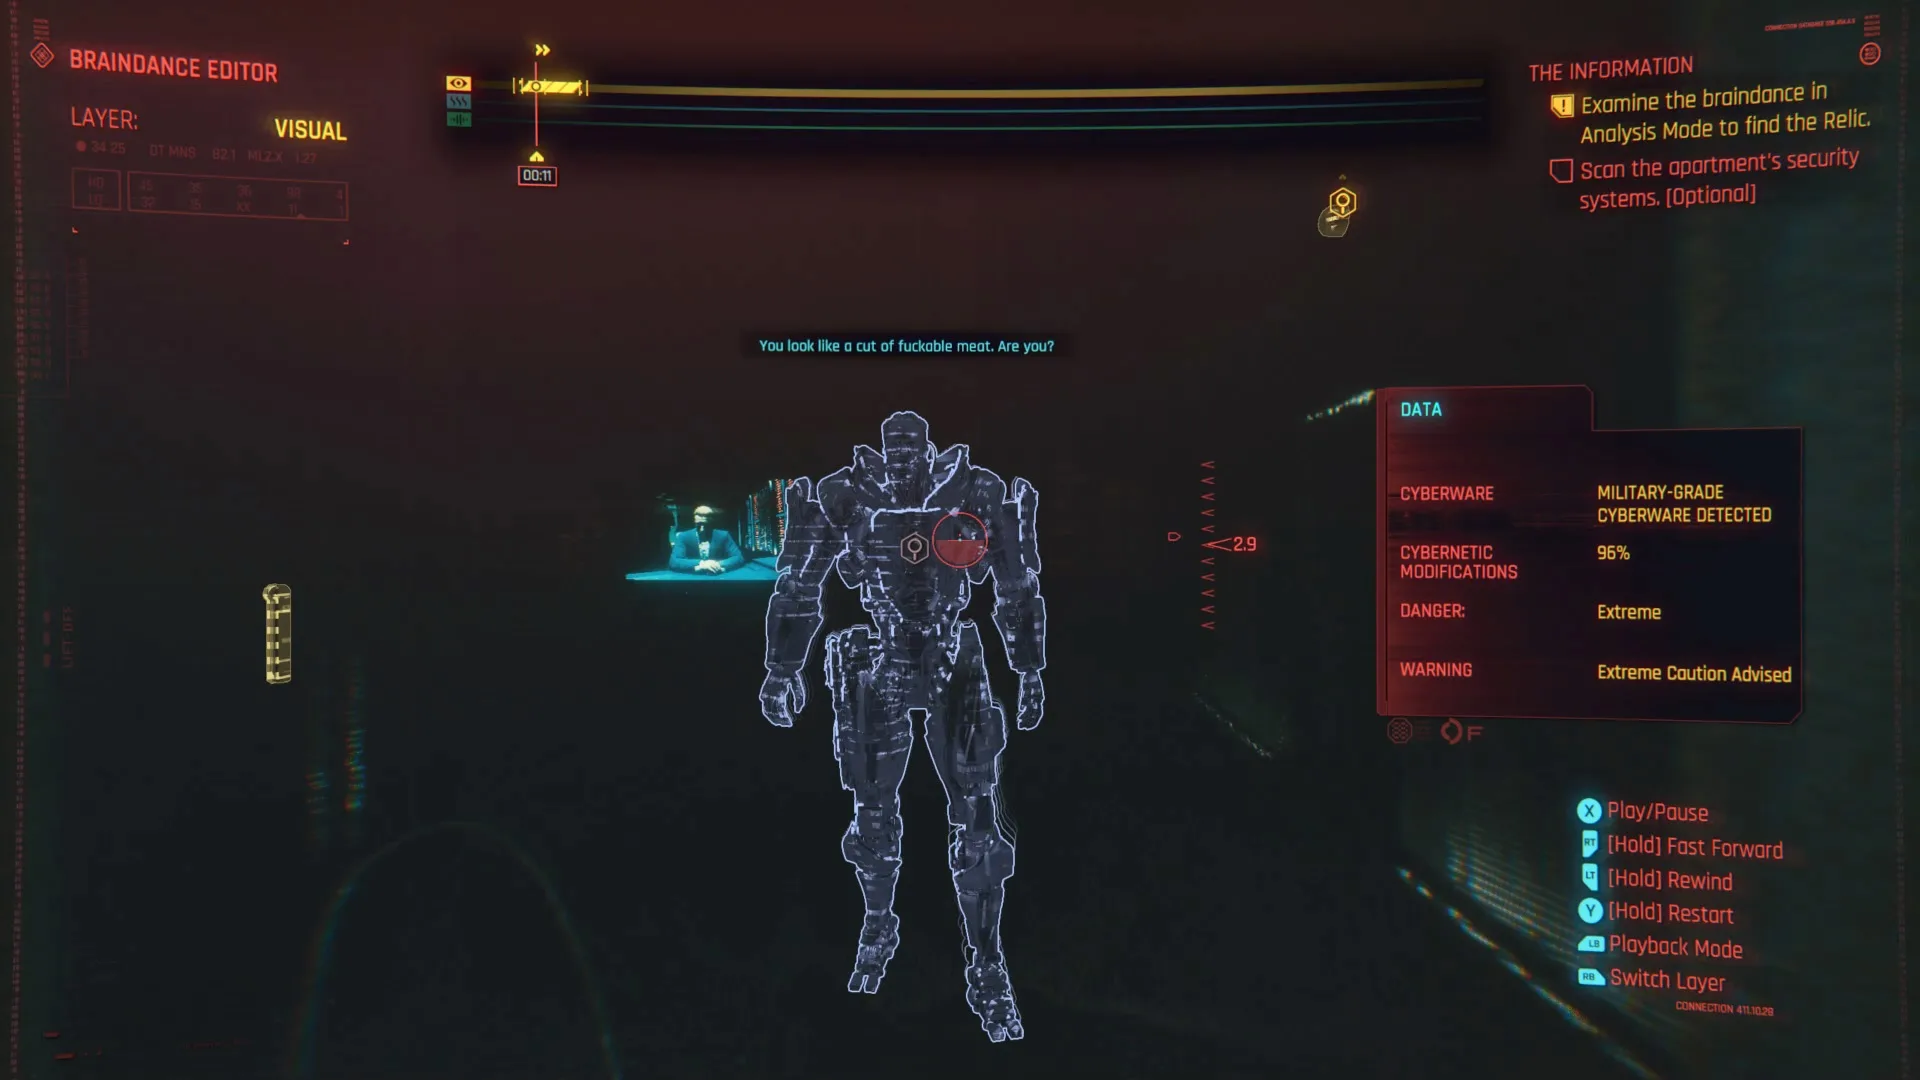
The security systems might seem complicated if you don’t focus initially, as it’s hard to know how much you need to scan until you’ve done so. You can actually spot four key items right away, which can be easily overlooked given how quickly they appear during the start of the Braindance.
Here’s how to find the apartment security systems:
-
0:10 / Visual
- Military-grade Cyberware: You’ll see a large cyborg guard as soon as you start; scan him immediately.
- Motion Sensor Camera: Located on the wall to the right, just outside the elevator entrance.
- Alarm System: Found on the wall to the right and left of the elevator exit; scanning either will count.
-
0:22 / Visual
- Motion Sensor Camera: There’s another on the ceiling just in front of the large TV.
- 0:30 / Audio
- Yorinobu’s Phone Call: At this timestamp, you’ll be prompted to listen to his conversation, which you can’t miss. You can also scan the TV as an audio source.
After the conversation wraps up, you’ll be instructed to find and scan the datapad for more data on the Relic’s storage. It can be tricky because the datapad only becomes visible right at the end of the recording.
-
2:05 / Visual
- Turret and Camera: At around two minutes in, look up to the ceiling near the TV to find these items.
- 2:45 / Visual
- Datapad: Near the recording’s conclusion, as Yorinobu approaches the bed, you can scan the datapad as he puts it away. There’s also a loaded gun on a chest at the end of the bed that you can scan simultaneously.
Scanning for Thermal Clues to Find the Relic
Once you’ve reviewed the recording and scanned the datapad, you can activate the thermal layer, allowing you to rewatch the Braindance to find the heat signature for the Relic storage. A blue gas will mark the cold items for you to examine.
You’ll start from the point where the Thermal layer is accessible and work backward through your findings.
-
2:40: Air Conditioning Vent – You can scan this as soon as the thermal feature is available.
-
1:30 – 1:56: Champagne and Ice Bucket – Found in the middle of the timeline when guests gather around the coffee table, but this isn’t your target.
-
1:00: Fridge – About a minute in, you can scan the fridge where Evelyn retrieves a drink, which is again not what you’re searching for.
- 0:40 – 0:46:
- Hidden Safe: Right at the beginning of the recording, when Yorinobu and Evelyn walk to the bar, you’ll see a brief opportunity to scan a hidden safe in the far corner of the room. This is your objective, and scanning it allows you to exit the Braindance even if you haven’t completed the optional tasks.
By carefully following these guidelines, you should successfully navigate the Braindance and gather all necessary information for the mission. Good luck!