Select Language:
In Crimson Desert, normal enemies usually aren’t too tough, but every so often you’ll face a boss that’s a real nightmare. One of the first of these tough fights is against the Devil in the Reed Fields. This battle involves multiple phases and enemies, and it’ll challenge your timing for parries, your dodging speed, and your overall readiness all at once.
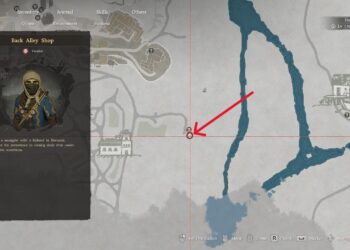
The fight takes place in Chapter 3 during the main quest called “The Face Behind the Mask.” First, you need to find him by following his trail with your lantern. Once you locate him, the real challenge begins.
This is your first big test of how hard Crimson Desert can get, and it’s definitely intense. Here’s everything you need to know to survive the fight with the Devil of the Reed Fields.
How to Prepare for the Devil in the Reed Fields
What to Bring
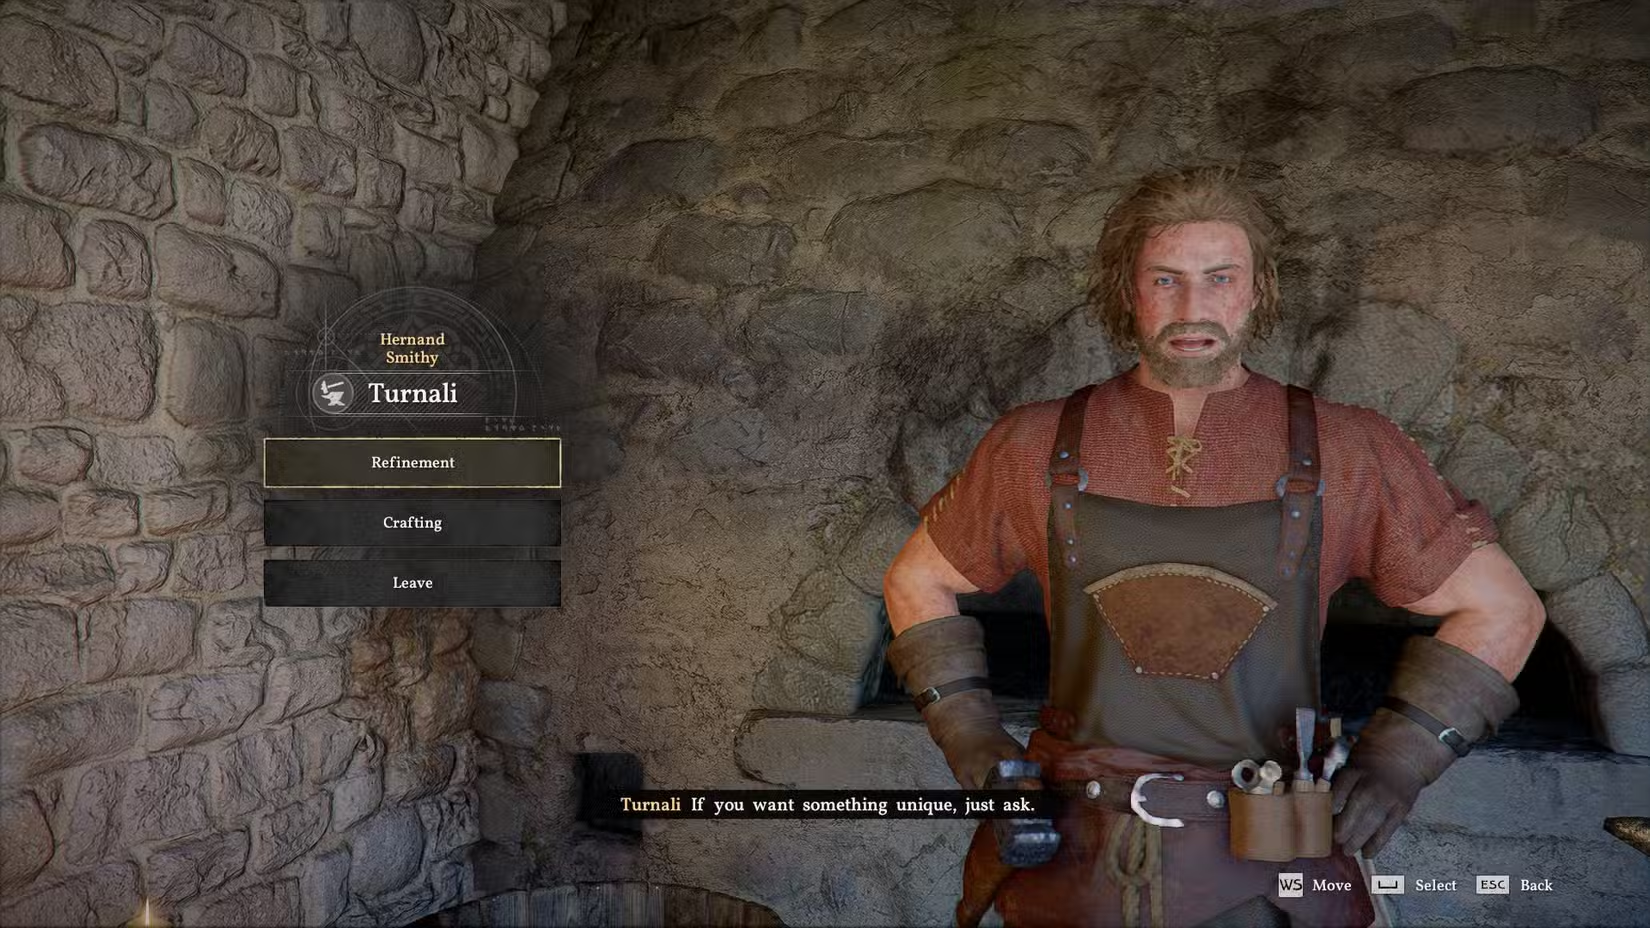
Before starting the fight, it’s smart to go back to town, craft some healing items, and improve your gear if you haven’t done so recently. Gather iron and copper ore from nearby veins and take them to the blacksmith to upgrade your best weapon and armor. You should also visit the butcher to cook any ingredients you have, which will help you heal faster during the fight.
If you have spare Abyss Fragments, consider upgrading your basic parry ability. Parrying will be crucial in this battle.
Reed Devil’s Moveset & Strategies
Lead-Up
The fight doesn’t begin as a typical boss battle. You start by tracking him using your lantern. Eventually, he appears in a secluded hill area along with some mask-wearing followers. Be aware that this part can be tough—you’re moving along cliffs, battling groups of enemies. The smaller foes can distract you, and then the Devil might strike with his giant staff, often leading to deadly combos.
To save resources, you can skip the lead-up by just following his trail straight to the end without fighting the smaller enemies. Use your lantern to guide you, and riding your horse can help you outrun the enemies.
When you reach a large reed field, interact with the doll to trigger a cutscene and start the real fight. This area will now serve as your checkpoint where you can upgrade gear or craft healing items before jumping back into battle if needed.
Phase One
Once the fight begins, the Devil immediately performs a long-range charged slash—watch his moves carefully to learn the telegraphing. Dodge when he charges up this attack; it’s fairly predictable.
He’ll then do a series of quick attacks, teleporting in front of you or on top of you, hitting with a flurry of sword strikes before disappearing. Parry his first attack, then respond quickly with your best counterattack. If you fail, dodge to avoid the rest of his combo.
At the end of his attack series, he might pause and sheath his sword, leaving him momentarily vulnerable. Use a move with forward momentum, like your RB+RT combo, to close the gap and land hits. He’ll stagger briefly, giving you the chance for more damage before he escapes.
Keep applying this strategy until he’s lost one health bar. Don’t forget to heal if needed, and stay patient—missed openings are normal.
Phase Two
When his first health bar drops, he enters a new phase. He’ll summon copies of himself that run around and try to swarm you, while six totems rise from the ground. You must destroy all six totems to progress, but the copies make it harder.
The best approach is to run from totem to totem, destroying each quickly with a heavy attack combo. Watch for red energy waves from the clones and dodge these attacks. Zooming out with the camera can help you see incoming threats better.
Phase Three
In the final phase, he acts similarly to his initial phase but with some differences. He can summon body doubles one at a time, which you should try to parry or dodge.
He also begins using his red wave attack again. If he suddenly appears far from you, recognize this move, and dodge in the same direction you’re moving—in reverse might get you caught.
During this phase, stick to your original tactic: parry and punish when possible, dodge if not, and heal as needed. Holding some healing items can help you manage the extra enemies and attacks, making the last part more manageable even if you need a few tries.
With proper preparation and patience, defeating the Reed Devil is doable. Focus on timing, learn his patterns, and stay calm, and you’ll have this boss beat and be on your way in Crimson Desert.