Select Language:
Welcome to Ginormosia, a truly unique area in Fantasy Life i: The Girl Who Steals Time. As the name suggests, it’s a massive region, more like an expansive open world than a section of a typical RPG featuring various separate maps. You’ll find yourself spending a lot of time here for several reasons, particularly due to the quest to discover and complete every shrine.
In total, there are 20 shrines scattered throughout Fantasy Life i: The Girl Who Steals Time. Some shrines challenge you with puzzles, while others require you to gather specific items. Completing these shrines will reward you with Strangelings. Here’s where you can find each shrine.
All Shrine Locations
|
Shrine’s Name |
Region |
Exact Location |
|---|---|---|
|
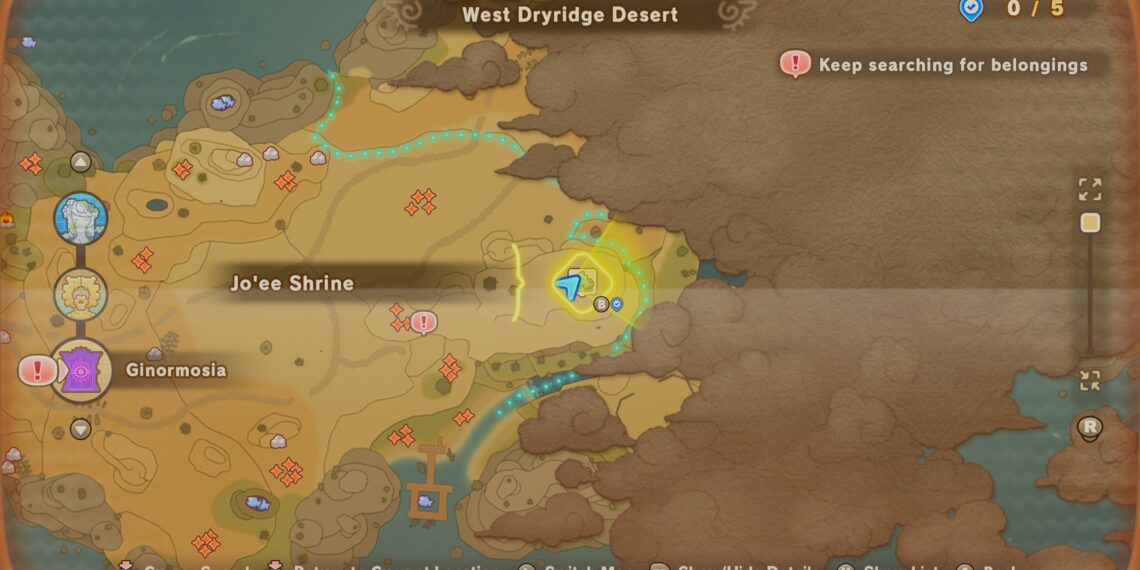
Jo’ee Shrine |
West Dryridge Desert |
Southeast of the tower, near the border with the East Dryridge Desert |
|
Sed’nas Shrine |
East Dryridge Desert |
East and slightly north of Haniwa Village |
|
War’ii Shrine |
Fangshore Isles |
Southwest of the tower, on the sandy isles near the border of the next region |
|
Angar Shrine |
Viridia Plateau |
Very close to the tower |
|
Sker’ri Shrine |
Viridia Plateau |
Far to the west and slightly south of the tower, near the borders with South Greatgut Plains and East Dryridge Desert |
|
Fan’ni Shrine |
South Greatgut Plains |
Not far east from the tower, at the top of one of the high cliff-like mountains |
|
Be’ranh Shrine |
South Greatgut Plains |
Southeast from the tower by an inlet with tiny islands leading into the ocean |
|
Besh’fel Shrine |
East Greatgut Plains |
Southeast of the section with islands, in a rocky area just west of the northern edge of the forest |
|
Eeg’ah Shrine |
West Greatgut Plains |
North of the fortress at the center of the zone, close to the border of Crickneck Canyon |
|
Het’rud Shrine |
Shroomhaven |
Located on one of the small islands along the southern shore, southeast of the tower |
|
Glehd Shrine |
Pettlewing Forest |
Located in the northeast part of the area, where a statue indicates the maze exits leading to the shrine |
|
Gel’ashi Shrine |
Wingtip Valley |
On the border with Moltana Wastes, specifically in the northern part |
|
Ree’lif Shrine |
Wingtip Valley |
Found in the far northern corner of Wingtip Valley |
|
Wavyu Shrine |
Moltana Wastes |
About a third of the way up the border with Wingtip Valley |
|
Faan Shrine |
Crickneck Canyon |
Situated at the northern tip of the grassy area in the southern part of the zone |
|
Dahl Shrine |
Crickneck Canyon |
Located directly west of the tower, near the lakes |
|
Lun’ii Shrine |
Scorchrock Mountains |
At the farthest western edge of the zone, on the peninsula |
|
Thril’ah Shrine |
Drakesnout Range |
On the western end of the zone next to the water, about halfway up the map |
|
Happi Shrine |
Drakeseye Valley |
Along the eastern border with Fangshore Isles, at a higher altitude |
|
Bit’ah Shrine |
Drakeseye Valley |
Located at the northern edge of Drakeseye Valley |


