Select Language:
The universe of Xenoblade Chronicles X: Definitive Edition is vast, but the heart of its narrative lies within the densely populated New Los Angeles (NLA). It’s the characters that truly bring the game to life, including your team and the many others you encounter. One such character is Alexa, who shares a passion for Skells, often mirroring that of dedicated players.
When she ends up damaging another Blade’s Skell, she vows to fix it, which leads her into a much larger predicament, including a plot against her life. Here’s a guide on how to successfully complete the “What the Skell?!” mission and take down its toughest foes.
How to Begin the “What the Skell?!” Mission
This mission is part of Alexa’s personal Affinity Missions, and you need to have completed her previous mission where she joined your team. This earlier mission is called Weaponized, which you can start in Chapter Four and it takes you to the area of Sylvalum. You also need to reach at least level 36, finish Chapter Nine, and have a minimum of two affinity hearts with Alexa.
Once you meet these requirements, make your way to the Outfitter’s Test Hangar to speak with a downcast Alexa. She’s upset after a weapons test went awry and resulted in a Skell being heavily damaged. Accompany her to the Administrative District so she can apologize formally.
Collecting the Repair Materials
Upon your arrival at the Hangar, Mika immediately confronts Alexa over the failed test, claiming that she and Camber are out of work until it’s resolved and that spare parts are scarce. Feeling responsible for this situation, Alexa insists that she will find the necessary parts herself, no matter the challenge.
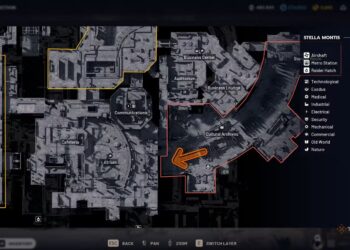
Being the helpful person you are, you agree to assist her, even though locating these items won’t be a walk in the park. You’ll need to gather two types of materials: five Standard Blade Modules and six Pan-Analysis Chips, both of which can be found in Cauldros. This territory might be new to you, so brace yourself for the adventure.
Standard Blade Modules
Your primary focus should be on the Standard Blade Modules. These can mostly be obtained from Fleet Shrads, although any Shrad can potentially drop them. Remember that the game will typically direct you to the nearest Shrad, not necessarily the one that has the best chance of dropping what you need.
Be cautious of certain Shrads, like Blast Shrads, which have a very slim chance of yielding Standard Blade Modules. Always check the name before engaging them in battle.
Focus on hunting down Fleet Shrads, as they almost always drop Standard Blade Modules. These enemies are lower in level (around 20-25) compared to others that are level 30 and above. They can be found in abundance at the White Phosphor Lake in the northeastern part of Cauldros, but watch out for tougher enemies lurking nearby.
Pan-Analysis Chips
On the other hand, gathering Pan-Analysis Chips is more straightforward. These are simply blue collectibles scattered throughout the area, and they’ll be marked for you in the game. Once you have collected six, head back to Camber.
A smart move is to add the Pan-Analysis Chip to your Collectopedia before collecting all six if you haven’t done so already, since the game points out their locations clearly.
Testing the Sparkjet Rifle
After you deliver the repair materials, Mika’s attitude towards Alexa softens slightly, though she’s still cool. Camber, on the other hand, expresses gratitude for your help. With that settled, Alexa decides to visit Tika to see if there are any new weapon tests available for her to take on.
Indeed, there is. This part of the quest resembles Alexa’s previous Weaponized Affinity Mission. Tika provides you with the Sparkjet Rifle, which must be used to defeat certain enemies. Like the Ramjet Rifle, it boasts an impressive TP Gain Rating. You’ll need to take out some challenging foes in Sylvalum and then a Tyrant in Cauldros.
Your first targets are the Cantors in Sylvalum, who only come out at night. You need to defeat three of them, but they shouldn’t pose much of a threat even if you meet only the minimum level requirement. Keep an eye out for a nearby Shadow Falsaxum that you might want to avoid.
A fun tactic is to use your Skells to fight, but leave the character with the Sparkjet Rifle on foot, so they are forced to engage without a Skell. As long as they hit the enemies once with the rifle, it counts as using it.
Next, you’ll need to battle the Tyrant, Rodriguez, the Twin-Tusked. This Potamus-type enemy isn’t overly strong, making it manageable to take down on foot, especially if you’re overleveled. There won’t be any backup enemies to complicate matters, allowing you to focus solely on it. You can still utilize the Skell method if you’re finding it difficult to fight without one.
Once you complete both objectives, you can head back to Tika and return the Sparkjet Rifle.
Investigating Eyewitness Accounts
Upon your return, Tika notices something off about the rifle and insists that Alexa discard it just before it unexpectedly explodes. Discovering that the previous failures weren’t entirely Alexa’s fault reveals that someone is deliberately sabotaging her efforts. Your next task is to uncover the identity of this saboteur, who must be positioned close to the event.
Initially, you’ll need eyewitness accounts to track down who is behind this. The first witness can be found right outside the Outfitter’s test Hangar. This person mentions seeing a woman run toward the Diner, marking your next target. Near the storage facility across from the Repenta Diner, another witness will indicate that they observed a Blade Operative rushing toward the Administrative District, looking distressed.
Proceed north along the road, and check by the red stairway leading downwards where you can find another witness. They claim a woman from the Outfitter’s Division hurried down to lower levels. As you descend, you’ll notice the quest marker indicating a familiar figure—Mika. It turns out she was envious of the attention Camber was giving to Alexa and wanted to undermine her. While not intending to kill, her actions were aimed at tarnishing Alexa’s reputation.
To Alexa’s credit, she’s more surprised by the notion that Mika could have feelings for anyone other than a Skell than by the attempted sabotage. She forgives Mika swiftly, provided that Mika allows her to pilot her Skell. As a reward for navigating these events, you will receive 26,000 Credits, 360 EXP, and one of Alexa’s unique Arts, Overclock, which is useful for Assault Rifles.
If you prefer, you can bypass the eyewitness steps entirely and head straight to Mika’s location, as she appears there as soon as this objective becomes available.