Select Language:
In The Elder Scrolls 4: Oblivion Remastered, the Knights of the Nine expansion includes a range of quests centered around finding the relics of Pelinal Whitestrake to defeat Umaril, who has purportedly risen from the dead.
The Shrine of the Crusader quest leads you to a concealed shrine, revealed to you by Pelinal Whitestrake in a vision. Your journey involves locating one of his relics, which grants you the strength to finally vanquish Umaril and disrupt his nefarious plans.
How to Begin the Shrine of the Crusader Quest
To initiate the Shrine of the Crusader quest, you first need to complete the Pilgrimage quest. During this quest, you will have a vision of Pelinal Whitestrake, who will mark the location of his shrine on your map.
This shrine is situated southeast of the Imperial City, beneath the surrounding lake. Follow the quest marker to reach the exact spot. You will need to dive underwater to uncover the stone door to Vanua, which leads you to the shrine.
Although the shrine is submerged, you don’t need special gear to breathe underwater. If you act quickly, you can enter the shrine and ascend the stairs before running out of air.
The Shrine of the Crusader Quest Walkthrough
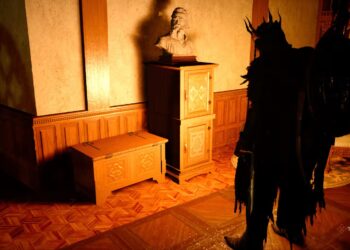
Inside the shrine, you’ll face numerous skeletons. Thankfully, they do minimal damage and are relatively easy to defeat. As you enter, you’ll notice an Ayleid Cask to your right. Collect the loot and proceed. A short distance ahead, a skeleton awaits, and there’s a path to the right with a deceased skeleton on a coffin that you can loot for bonemeal and a ring.
Continuing deeper into Vanua, you’ll encounter more skeletons. Push forward until you hit a dead end. To your left, look for a glowing button you can press to open a new path.
In this area, you can collect several Welkynd Stones. You can knock them off their pedestals using magic or arrows. These glowing stones will instantly restore your magic, making them ideal for spellcasters.
After pressing the button, continue down the newly opened path. You’ll face another skeleton, and upon entering a door, you’ll find yet another skeleton waiting for you. Defeat it and take the stairs to your left leading up.
On the upper level, another skeleton will be there. Once you dispatch it, an Ayleid Cask will be on your right. Loot it and keep moving forward, where you’ll find a door that allows you to venture further into the shrine.
Through this door, you’ll encounter two skeletons to your left. Progressing through a hole in the wall will lead you to the wooden door that opens to the Shrine of the Crusader.
Searching for the Helm
Upon entering this shrine via the wooden door, you’ll find yourself in a room with several skeletons and no clear exit. Proceed down the northward path, and look for a hole in the wall to jump into.
This hole will take you to another part of the shrine, where a deceased skeleton lies in the center—another fallen crusader. In this section, you’ll find two locked gates requiring a key to access.
Search the skeleton to automatically trigger the Priory of the Nine quest, the next quest in the Knights of the Nine expansion. You’ll also discover Sir Amiel’s Journal, which chronicles his journey as a crusader, along with his ring and key, both of which will assist you in your quest.
Next to Sir Amiel’s skeleton are a Knights of the Nine Shield and a Fine Steel Longsword. After gathering your loot, unlock the two gates. One takes you back to Vanua and the other leads you deeper into the shrine, where you will spot the Helm of the Crusader resting on an elevated platform.
By jumping over the pillars and ledges in this area, you can technically reach the Helm of the Crusader early, allowing you to skip parts of the dungeon. However, doing so may also prevent you from obtaining some valuable chests.
Reaching the Altar of the Helm Through the Lost Catacombs
Enter the door on the western wall where Sir Amiel’s skeleton lies. Defeat the skeleton in front of you and head to the northwest corner of the room where you’ll discover a hole to proceed through. Although there is an additional door in this room, it leads nowhere.
Descending through the hole will guide you down a tunnel into another section of the shrine, where you’ll face more skeletons. If you explore the south side of this room, there’s a dead end with a chest, while heading north leads to the door that opens into The Lost Catacombs.
Inside the catacombs, you’ll find a skeleton at the top of the stairs. Keep advancing until you reach a wooden door. After passing through, you’ll enter a chamber containing two skeletons and a chest in the eastern section. Once looted, look south for a hole in the wall to jump through.
This hole will guide you to a corridor with two doors that lead back to the shrine. Both doors access the same area, but the right door has a chest on your way. After checking the chest, advance until you find a path through the wall on your right.
The narrow passage will bring you to the Helm of the Crusader on the altar. You can pick up the helm to complete the quest. Then, return to the platform where you found Sir Amiel’s skeleton and exit the dungeon via the southern gate.
As you exit, be sure to check the wall on your right for a chest before opening the door to Vanua. After returning to Vanua, you’ll encounter several ghosts, which are immune to melee attacks, so use spells to defeat them.
Finally, you’ll jump into the main hall of the shrine, the very place you entered. From here, you will need to swim your way out of the dungeon.