Select Language:
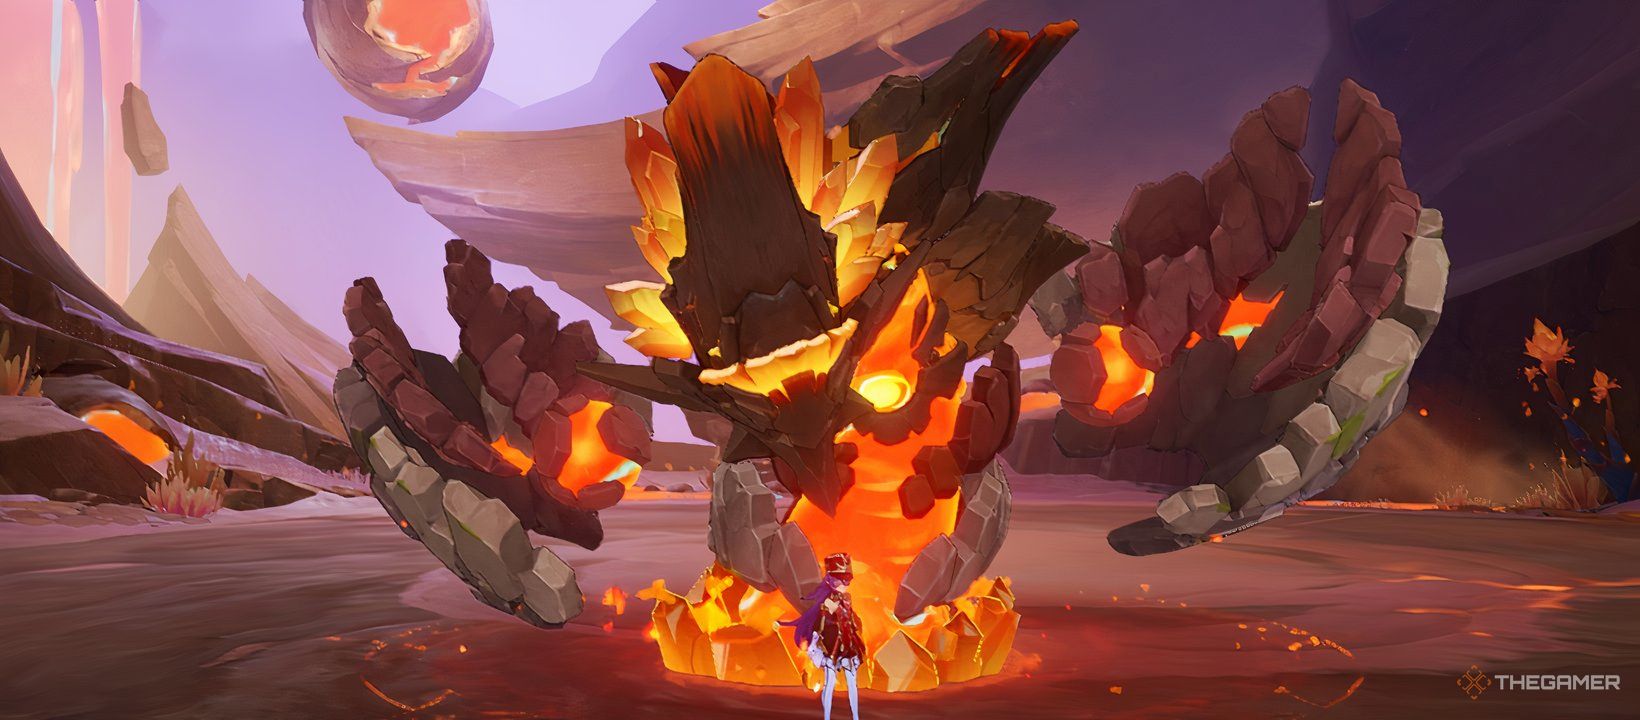
If you’re anxious about encounters with lava, dragons, or stone figures, facing the Lava Dragon Statue boss in Genshin Impact could be quite daunting. While it looks intimidating, this boss is actually among the simpler opponents you’ll encounter in the game. You can easily stun it thanks to its clear attack patterns and simple mechanics.
Defeating the Lava Dragon Statue rewards players with the Sparkless Statue Core, which is a key ascension material for characters like Varesa. To successfully take down this geothermal creature, it’s beneficial to assemble a team with characters that can deal substantial Pyro damage.
Finding the Lava Dragon Statue
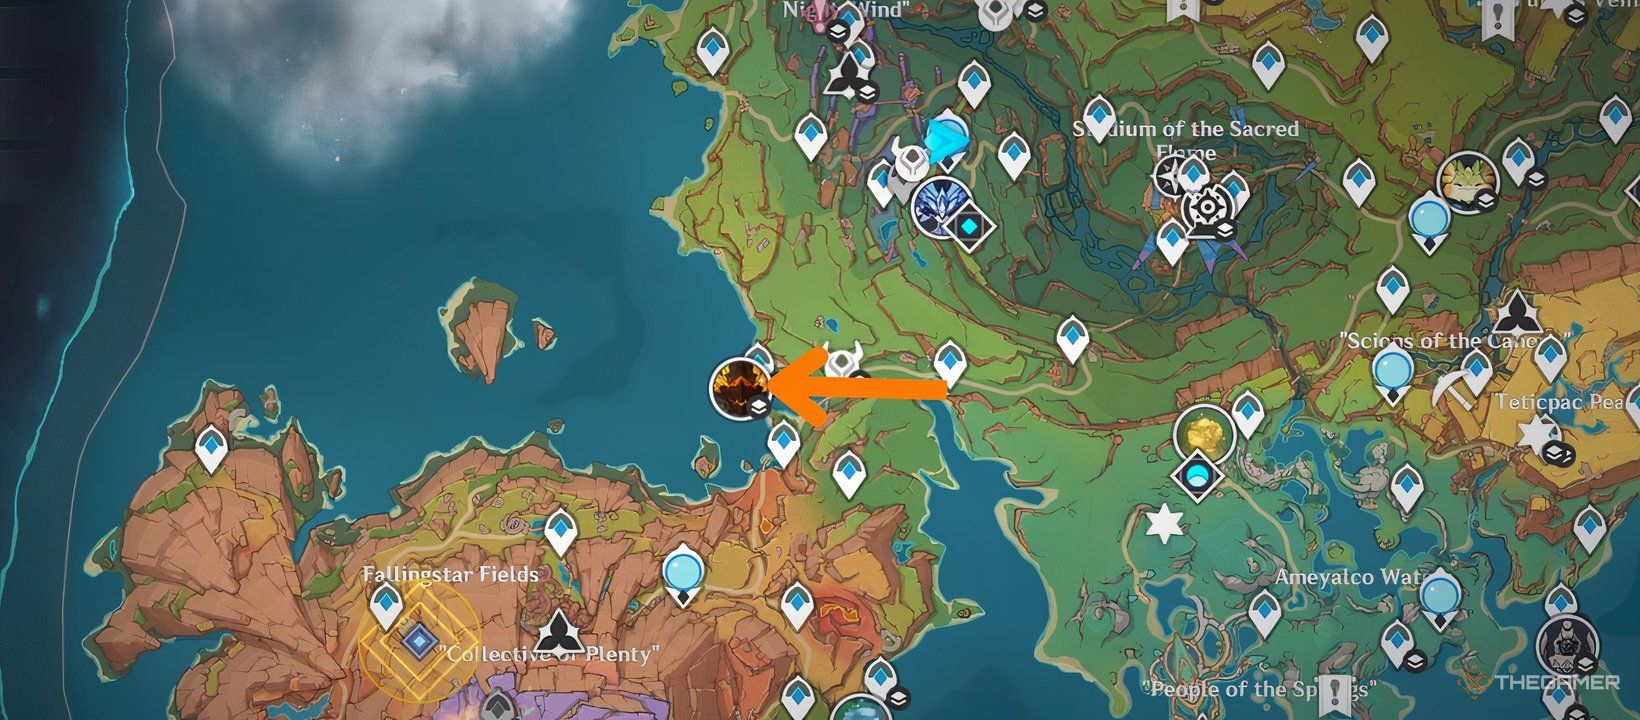
The Lava Dragon Statue is located in an underground area close to the entrance of the Atocpan region. To find it, head southwest of the Stadium of the Sacred Flame or northwest from the People of the Springs.
How to Reach the Lava Dragon Statue
To make your journey easier, you can click on the Lava Dragon Statue icon on the map to reveal its underground location. Then, set a marker at the entrance and begin your navigation.
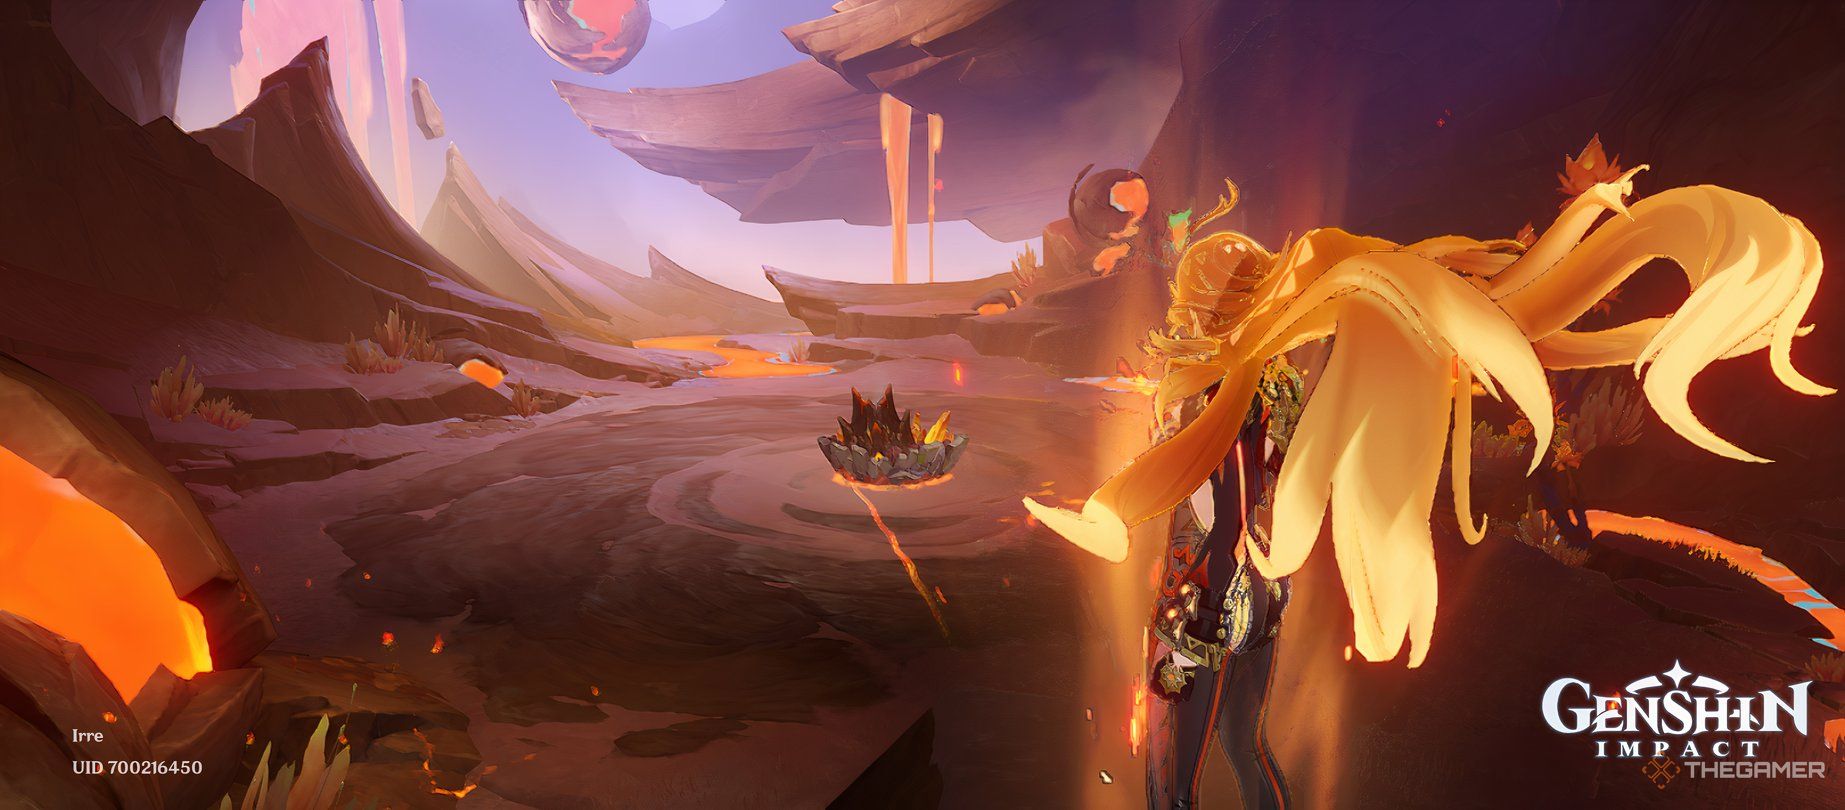
From the Teleport Waypoint, follow the main path leading to Atocpan. You’ll need to stay on this path until you spot your marker or a visible opening on the map.
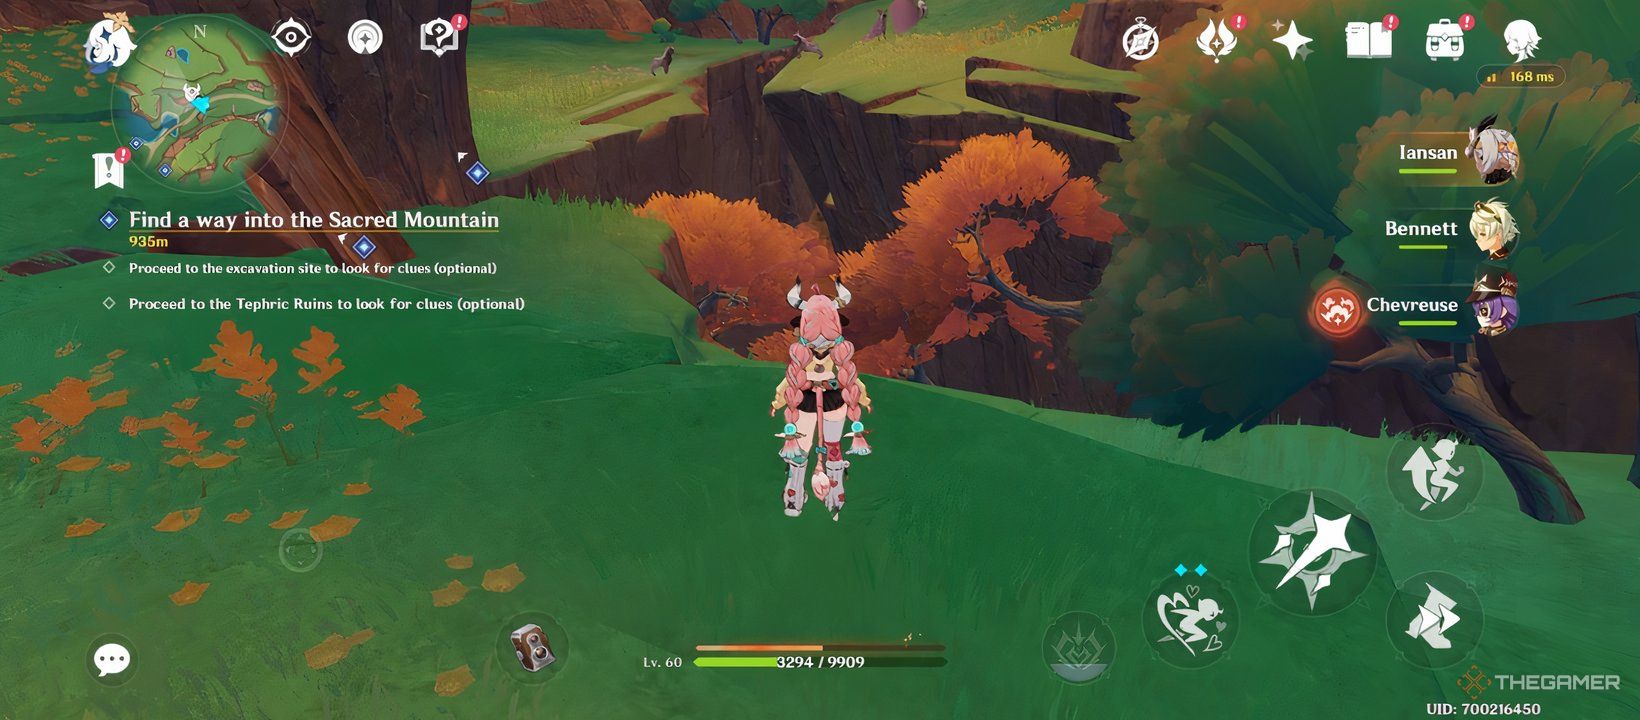
Take a detour to the right side of the path, moving into the green area, where you’ll discover an entrance to the underground. Jump in, using your character’s Plunge Attack to avoid fall damage.
Follow the only available path to reach both the underground Teleport Waypoint and the Lava Dragon Statue boss.
How to Defeat the Lava Dragon Statue
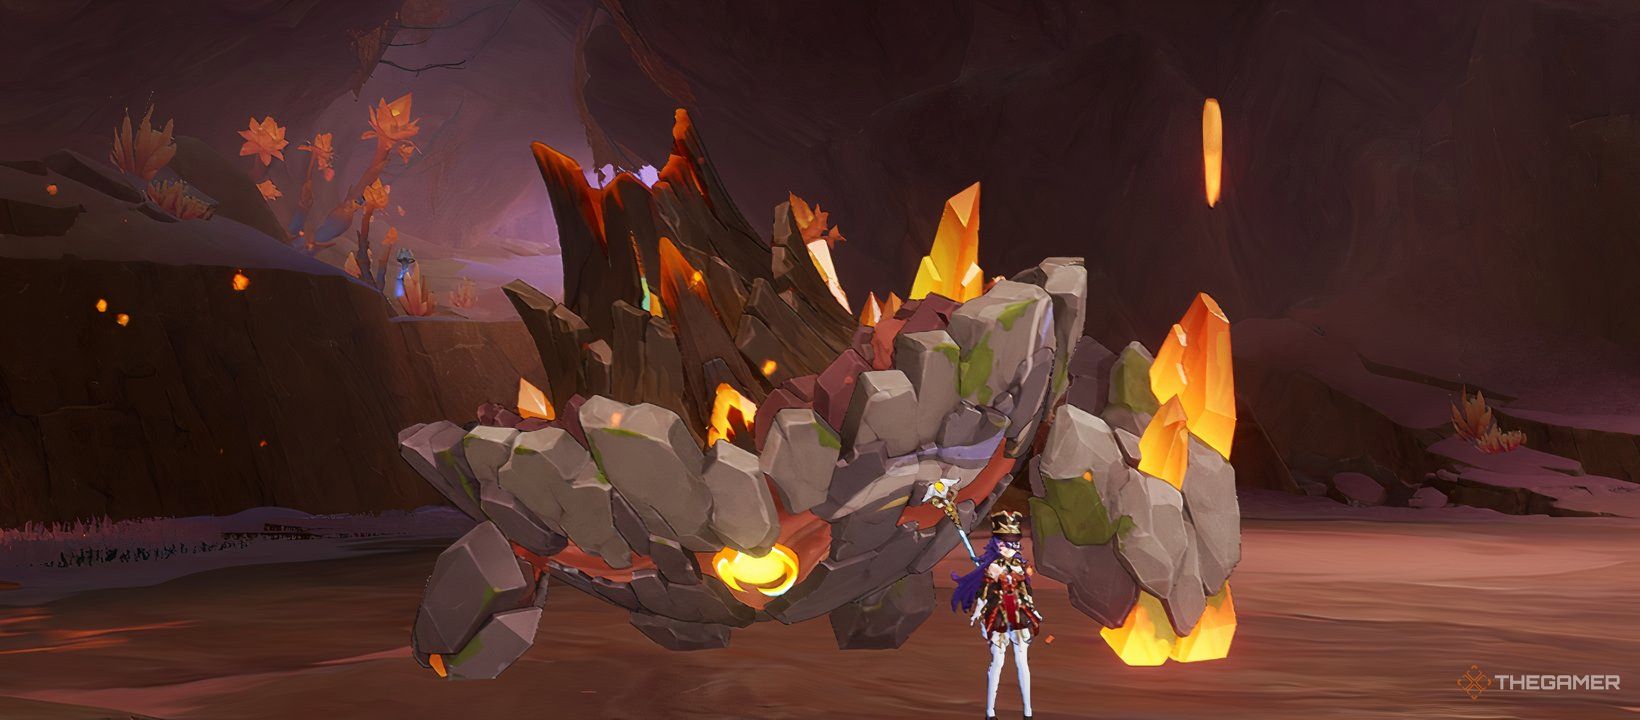
The Lava Dragon Statue is relatively easy to defeat in Genshin Impact. It has limited strong attacks, and by keeping a safe distance, you’ll have ample time to dodge its moves.
Its primary attacks involve launching its body at you in various patterns that are easy to anticipate and avoid. If you do take damage, it’s not severe, and having a reliable healer or shield character can help you sustain through the fight.
The Lava Dragon Statue possesses two long-range attacks similar to those of the Pyro Regisvine, which are also simple to dodge.
In its base state, the Lava Dragon Statue boasts a high 70% resistance to all elements and physical damage, making it quite durable.
Although you typically want to avoid the same element a boss wields in Genshin Impact, the Lava Dragon Statue is an exception. You’ll need characters that excel in Pyro damage to take it down.
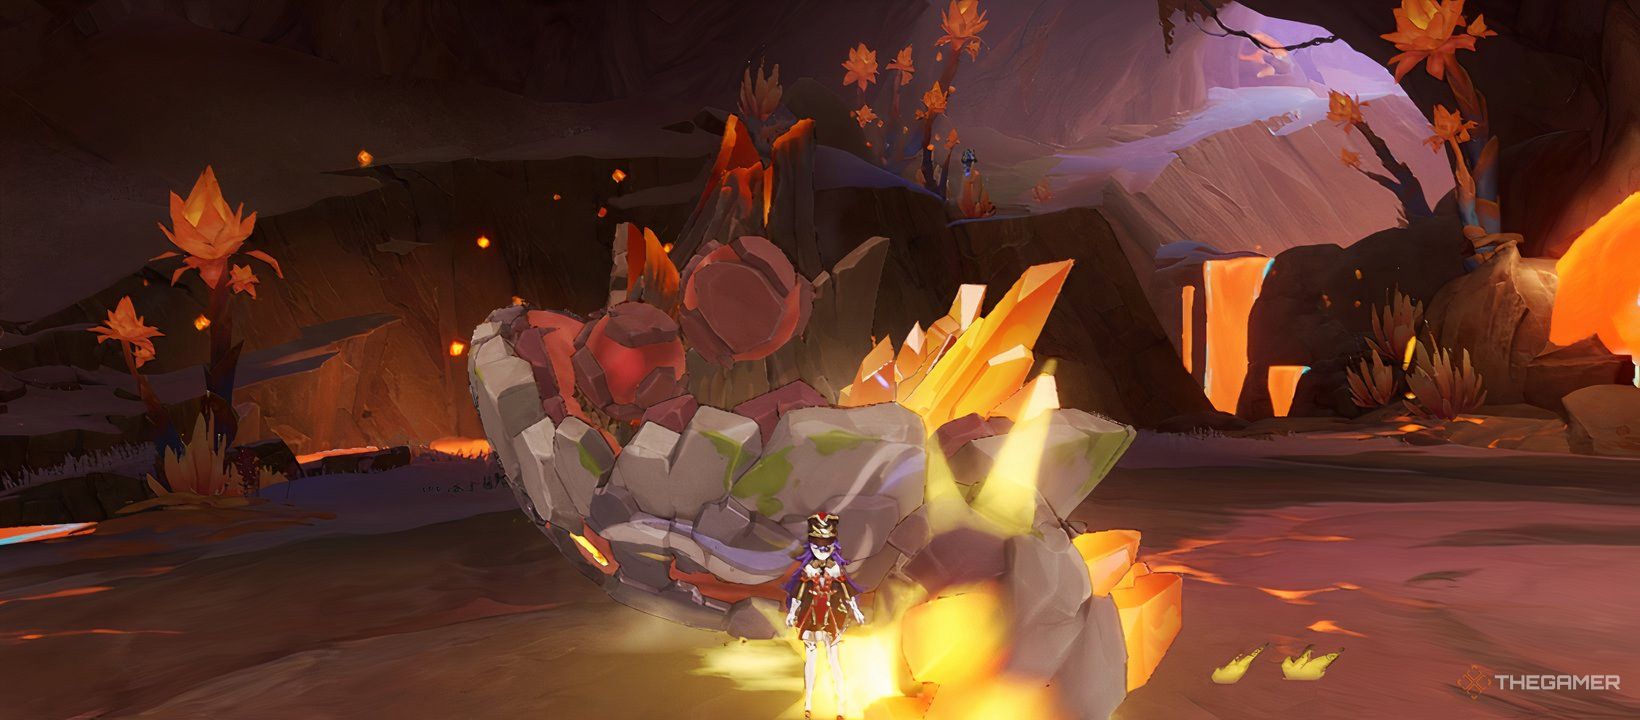
While it’s possible to defeat the boss without charging its Fury Meter, doing so will stun it and reduce its resistances, allowing your characters to deal significantly more damage.
Each time you deal Pyro damage or apply Pyro effects, you fill the boss’s Fury Meter. Once it fills for the first time, the boss transitions into its Molten Dragon state.
In this Molten Dragon state, you receive a new Fury Meter to fill. If you deal Cryo or Hydro damage, that meter will decrease.
You can take down the boss in this phase since its resistance is lower, but to achieve the full resistance reduction and the stun, you need to repeat this process.
Once you’ve filled its Fury Meter twice, the boss will crash down and enter its Overburn state. During this state, it is more susceptible to damage, meaning you need to chip its health down to zero before it recovers.
If the Lava Dragon Statue wakes up before you can finish it off, it will regain its 70% resistance, forcing you to start the Fury Meter process over again.
Best Teams to Defeat the Lava Dragon Statue
As the Lava Dragon Statue forces you to concentrate on Pyro damage and discourages using Hydro and Cryo characters, the best team setups include Overloaded teams, Burning teams, or pure Pyro compositions.
If you lack a fully developed team, pairing any Dendro character with a Pyro character like Amber creates a viable strategy that enables you to use Burning effects and frequent skills to stun the boss.
The boss’s Fury Meter does not rely on the amount of damage dealt; it only counts the number of Pyro attacks. Therefore, you can utilize a level one character as long as they can frequently apply Pyro.
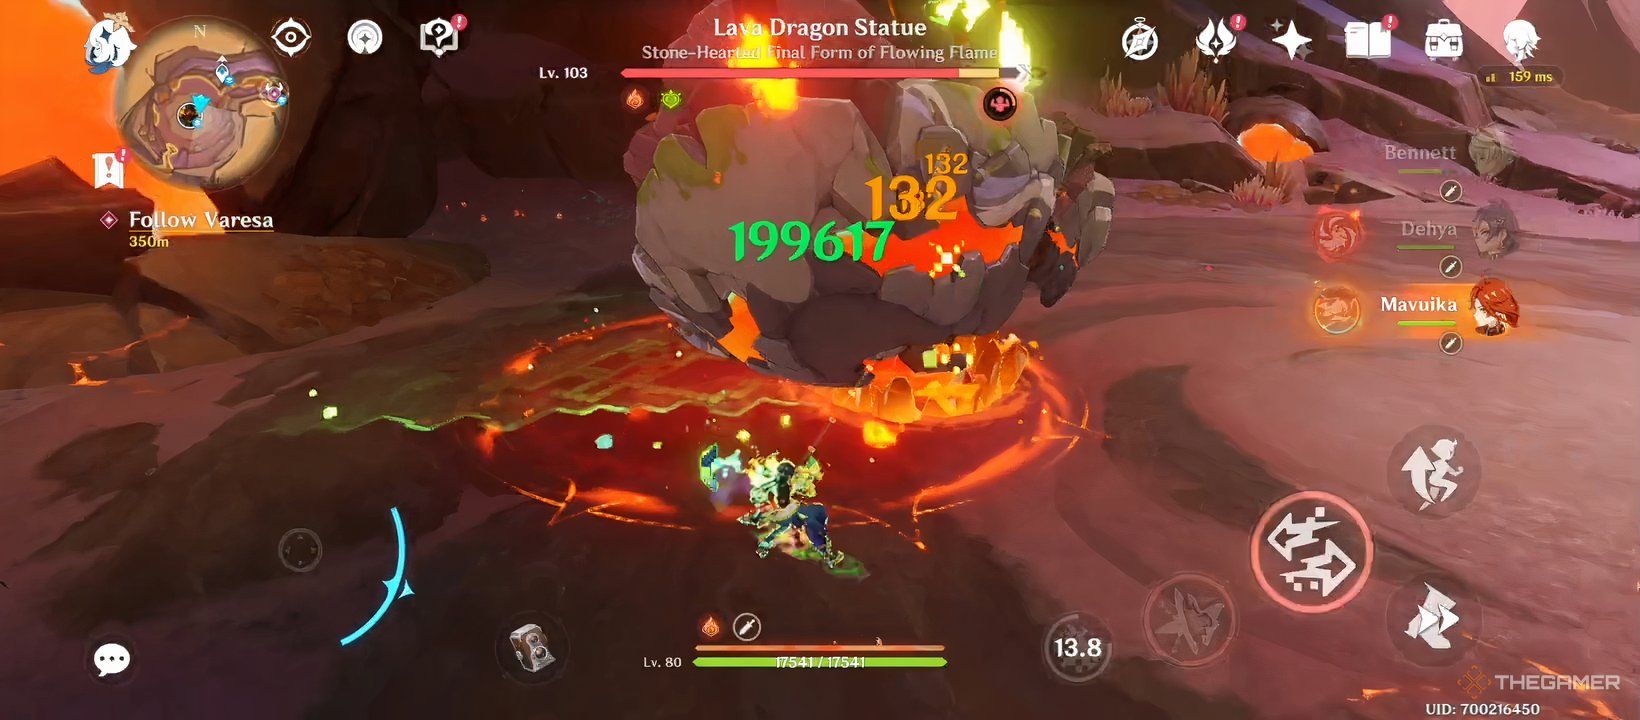
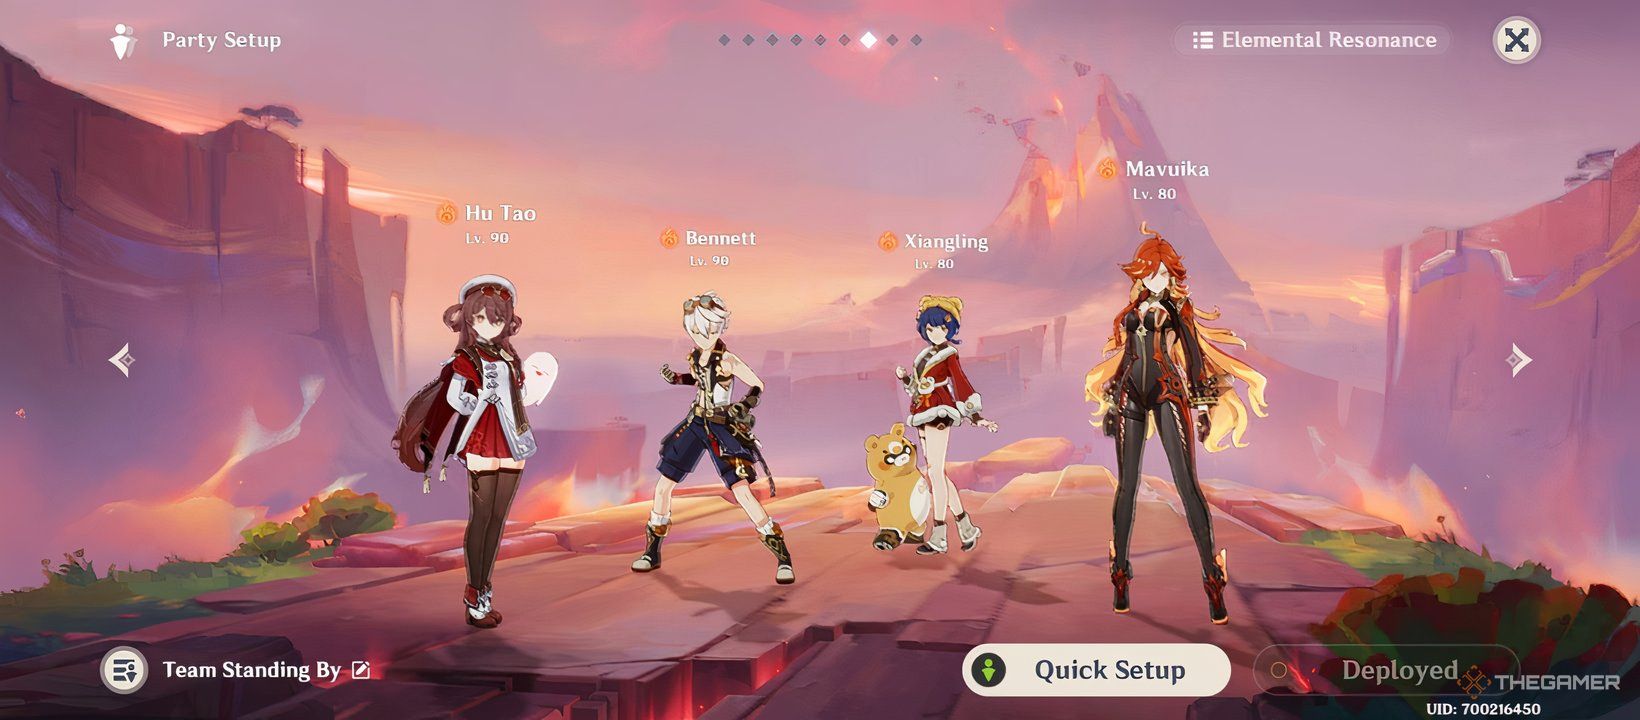
Mavuika and Chevreuse
Though Mavuika’s optimal teams often include Hydro or Cryo characters, the Chevreuse core stands out as an effective team to tackle the Lava Dragon Statue.
Mavuika applies substantial Pyro while active and also as an off-field presence. Chevreuse complements her role with Pyro application through her skills and burst.

The star of this setup is Bennett. His skills and burst can apply several Pyro instances, allowing the Fury Meter to fill quicker than with other characters.
Additionally, Bennett’s passive ability enables him to use his skills more frequently while in Burst mode, allowing him to level up the Fury Meter even faster by using his Elemental Skill repeatedly.
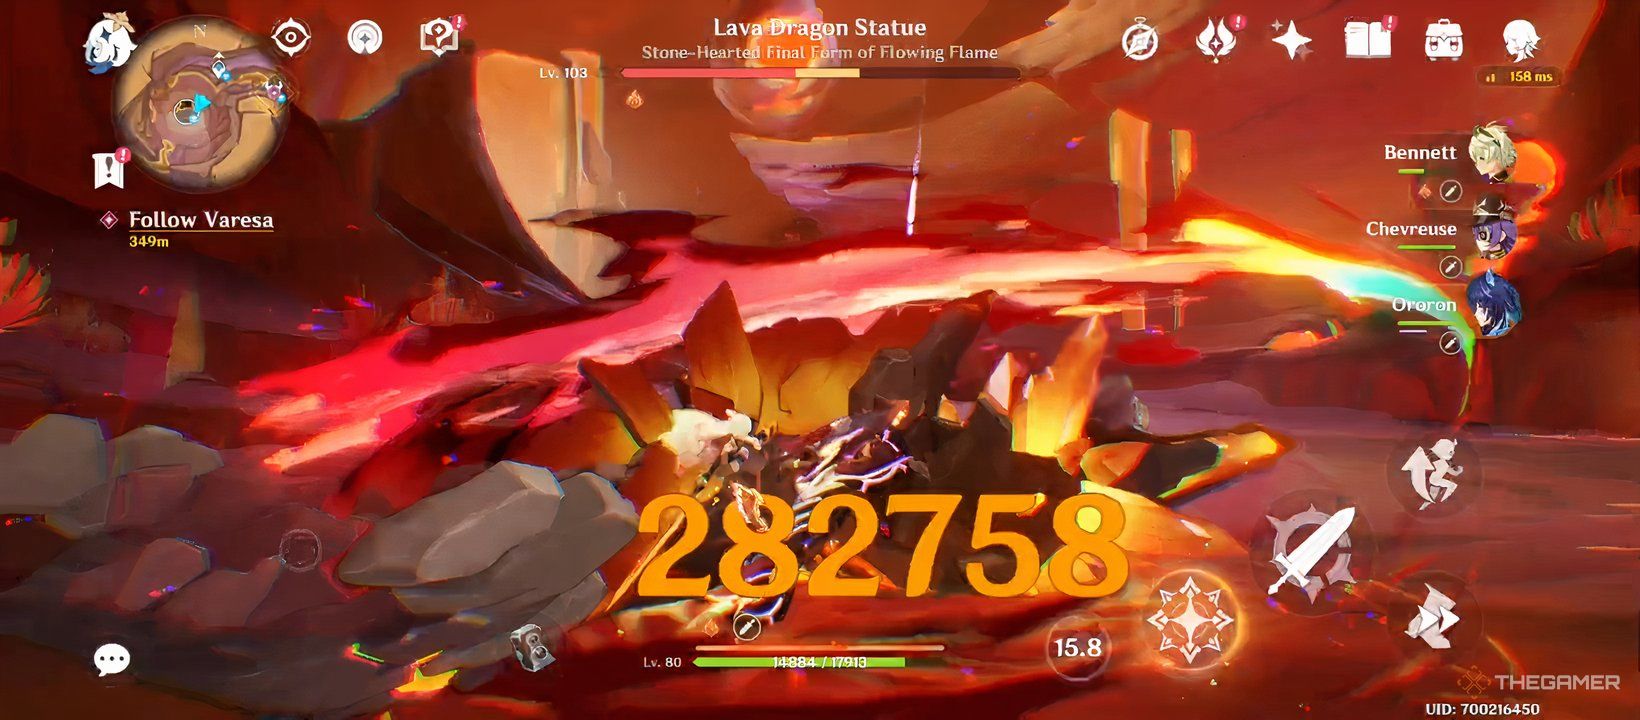
Once the boss is stunned, it will have lowered resistance, allowing it to take increased damage compared to typical enemies. You can unleash your rotations, working to bring its health down rapidly.
Burning Teams
Certain elemental reactions can also contribute to filling the Lava Dragon Statue’s Fury Meter. The primary reaction to do this is Burning, which inflicts consistent Pyro damage.
One of the most effective Burning team compositions includes Kinich, Emilie, Bennett, and Mavuika, although many other character combinations will also work.
To start, use Kinich’s Burst, allowing you to quickly switch back to Bennett for longer Pyro application.
Utilize your off-field abilities and then swap to Kinich to apply Dendro and activate Burning. After completing a rotation, switch back to Bennett to consistently work on elevating the Fury Meter.
When the boss is stunned, proceed with your usual damage rotation to finish it off quickly.
Mono Pyro Teams
Since the fight requires substantial Pyro application, Mono-Pyro teams excel at defeating the Lava Dragon Statue.
Just keep attacking the boss until you trigger the Overburn status, leading to increased damage output.
Mono Pyro teams tend to be the most efficient way to transition through the Lava Dragon Statue’s two states.
Other Teams
If you can’t build a dedicated team, simply pair a Dendro character with a quick-hitting Pyro unit to use Burning and deal with the resistances.
Afterward, bring in your other characters to deal heavy damage before the boss can recover.
You can still utilize teams that include Hydro or Cryo characters against the Lava Dragon Statue, but avoid switching to them or applying Elemental damage.
Top Characters for Beating the Lava Dragon Statue
Even if you can’t form a complete team for this boss, certain characters can efficiently build the Fury Meter faster than others.
Look for units with low internal cooldowns on their attacks or those that can inflict multiple instances of Pyro damage per hit.
The Lava Dragon Statue’s meter fills up even if a Pyro attack doesn’t apply the element—however, attacks that do will fill it faster, which is why you want characters with rapid attacks or unique cooldown mechanics.
|
Character |
Reason |
|---|---|
|
Bennett |
Both his Elemental Burst and Elemental Skill apply multiple units of Pyro. His C6 offers Pyro-infusion for even more damage. |
|
Xiangling |
Her Pyronado has no internal cooldown. |
|
Hu Tao |
Her Charged Attacks have no internal cooldown. |
|
Amber |
Her Elemental Burst applies Pyro damage quickly. |
|
Kinich |
Can apply a lot of Dendro while dealing damage. |
|
Nahida |
Can trigger Burning with her skills. Tri-Karma Purification can continuously refresh Burning from off-field. |
|
Emilie |
Can trigger Burning and enhance damage from the status effect. |
|
Any Pyro/Dendro Combo |
Can keep applying Burning to trigger ongoing Pyro damage. |
Drops from the Lava Dragon Statue

The Lava Dragon Statue drops the Sparkless Statue Core. As of version 5.5, only Varesa requires it for ascension.
To ascend a character to level 90, you will need a total of 46 of these cores. If you are fighting at the maximum World Level, you will usually obtain three cores each time you defeat it.
This means you will need to slay the Lava Dragon Statue 16 times to fully ascend a character.