Select Language:
Hollow Knight: Silksong may not seem like a Souls-like game at first, but it shares many mechanics with that genre. For instance, enemies reset when you sit on a bench, except for bosses. If you get defeated, you’ll always respawn at the last bench you used. Developers have used this mechanic to increase the difficulty of some bosses. The Last Judge is a good example; it will take several attempts to reach it again after losing, so defeating it quickly is crucial.
How to Reach the Last Judge
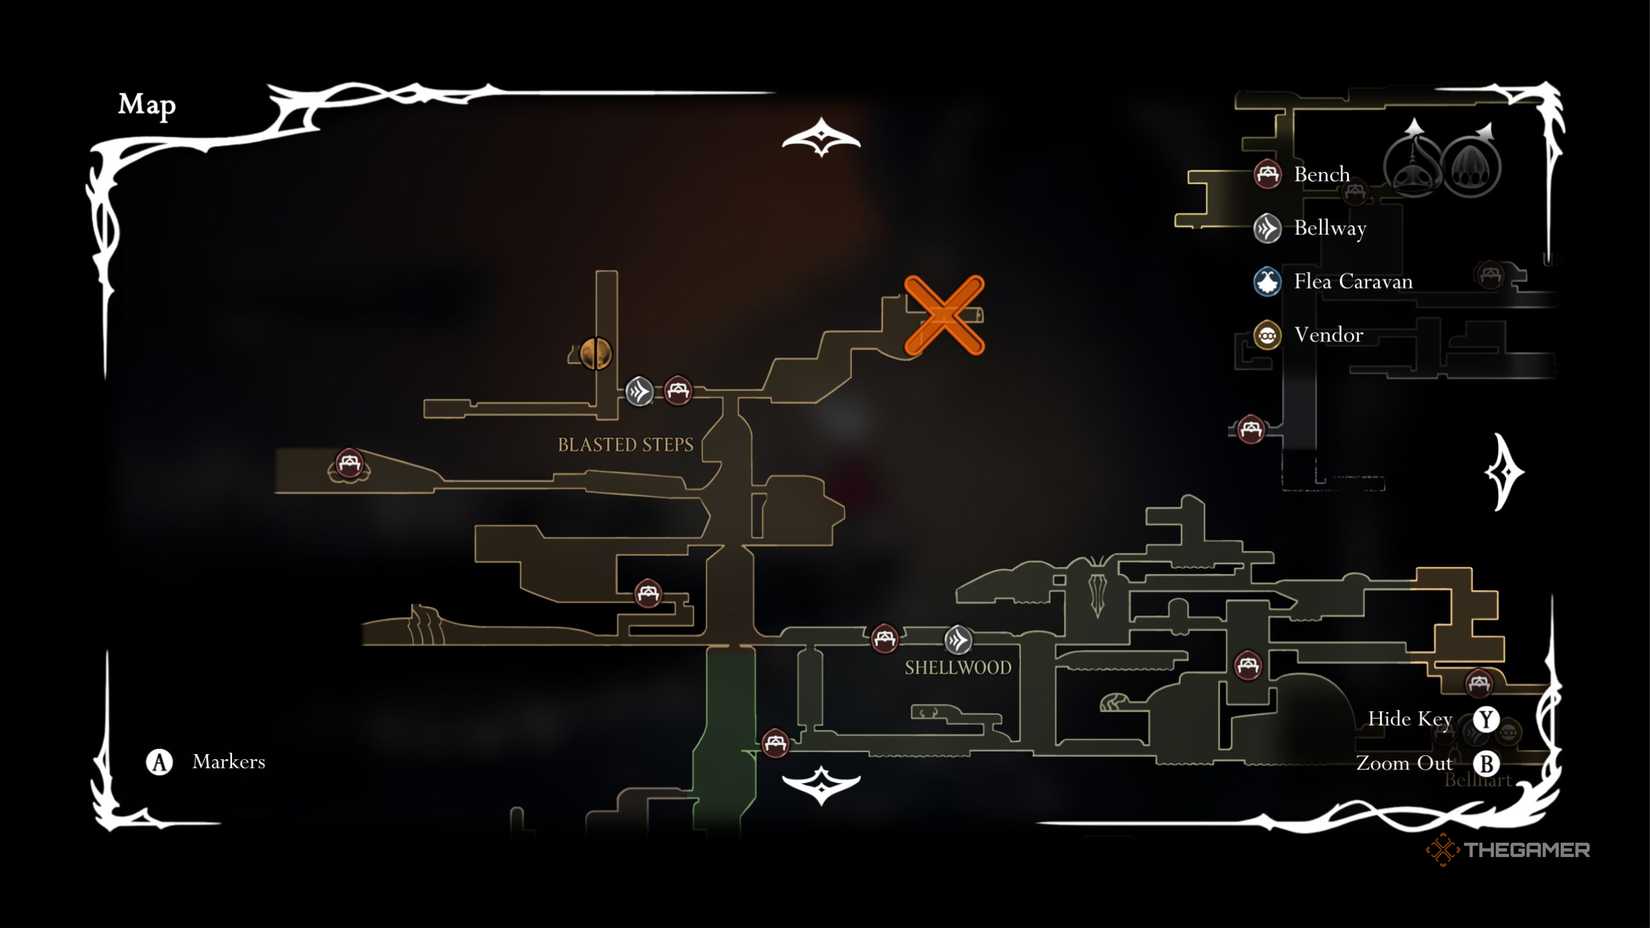
The Last Judge is the main boss in the Blasted Steps area. Reaching it takes some time. When you are near the bench close to the Bellway of this zone, you can start heading toward the boss. But remember, each time you die, you must start back from this bench, and the path ahead is filled with enemies and traps.
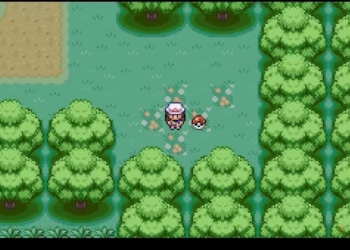
To make your return safer, first go to the right from the bench until you reach a sandy area. In this spot, after your first jump, a flying creature with a red drill on its face will appear. This enemy spawns in a tight space and can be tough to defeat or avoid.
The best way to handle this foe is to jump as it’s about to land, then hit it with a downward strike. Once it drops its drill, wait for it to throw another one, then strike again to pass quickly.
After clearing the bug, use your Cling Grip to jump onto a series of platforms. On the right, you’ll see a couple of bells hanging. Jump onto these bells and strike them downward to get past. Beyond that, ignore some enemies and continue to the left after climbing over the guard to reach your goal.
Use another bell to reach the area at the top right. Glide past using the bell, then wall hop to ascend. In the next part, hit the lower bell to reach the left wall, climb it, and then use the upper bell to get to the top right. Following this path will lead you straight to the Last Judge.
Last Judge Phase One Guide
The fight against the Last Judge has three phases, with clear differences in the first two. The last phase doesn’t change much visually. The first phase is relatively easier; here are the main attacks to watch for:
-
Spin Attack: The boss rotates its weapon for a second, then unleashes it around its body, spinning for a few seconds. If you’re within the radius, you’ll take damage. To avoid this, dash away as soon as you see the hand spinning and wait for the spin to end.
-
Ground Slam: The boss jumps in the air with a yellow glow on its hand and drops straight down onto your position. This can be dodged simply by walking away while it jumps. Once on the ground, it’s a good chance to land some hits.
-
Throw Attack: Before attacking, the boss puts a hand behind its back and shivers. It then throws its chained weapon, which later gets pulled back through the ground. Stay on the ground near the boss when it throws and jump as it recalls the weapon to get a few hits.
ADVERTISEMENT
The boss attacks slowly in this phase, so focus on avoiding damage and saving Silk for the next phase. Be careful not to get cornered, especially during the Spin Attack, which is harder to dodge if you’re stuck in a corner. If pushed towards one side and it begins the Spin Attack, try to move past it while it jumps for a Ground Slam. Also, watch for jumping moves in the middle of the arena—these don’t have a glow, so stay away from the center when you see the boss jump.
Last Judge Phase Two Guide
The second phase is tougher. The same three attacks from phase one now have fiery enhancements, and there’s a new, more dangerous attack. The boss will roar and stand with its hand on its chest to signal the start of phase two. Immediately afterward, you’ll face a Fire Spin Attack, which lasts longer.
Following this, the boss performs its upgraded attacks:
-
Fire Spin Attack: Similar to phase one, but with circular fire waves that expand across the battlefield. Smoke appears where fire will spawn, lasting about a second. To dodge, wait for the smoke and stand in the middle of the arena.
-
Fire Ground Slam: The boss performs a slam, then unleashes horizontal fire waves across the ground, which are easy to dodge if timed correctly. Jump over the waves to avoid damage and strike when the boss is vulnerable.
-
Fire Throw Attack: After throwing its weapon, the boss’s explosion causes a large AoE damage. To avoid this, move far from it when it throws the weapon.
-
Fire Charge Attack: The boss bends down, charges its hands, and then dashes forward, releasing fire in up to three spots. When you see it charging, jump and glide past, then sidestep the bursts of fire. When the boss is in the middle of the arena, it’s easier to get hits, as the fire bursts are spaced out.
Patience is key. Its attacks are slow but cover large areas, and they can chain together. If it charges Fire Charge in the middle of the field, your chances to strike are best, as the bursts won’t cover the full width. Just be cautious about the next attack if you overstay your welcome, especially if it follows with a Fire Spin.
Final Phase
The last phase occurs after a second roar. No new attacks are introduced, but the Spin Attack now includes four fire rings, which you must navigate by moving quickly between rings to avoid damage. Once you defeat the boss, you gain access to the Citadel.