Select Language:
Sure! Here’s a fresh version in American English:
Dwarven Devices Overview
Dwarven Devices are part of the exciting new exhibit category in the Fantasy Finds DLC for Two Point Museum. Although the game doesn’t explicitly mention it, if you pay attention to the item descriptions, you’ll discover that grouping these devices together grants you added benefits, much like the Astral Anomalies.
Gathering Dwarven Devices
Collecting all the Dwarven Devices involves quite a bit of adventure with your Fantasy Experts. If you aim for complete Knowledge and Pristine Quality on each item, prepare for a challenge. The effort pays off, as the setup will create an engaging tour and allow you to profit from the Geode extraction, a valuable side activity for your museum.
Where to Find Dwarven Devices
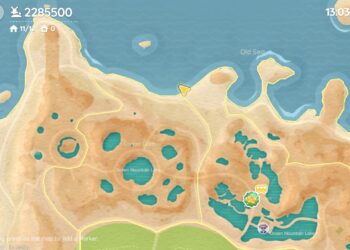
You can find Dwarven Devices in the southwestern area of the Scorched Earth expedition map, which becomes accessible as you advance through the early storyline. Initially, you can extract Geodes from the Mines of Adnausea and gather your first set of Devices at Great Dwharf.
Once you have at least five Dwarven Devices (including Geodes) displaying a total of 225 Buzz or more, you can unlock Furious Forge after a few dwarf guests complete their Dream Visit. Additionally, displaying three Pristine Dwarven Devices is required to access Cog Tower.
Note: While Furious Forge doesn’t contain any Dwarven Devices, unlocking it is necessary to reach Cog Tower.
Locations of Dwarven Devices
Here’s where to find various Dwarven Devices along with tips for each location:
| Location | Devices | Tips |
|---|---|---|
| Mines of Adnausea | Fire Geode, Grass Geode, Water Geode | Equip Bolt Buckle Boots or bring a Dexterity Potion to avoid the Worm Food event. |
| Great Dwharf | Gas Device, Geode Device, Smelting Device | A Barbarian, Bard, and Wizard of Rank 5 or higher will handle this area easily with Mythical Gear. |
| Cog Tower | Fire Device, Wind Device | The Fantasy Stat requirements are high. Bring a Curse Counter for Wildfire protection, but be cautious of the Teleportation Trap. Your Expert can heal in the Bandage Box upon returning. |
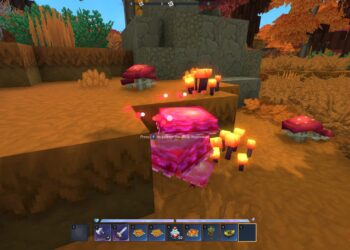
How to Activate the Geode Device
The Geode Device requires the Smelting Device for power, which in turn needs all three of the Gas, Fire, and Wind Devices placed nearby. The ideal setup is to have the Smelting Device centrally located, surrounded by the other three within its effect range.
When arranged correctly, the Smelting and Geode Devices will begin to function. As long as they are active, you can put Geodes into the Geode Device to convert them into Crystals.
Tip: There may be a delay of a few seconds before you can collect a Crystal from the Geode Device once it’s finished processing.
Why Convert Geodes Into Crystals?
Crystals serve as upgraded versions of Geodes, each carrying its own Knowledge rating. You can research both the Geode and its corresponding Crystal through repeated visits to the Mines of Adnausea.
Crystals maintain the Quality of their original Geodes but yield approximately twice the Buzz. This factor alone makes it worthwhile to refine every Geode you find after completing your research on them.
Moreover, Crystals sell for a flat $20,000, irrespective of Quality, making them a quick way to generate cash when needed. If a Collector visits your museum looking for Dwarven Devices, having several Crystals on display increases your chances of receiving a lucrative offer—so don’t hesitate to stock up!
Let me know if you need anything else!