Select Language:
Quick Links
The Elder Scrolls IV: Oblivion Remaster includes all downloadable content from its original version. One notable DLC is “Knights of the Nine,” which features a brief questline leading players across Cyrodiil to discover a long-lost paladin order. Gaining their approval allows you to obtain a powerful armor set.
Before you can start this quest, you’ll need to complete “Pilgrimage,” a short side quest that requires you to visit each of the wayshrines dedicated to the Nine Divines scattered throughout Cyrodiil. These wayshrines aren’t marked on your map, making them tricky to locate. Thankfully, this guide will assist you.
What Are Wayshrines?
Wayshrines are hidden locations throughout Cyrodiil, each dedicated to a specific deity from the Nine Divines. Interacting with a wayshrine provides temporary boosts to your health, Magicka, or fatigue for ten minutes, and you can refresh this benefit by visiting as many as you wish.
Completing the “Pilgrimage” quest entails locating each wayshrine. After interacting with all nine, you will gain access to the Knights of the Nine faction and their hideout, where you can claim their distinctive armor set.
How to Begin the Pilgrimage Quest

You can initiate the Pilgrimage quest by talking to the chapel priest at the eastern end of Anvil, a town to the west in Cyrodiil. Ask the priest about ancient artifacts from the Knights of the Nine to trigger the quest. Inform him that you are not a seasoned traveler, and he will provide you with a map showing the locations of the shrines.
Wayshrine Locations
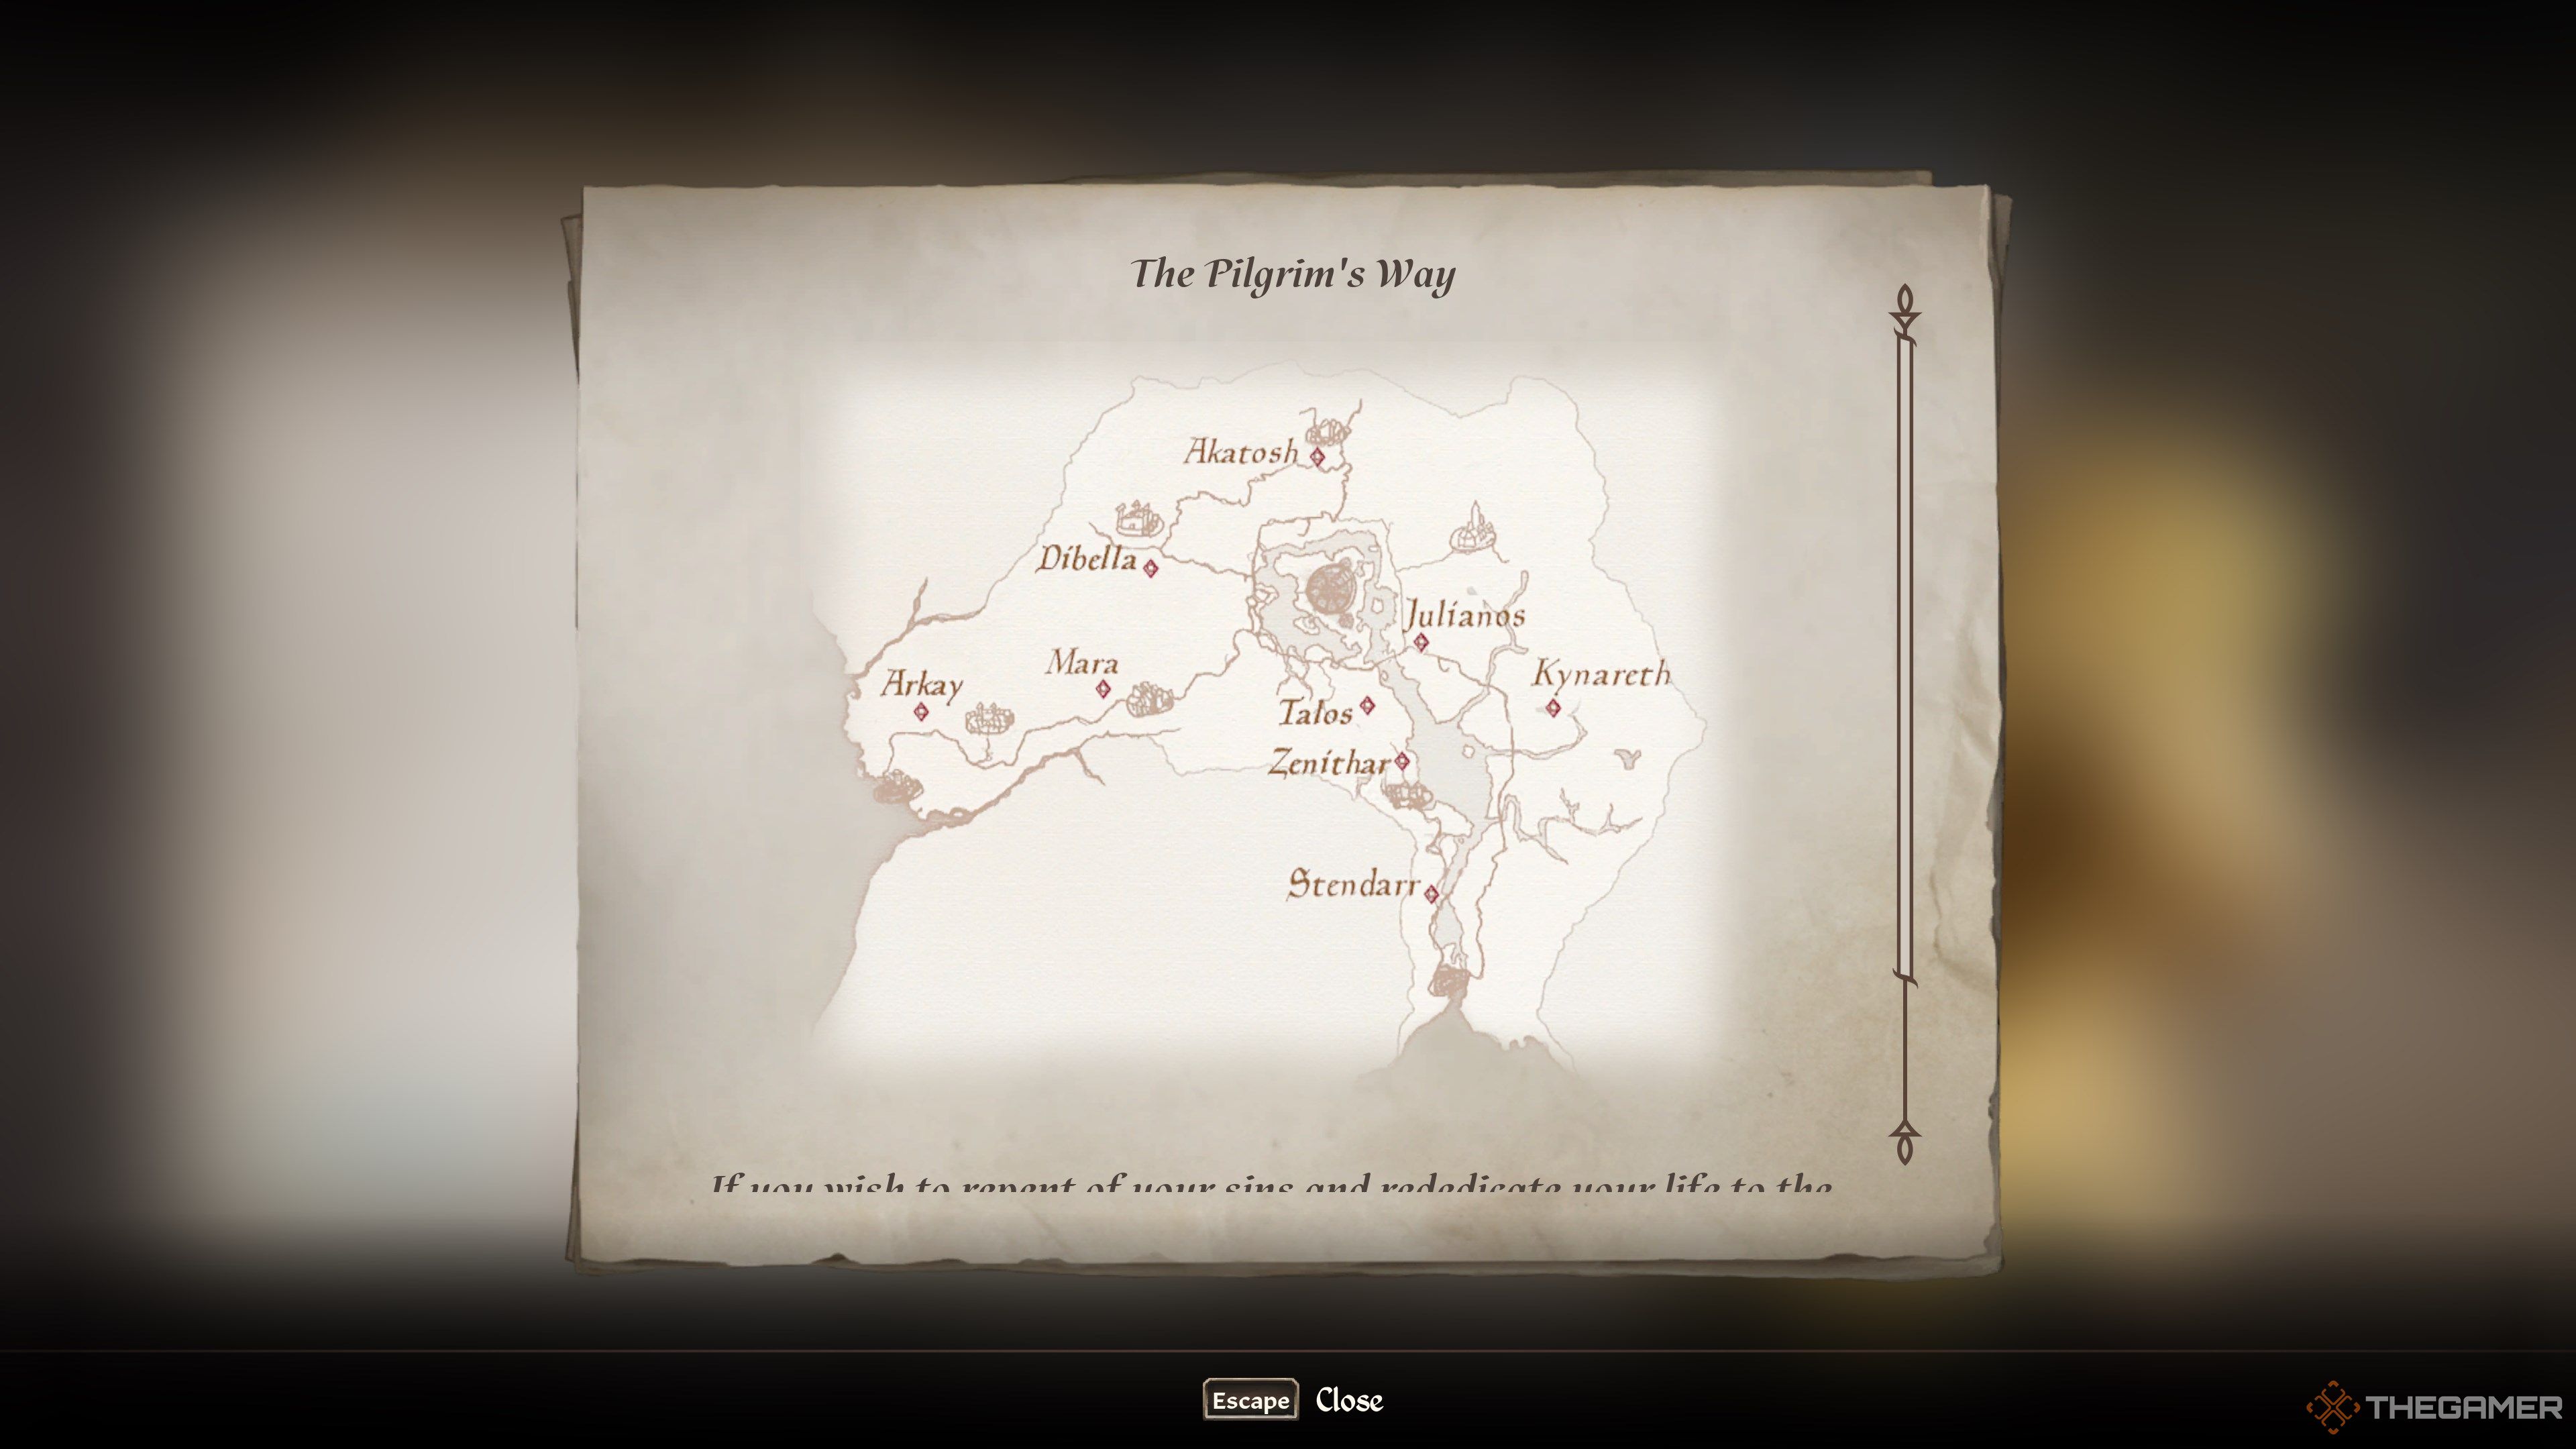
There are nine wayshrines to discover for this quest, all marked on the map the priest gives you. You can visit these shrines in any order; just ensure you activate all nine during your gameplay.
Upon discovering all nine, a spirit from the Knights of the Nine will appear. Listen to their message and check your quest log to track the Pilgrimage quest; this will reveal a hidden dungeon on your map. Completing this dungeon will earn you several pieces of the Knights of the Nine armor set. Follow the quest chain to obtain the entire set.
Arkay Wayshrine Location
- Location: North of Anvil, just a short distance from Briana Cross Inn.
The Shrine of Arkay is situated north of Anvil and west of Skingrad. From Briana Cross Inn, head northwest for a short walk to reach the shrine.
Mara Wayshrine Location
- Location: Northwest of Skingrad, located near the mine.
Travel to the mine located on the western outskirts of Skingrad and head northwest to spot the Shrine of Mara.
Dibella Wayshrine Location

- Location: South of Chorrol, directly south of Weynon Priory.
To find the Dibella Wayshrine, go to Weynon Priory, which is on the outskirts of Chorrol, and head straight south until you reach a dirt path leading to the shrine.
Akatosh Wayshrine Location
- Location: South of Bruma, at the top of Orange Road, below the “a” in “Bruma.”
Follow the road beneath Bruma to the east until you discover a stone staircase leading up from the path. Ascend the stairs and continue along the path to reach the Shrine of Akatosh.
Zenithar Wayshrine Location
- Location: North of Bravil, just a short distance north of The Green Road.
The Shrine of Zenithar is directly north of Bravil. Stray off The Green Road, navigate past the nearby mine, and you’ll find the shrine near the shoreline.
Talos Wayshrine Location
- Location: North of Bravil, a short distance east of Hircine’s Shrine.
Make your way to Hircine’s Shrine and take a brief stroll east to locate the Shrine of Talos, situated next to a graveyard.
Stendarr Wayshrine Location
- Location: Situated between Bravil and Leyawiin.
The Shrine of Stendarr lies directly between Bravil and Leyawiin at the southern end of Cyrodiil. Fast travel to Leyawiin and follow the river north, and the wayshrine will be right along your path.
Kynareth Wayshrine Location
- Location: At the lake in The Nibenay Basin, northeast of Bravil.
Kynareth’s Wayshrine is quite remote, so prepare for a trek. You need to locate the pond that sits directly under the “The Nibenay Basin” label on your map, situated in the eastern part of Cyrodiil, northeast of Bravil. Venture to the southeast edge of the small lake to find the shrine.
Julianos Wayshrine Location
- Location: At the intersection on the southeast corner of the road surrounding the Imperial City.
When looking at the Imperial City map, focus on the road circling its perimeter. Head to the southeast corner of the road encircling the city, located just above The Upper Nibon river. Walk a short distance south off the road to discover the Shrine of Julianos next to a small body of water.