Select Language:
Elden Ring Nightreign marks a significant shift from the original Elden Ring, introducing various ways to make shorter matches more engaging and memorable. The game accomplishes this by altering enemy placements, adjusting the areas you explore during a run, and randomizing the weapons and bosses you encounter.
Despite these random elements, some predictability remains. For example, you can expect that enemies in a camp will vary each time you play. However, you can’t anticipate when a formidable foe like the Fell Omen might unexpectedly confront you and disrupt your progress. Various Nightlords can invade your runs, so it’s essential to know how to prepare for these encounters.
What Are Raids?
Each run in Nightreign feels unique, but there are some consistent elements to expect. If Misbegotten have overrun an encampment, a Leonine Misbegotten will always be stationed at the top of the hill. You can always count on finding a mini-boss beneath a castle’s tunnels, even if the specific enemy varies from run to run. Certain aspects remain consistent despite the randomness.
Raids, on the other hand, are completely unpredictable. They can strike at any moment, no matter the time of day or where you are in your run. They might happen just minutes into your journey or even alongside other bosses. They can catch you off-guard in a significant location or in a remote area. This unpredictability makes responding to them both exhilarating and daunting.
When a Raid occurs, typically only one will happen during a run, although that’s not always guaranteed. It’s wise to stay prepared, as they can appear at any time and are fully capable of ending your run.
Every Raid and How to Beat It
There are four types of Raids you can encounter. Three come from lesser Nightlords, while one involves an invasion by the Fell Omen. Each functions differently, so here’s how to prepare and ultimately defeat them.
Fell Omen Raid
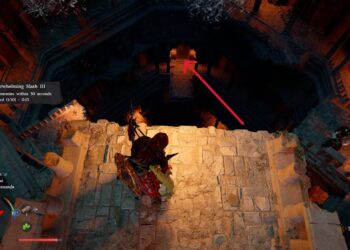
The dreaded Morgott, known here as the Fell Omen, can invade at any moment. Once he does, he will relentlessly pursue your party. You cannot escape him. He will chase you until either you or your party falls. Over time, he might give up his chase, especially if he has marked all members of the party, but it’s better to confront him than to run.
The Fell Omen can also be fought as a boss at the end of Nights one and two, but this battle differs from the Fell Omen Raid.
In combat, the Fell Omen typically locks onto one player, indicated by a red target circle. He will primarily chase that player, giving others a chance to strike while he’s focused. Be ready for him to switch targets, though.
With a team effort, you can bring him down. He is prone to staggering and can bleed, so a full assault with heavy weapons can keep him immobilized. Stay brave—he’s still just flesh and blood.
Augur Raid
Augur, a giant aquatic Nightlord, floats around the battlefield like a creature of the sea. However, in Raid form, he appears in a weaker version, but still demands your full attention.
This Raid is signaled by a message about large bubbles forming above you. These bubbles will have a blue-purple color and will descend slowly to trap anything inside. To escape, you must engage with Augur directly inside the bubbles.
Once you enter the battlefield, you can’t exit until the fight is over, so be ready for a challenge.
Upon entering, the screen will go black for a few seconds as you transition to a new arena. During this fight, Augur relies on a Spinning Dash attack and Wave Splashes, which are manageable to dodge. Expect him to stay closer to the ground than in his Nightlord form. Still, bring a ranged weapon and spells, especially those with a Lightning element.
Sentient Pest Raid
The Sentient Pest Raid is one of the more challenging encounters—not due to the boss’s strength, but because locating them can be quite tricky. The Raid begins with a message announcing a swarm of locusts descending, resulting in a darkened sky. These locusts can siphon your levels and cause massive explosions on the ground.
If you’re caught in these explosions, you’ll lose a level and the Runes associated with it. Unlike typical deaths that cost you one level, these locusts can strip away multiple levels at once. So, how do you defeat this swarm?
You need to find their master, but unlike other Raids, this one isn’t marked on your map. To locate them, follow the locusts after an explosion. They will fly back to their master’s position in a predictable manner.
Once you reach them, the outline of Sentient Pest will become visible, revealing the moth section of the Nightlord—not the scorpion. The moth doesn’t fight back, so while you must be cautious of the locust explosions, defeating it will restore any lost Runes and levels.
Equilibrious Beast Raid

The Equilibrious Beast Raid offers a different experience. Instead of defeating a boss, this encounter revolves around making deals. When they appear, the entire party will be cursed, reducing max HP by approximately 40%. This curse remains until you break it.
You can lift the curse in two ways, with Equilibrious Beast marked on your map by a red circle. The first option, which you should avoid if possible, is to defeat them. Attacking the Equilibrious Beast will summon Libra, who is just as formidable as their Nightlord form. While defeating them dispels the curse, it’s difficult to overpower them with reduced HP.
The second—and preferable option—is to make a deal. Libra will ask for Runes to break the curse. The required amount can vary greatly, ranging from 15,000 Runes up to 35,000. So, once you’re cursed, hold off spending Runes, ensuring you have enough by the time you reach Libra to lift the curse.
After paying to lift the curse, your HP will be restored. You can talk to Libra again for additional deals that are more balanced, allowing for upgrades without significant drawbacks.
The Reward from Every Raid
Each successful Raid brings unique rewards. Here’s what you can gain from each:
- Fell Omen – There are two rewards: if you fail, you’ll lose a level and receive the Unhealed Wounded Carved By The Night, which increases all damage taken. If you succeed, you’ll receive Traces of Grace-Given Lord, enhancing your attack power with every new Site of Grace discovered.
- Augur – Defeating Augur grants the Unifying Fate perk, enabling your flasks to restore FP in addition to HP.
- Sentient Pest – Conquering Sentient Pest rewards you with Integration of Intelligence, providing random large Runes when defeating enemies. It also restores any Runes lost from level reductions.
- Equilibrious Beast – After paying to remove the curse, you’ll acquire Demon’s Plating, enhancing attack power based on your Runes. You can also engage Libra again for additional, beneficial deals without penalties.
Currently, these four Raids are all available in the game, but it’s possible more will be introduced in the future. Now, you’re better equipped to manage the ones that exist.