Select Language:
Liberation Peak is the biggest map available at the start of the Battlefield 6 beta. It offers a classic Battlefield experience with wide open spaces, narrow passages, and varying elevations. Sometimes, the terrain advantages can give the leading team an edge, but smart players using all their tools can still change the outcome of a match.
On this map, long-range weapons are very useful because there are lots of open areas. However, there are also small buildings and tight corridors that are great for close combat. With the right strategies, each of Battlefield 6’s four classes can succeed on Liberation Peak.
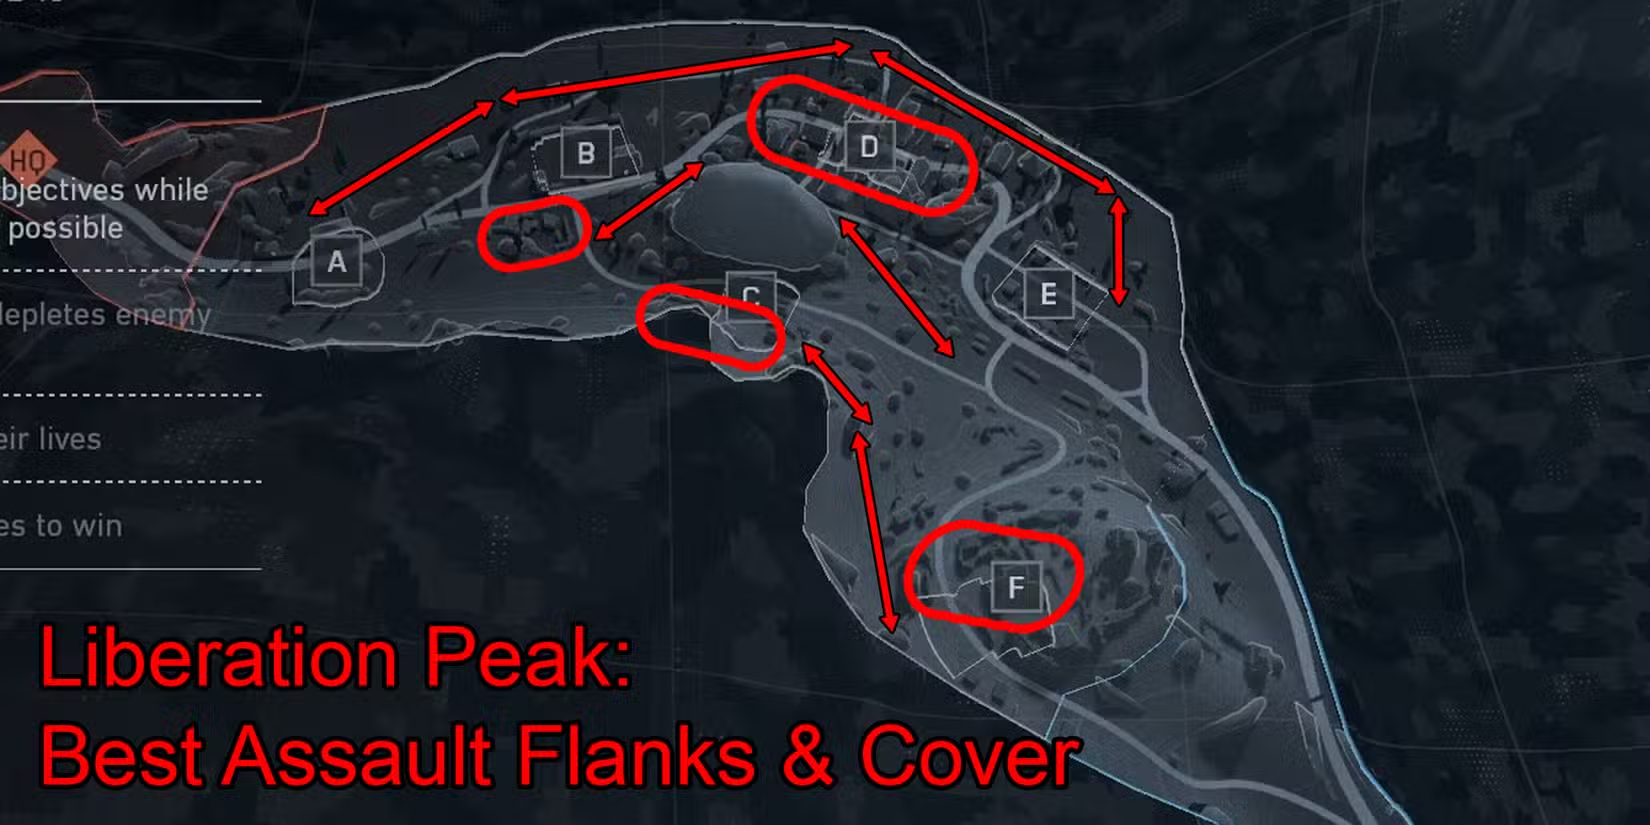
### Top Strategies for the Assault Class
Despite the large open areas making the Assault class less effective in some situations, it remains powerful when attacking or defending key points. Focus on areas with plenty of cover between objectives and buildings to move through. Using climbable ladders to get into buildings can surprise enemies or provide safety when under fire from tanks. A skilled Assault player can control the northern objectives, especially with well-placed spawn points to stay active longer. There are also hidden routes for flanking enemies, taking advantage of terrain variations and traversal tools like ladders or breach launchers.
### Top Strategies for the Engineer Class
The Engineer’s main role is countering vehicles rather than map control, but the map’s open spaces make their skills more crucial. Always keep an Anti-Air launcher ready, as aerial attacks are common on this map. If your team spawns near objective E, using the nearby hill with a sniper nest for overwatch can help pick off enemies at the center of the map. The rocky area south of objective A also makes for a good sniper spot, especially on smaller game modes like Breakthrough or Rush.
### Top Strategies for the Support Class
Support players are vital in narrow choke points, providing cover, ammo, and revives. Smoke grenades are especially useful here, helping you survive crossfires and sniper fire from long-open areas. With the Portable Mortar unlocked, Support players can attack objectives from a safe distance — just be sure to take cover while firing. This class’s ability to lay down suppressive fire makes it a strong choice for controlling objectives like B, D, and E, especially since these spots offer vehicle spawns for added firepower.
### Top Strategies for the Recon Class
Recon is one of the most powerful classes on Liberation Peak because the open terrain makes sniping easier and safer. The large central mountain offers excellent vantage points for long-range combat, but be careful—players can’t go too high without risking death. Mastering high jumps can help you reach hidden spots for safe sniping or setting spawn points. If enemies are flying overhead, a Laser Designator can help take them down or guide your team’s anti-air defenses. The hill near objective E and the rocky area south of A are popular sniping sites for controlling the map.
Overall, understanding the terrain and using the right tools for each class will give you an advantage on Liberation Peak. Good teamwork and smart positioning are key to winning on this large, varied map.